Ga door naar hoofdinhoud

Shark Rotator Slim-Light Lift-Away Upright Roller Brush Belt Replacement

Wat je nodig hebt

  1. Shark Rotator Slim-Light Lift-Away Upright Roller Brush Belt Replacement, Roller Brush: stap 1, afbeelding 1 van 2 Shark Rotator Slim-Light Lift-Away Upright Roller Brush Belt Replacement, Roller Brush: stap 1, afbeelding 2 van 2
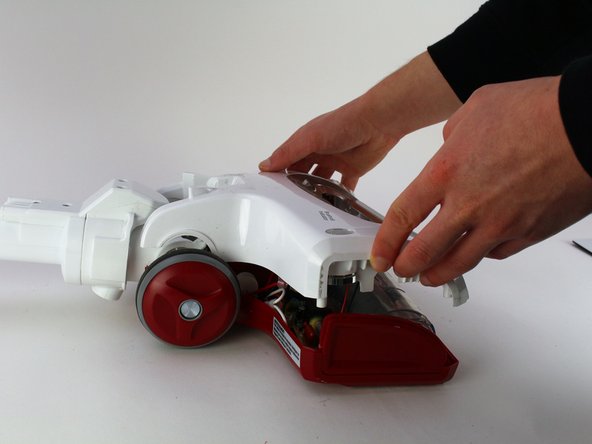
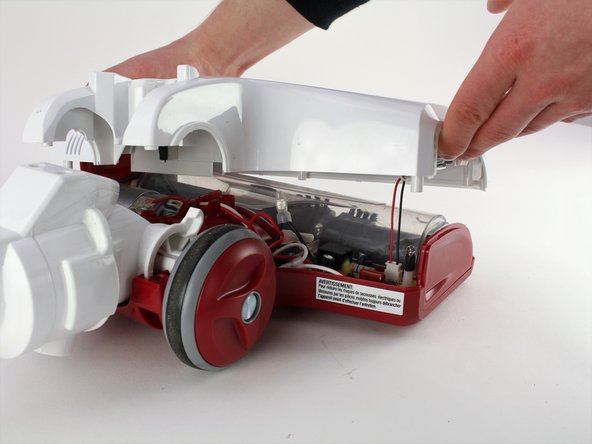
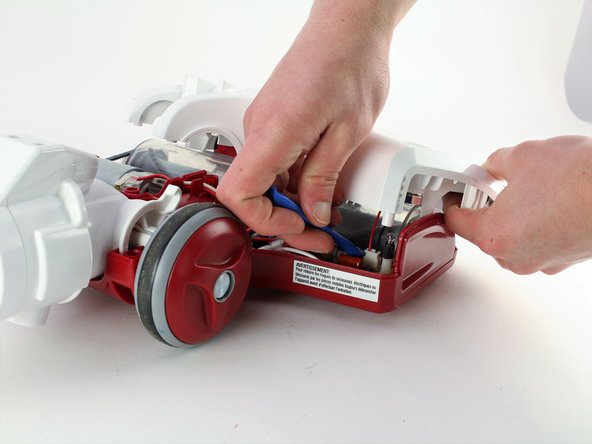
    • Push the red Lift Away button down and lift up on the vacuum handle to detach the base.

    • The handle was removed for convenience but is not required.

  2. Shark Rotator Slim-Light Lift-Away Upright Roller Brush Belt Replacement: stap 2, afbeelding 1 van 1
    • Turn over the vacuum to reveal the roller brush.

  3. Shark Rotator Slim-Light Lift-Away Upright Roller Brush Belt Replacement: stap 3, afbeelding 1 van 2 Shark Rotator Slim-Light Lift-Away Upright Roller Brush Belt Replacement: stap 3, afbeelding 2 van 2
    • Pry the small wheels at the bottom of the base using the plastic opening tool.

  4. Shark Rotator Slim-Light Lift-Away Upright Roller Brush Belt Replacement: stap 4, afbeelding 1 van 2 Shark Rotator Slim-Light Lift-Away Upright Roller Brush Belt Replacement: stap 4, afbeelding 2 van 2
    • Using a coin, turn the big white knobs located above the roller brush counter-clockwise.

  5. Shark Rotator Slim-Light Lift-Away Upright Roller Brush Belt Replacement: stap 5, afbeelding 1 van 3 Shark Rotator Slim-Light Lift-Away Upright Roller Brush Belt Replacement: stap 5, afbeelding 2 van 3 Shark Rotator Slim-Light Lift-Away Upright Roller Brush Belt Replacement: stap 5, afbeelding 3 van 3
    • Lift up the suction hose to reveal a screw.

    • Remove the 12.7 mm Phillips #02 screw.

  6. Shark Rotator Slim-Light Lift-Away Upright Roller Brush Belt Replacement: stap 6, afbeelding 1 van 2 Shark Rotator Slim-Light Lift-Away Upright Roller Brush Belt Replacement: stap 6, afbeelding 2 van 2
    • Remove eight 12.7mm screws located under the vacuum using a Phillips #02 screwdriver.

    • Remove two 12.7 mm screws located next to the wheels with a Phillips #02 screwdriver.

    • The two screws located next to the wheels are smaller in diameter.

  7. Shark Rotator Slim-Light Lift-Away Upright Roller Brush Belt Replacement: stap 7, afbeelding 1 van 3 Shark Rotator Slim-Light Lift-Away Upright Roller Brush Belt Replacement: stap 7, afbeelding 2 van 3 Shark Rotator Slim-Light Lift-Away Upright Roller Brush Belt Replacement: stap 7, afbeelding 3 van 3
    • Turn the vacuum upright and pull the white upper section of the brush roller circuit housing.

    • Be careful when lifting the housing as there is a connector attached.

  8. Shark Rotator Slim-Light Lift-Away Upright Roller Brush Belt Replacement: stap 8, afbeelding 1 van 2 Shark Rotator Slim-Light Lift-Away Upright Roller Brush Belt Replacement: stap 8, afbeelding 2 van 2
    • Remove the connector attached to the circuit boards using a plastic opening tool.

  9. Shark Rotator Slim-Light Lift-Away Upright Roller Brush Belt Replacement: stap 9, afbeelding 1 van 3 Shark Rotator Slim-Light Lift-Away Upright Roller Brush Belt Replacement: stap 9, afbeelding 2 van 3 Shark Rotator Slim-Light Lift-Away Upright Roller Brush Belt Replacement: stap 9, afbeelding 3 van 3
    • Remove the two 12.7 mm screws located at the top of the clear plastic brush roller housing using a Phillips #02 screwdriver.

    • Lift the clear plastic brush roller housing.

  10. Shark Rotator Slim-Light Lift-Away Upright Roller Brush Belt Replacement: stap 10, afbeelding 1 van 2 Shark Rotator Slim-Light Lift-Away Upright Roller Brush Belt Replacement: stap 10, afbeelding 2 van 2
    • Wiggle the brush roller upwards from the left and right side slots.

  11. Shark Rotator Slim-Light Lift-Away Upright Roller Brush Belt Replacement, Roller Brush Belt: stap 11, afbeelding 1 van 1
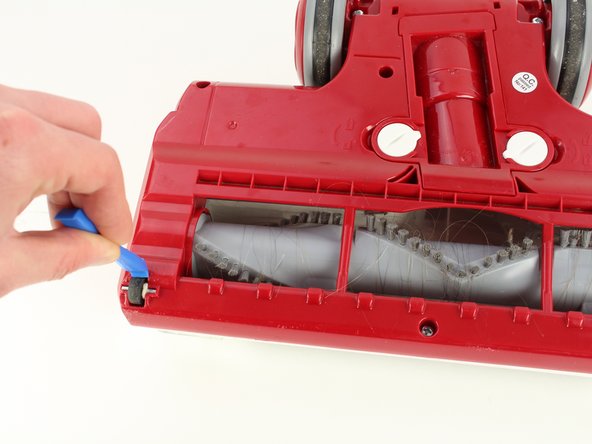
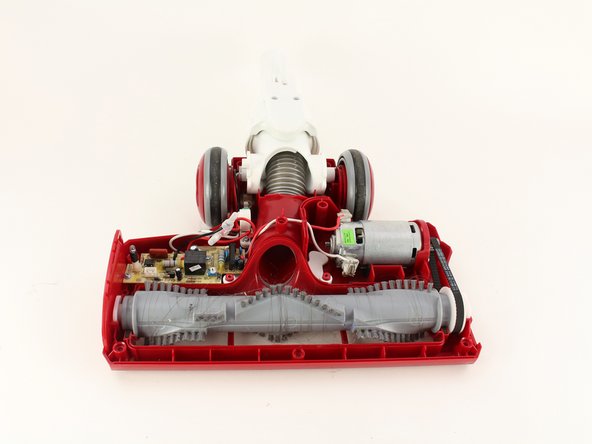
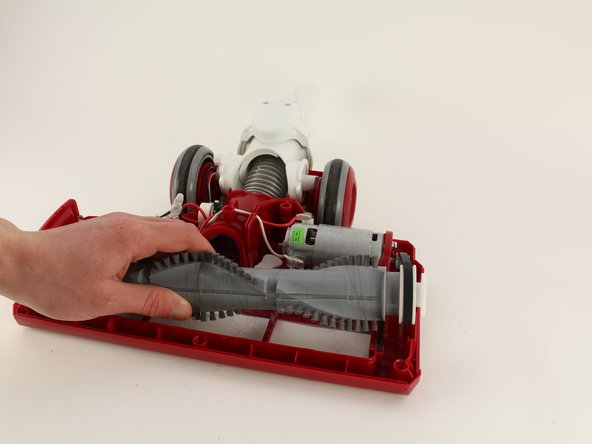
    • Remove the roller brush by sliding it out toward the left, off the belt.

  12. Shark Rotator Slim-Light Lift-Away Upright Roller Brush Belt Replacement: stap 12, afbeelding 1 van 1
    • Remove the belt from the motor gear by sliding the belt away from the gear and belt motor.

    • In the following picture the belt was already removed.

Conclusie

To reassemble your device, follow these instructions in reverse order.

Daniel Ceja

Lid sinds: 01/24/19

277 Reputatie

2 handleidingen geschreven

Team

Cal Poly, Team S19-G3, White Winter 2019 Lid van Cal Poly, Team S19-G3, White Winter 2019

CPSU-WHITE-W19S19G3

5 Leden

12 handleidingen geschreven

0 opmerkingen

Voeg opmerking toe

Weergavestatistieken:

Afgelopen 24 uren: 1

Afgelopen 7 dagen: 3

Afgelopen 30 dagen: 10

Altijd: 557