Inleiding
The roller brush can have debris that will cause the vacuum to not work properly. It is important that you always clean your roller brush after every use, so that your Shark Rotator Powered Lift Away Speed Vacuum can perform at it's best. This guide will show you how to change your roller brush if it becomes damaged or is broken.
Wat je nodig hebt
-
-
Turn the vacuum on its side.
-
Using a quarter, twist the three green locks to the unlock position.
-
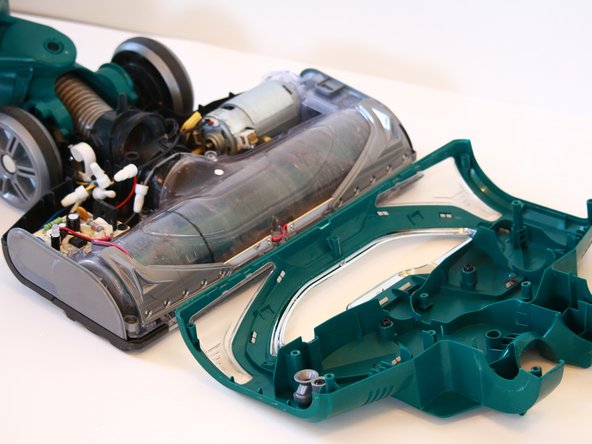
Pull the bottom roller brush cover to open the vacuum.
-
-
-
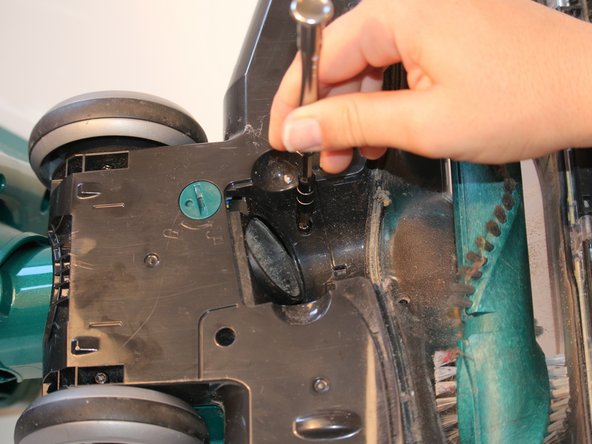
Remove the three 14.3 mm screws with a T20 screwdriver.
there is also a small ~13mm PH0 screw on the center of the edge in front of the roller between the 2 other screws indicated that must be removed before you can get the cover off.
-
-
-
-
Turn the vacuum around.
-
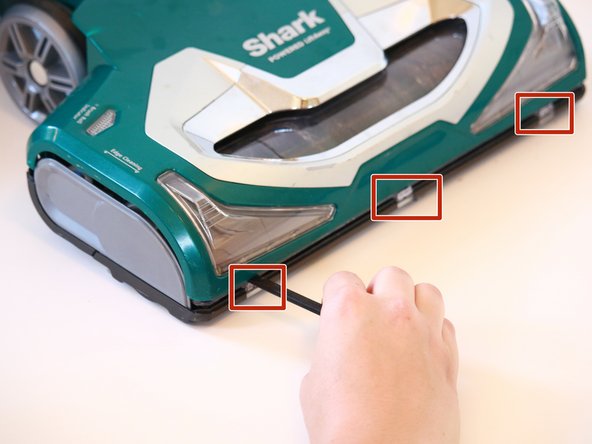
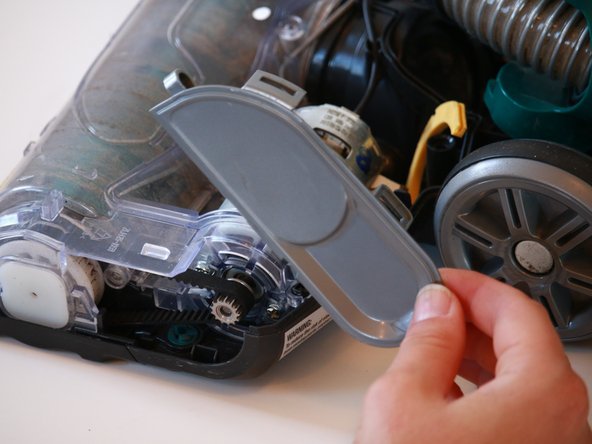
Using a spudger, pry the top of the vacuum cover off. There are three tabs behind each of the clear rectangles below the headlights.
-
-
-
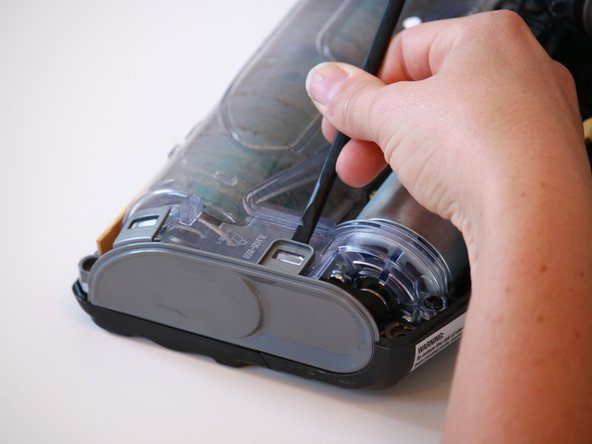
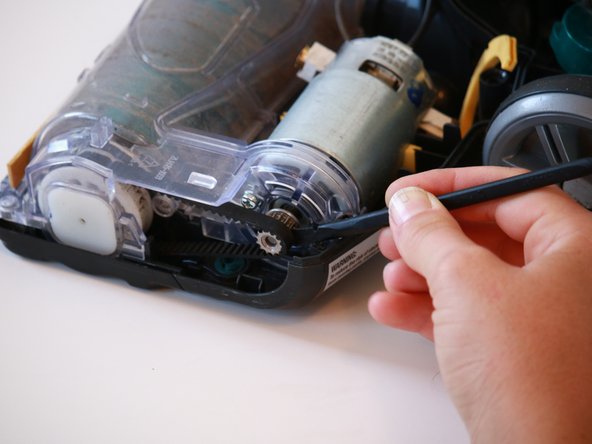
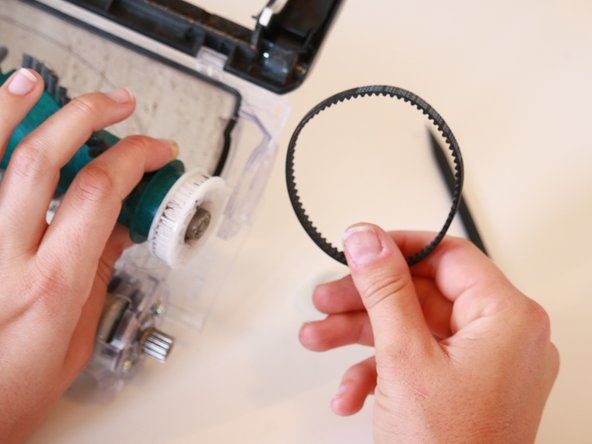
Remove the belt from the gear.
Thank you for posting this. I couldnt find these instructions anywhere else.
-
-
-
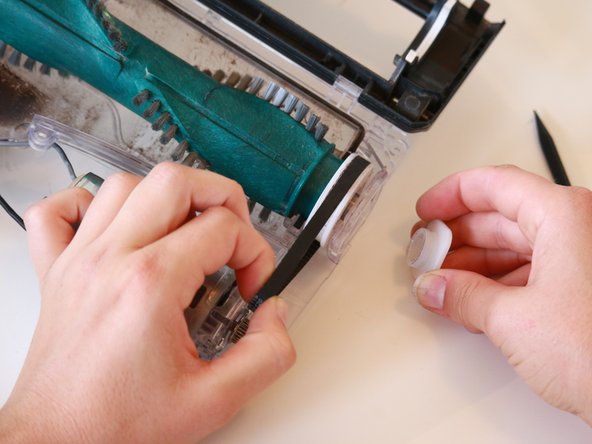
Pull roller brush away from the vacuum.
Most complicated brush roll I've ever seen!
Where can I purchase the roller brush
-


To reassemble your device, follow these instructions in reverse order.
To reassemble your device, follow these instructions in reverse order.
Annuleren: ik heb deze handleiding niet afgemaakt.
9 andere personen hebben deze handleiding voltooid.
Team

Cal Poly, Team S4-G6, White Fall 2018 Lid van Cal Poly, Team S4-G6, White Fall 2018
CPSU-WHITE-F18S4G6
4 Leden
12 handleidingen geschreven
13 opmerkingen
Exactly, I struggled for sometime trying to find that 1 little screw that was a Phillips head.
I figured out how to get it apart… Where do I find a new roller?
where can i get a new roller also...
This is already out of date. While this was the best guide I could find online, my model is just a tad newer. And much more of a PITA. Now a T20 “tamper proof” is needed, the one with the little indentation. And they’ve added more to make the process even less user friendly. One tiny screw at the base of the outlet to the tube, and another tiny screw positioned halfway under the clip to remove the plate. AND I had to remove pins from the hinges. We won’t buy a Shark again.
The good news is if you CALL Shark, they will send you a replacement head unit for 50% off with free shipping.
Once customer service confirmed the brushwheel is “integral” to the head unit, at least I knew it could not be replaced at least not using genuine parts. Shark could just SAY THIS on their website - instead of showing all replacement parts EXCEPT the brushwheel. When I told customer service I would NEVER spend $130 on a head unit + shipping, he out me on hold to “check something” and offered this deal which I took.
You can find aftermarket shark brushwheels, but often they don’t say if they’ll fit the NV682 model.. probably because Shark’s done such a wonderful job at killing the parts aftermarket.
Before you toss the head unit, salvage the motor + hear + toothed belt and give it to an evil genius you know. The motor has tons of torque.
What would HELP is if people can locate third-party “brushwheels” that fit a model, please comment with your model and a link to the aftermarket brushwheel.
I can confirm on the model NV682, Shark will only sell you a complete head — but NOT the brushwheel. I saw a bunch of aftermarket wheels on Amazon that MIGHT work but they didn’t list “682” in the supported models, and they didn’t have free returns so I could not be confident enough to order.
Thanks for the instructions and especially the pictures. Just a note though. On my model the screw at Step 6 was a Torx Security T15.
I found a replacement brush on Amazon.
great job on the instructions and pix. I have never seen a roller brush so difficult to replace . . . wow!
Thanks for your help! We called Shark and were repeatedly told the brush cannot be replaced but it can and now the vacuum works like it did when we first bought it! Took my husband a couple of hours because some of the screws didn't want to budge but he stuck with it!
I meant to add that I bought the replacement brush on Amazon for $16 and that included a new belt too!
This was like brain surgery!
But… I got her done with only one screw left without a home and this machine works like new
I am very grateful for your instructions but wow I can’t believe how complicated that was!
As a general comment. Take care and good luck with this procedure. Instructions are fine, I found just one small screw wasn't covered. Front centre in roller cavity near the centre tab. Taking apart was straightforward, then it all feels like a jelly. Bits start moving and falling off as you turn the vacuum around, spring fell off plus other bits. Eventually got it back together, but not so easy, very fiddly. Anyway it works now. MikeM
Mike Mason - Antwoord