Ga door naar hoofdinhoud

Shark ION Robot 750 Charging Dock Motherboard Replacement

Wat je nodig hebt

  1. Shark ION Robot 750 Charging Dock Motherboard Replacement, Charging Dock: stap 1, afbeelding 1 van 1
    • Remove the three Torx T6 screws on the underside of the charging dock.

    • Lift off the lower case.

  2. Shark ION Robot 750 Charging Dock Motherboard Replacement: stap 2, afbeelding 1 van 1
    • Using a Phillips #0 screwdriver, unscrew the four screws inside.

  3. Shark ION Robot 750 Charging Dock Motherboard Replacement: stap 3, afbeelding 1 van 2 Shark ION Robot 750 Charging Dock Motherboard Replacement: stap 3, afbeelding 2 van 2
    • Gently push in the tabs to remove the sensor housing.

  4. Shark ION Robot 750 Charging Dock Motherboard Replacement: stap 4, afbeelding 1 van 1
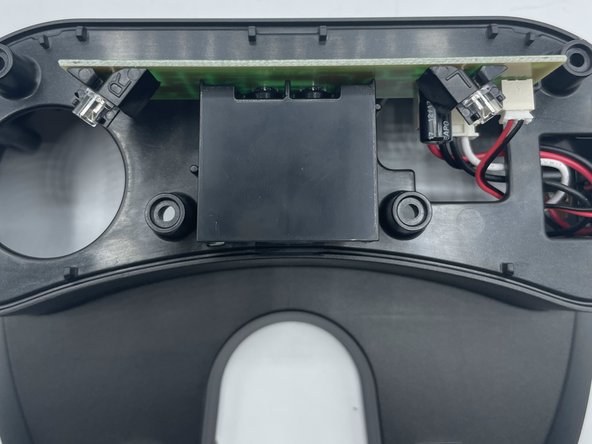
    • Unplug the two wires going into the motherboard, then gently lift the motherboard up and out of its slot.

Conclusie

To reassemble your device, follow these instructions in reverse order.

corieon downing

Lid sinds: 09/13/23

181 Reputatie

2 handleidingen geschreven

0 opmerkingen

Voeg opmerking toe

Weergavestatistieken:

Afgelopen 24 uren: 0

Afgelopen 7 dagen: 0

Afgelopen 30 dagen: 12

Altijd: 65