Ga door naar hoofdinhoud

Deze handleiding heeft recentere wijzigingen. Schakel over naar de nieuwste niet-geverifieerde versie.

Sega CD CD Tray Replacement

Wat je nodig hebt

  1. Sega CD CD Tray Replacement, Sega CD Plastic Housing Removal: stap 1, afbeelding 1 van 2 Sega CD CD Tray Replacement, Sega CD Plastic Housing Removal: stap 1, afbeelding 2 van 2
    • Using a Phillips head screwdriver remove six screws from the bottom of the console.

    • The six screws are marked.

  2. Sega CD CD Tray Replacement: stap 2, afbeelding 1 van 1
    • Remove the two screws that attach the Genesis' connector to the rest of the console.

    • The two screws are marked in the diagram.

  3. Sega CD CD Tray Replacement: stap 3, afbeelding 1 van 1
    • Slide the lock tab to the left to separate the halves of the console.

  4. Sega CD CD Tray Replacement: stap 4, afbeelding 1 van 1
    • Lift from the left side to remove the top of the case.

  5. Sega CD CD Tray Replacement: stap 5, afbeelding 1 van 1
    • Using the spudger, pry the cover off of the Genesis attachment.

  6. Sega CD CD Tray Replacement: stap 6, afbeelding 1 van 1
    • Lift the top of the case to remove the cover.

  7. Sega CD CD Tray Replacement: stap 7, afbeelding 1 van 1
    • Remove the faceplate by pulling it up, then out.

  8. Sega CD CD Tray Replacement, CD Tray: stap 8, afbeelding 1 van 2 Sega CD CD Tray Replacement, CD Tray: stap 8, afbeelding 2 van 2
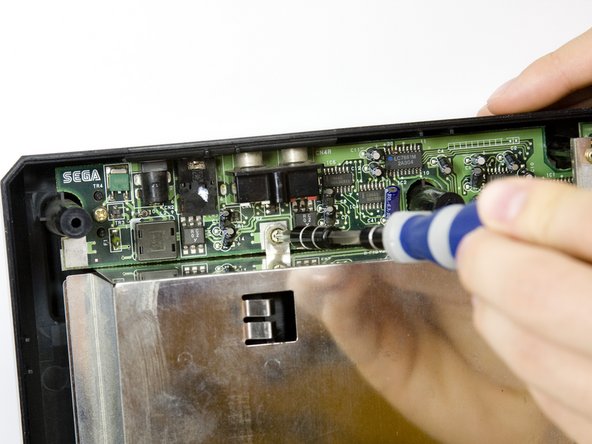
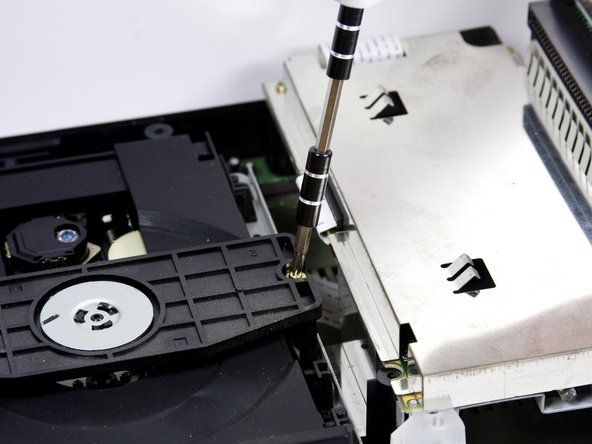
    • Remove metal plate by unscrewing the three screws with the Phillips head screwdriver and then lifting the plate.

    • The three screws are shown on the diagram.

  9. Sega CD CD Tray Replacement: stap 9, afbeelding 1 van 2 Sega CD CD Tray Replacement: stap 9, afbeelding 2 van 2
    • Remove the two screws from the plastic bar.

    • The two screws are shown pictured.

  10. Sega CD CD Tray Replacement: stap 10, afbeelding 1 van 2 Sega CD CD Tray Replacement: stap 10, afbeelding 2 van 2
    • To remove the CD tray

    • Remove the four screws with the Phillips head screwdriver.

  11. Sega CD CD Tray Replacement: stap 11, afbeelding 1 van 1
    • Carefully unplug the wire connected to optical reader.

  12. Sega CD CD Tray Replacement: stap 12, afbeelding 1 van 2 Sega CD CD Tray Replacement: stap 12, afbeelding 2 van 2
    • Remove the four screws on the underside of the CD tray with a small Phillips head screwdriver.

    • The four screws are highlighted on the diagram.

    • The four springs below the circuit board are attached to the screws, so be careful not to lose them when you remove the screws.

  13. Sega CD CD Tray Replacement: stap 13, afbeelding 1 van 1
    • Carefully remove the CD tray from circuit board.

Conclusie

To reassemble your device, follow these instructions in reverse order.

Één andere persoon heeft deze handleiding voltooid.

sskyllin

Lid sinds: 10/18/10

21 Reputatie

2 handleidingen geschreven

Team

Cal Poly, Team 5-14, Maness Fall 2010 Lid van Cal Poly, Team 5-14, Maness Fall 2010

CPSU-MANESS-F10S5G14

4 Leden

12 handleidingen geschreven

0 opmerkingen

Voeg opmerking toe

Weergavestatistieken:

Afgelopen 24 uren: 2

Afgelopen 7 dagen: 4

Afgelopen 30 dagen: 38

Altijd: 9,577