Ga door naar hoofdinhoud

Sanyo-PM 8200 Keypad Replacement

Wat je nodig hebt

  1. Sanyo-PM 8200 Keypad Replacement, Power Off Phone: stap 1, afbeelding 1 van 1
    • Power down the phone by holding down the red "end" button.

  2. Sanyo-PM 8200 Keypad Replacement, Remove Old Battery: stap 2, afbeelding 1 van 1
    • Push and hold the button on the back toward the direction of the arrow to unlock the battery.

    • Lift and remove the battery from the back of the phone.

  3. Sanyo-PM 8200 Keypad Replacement, Back Casing: stap 3, afbeelding 1 van 1
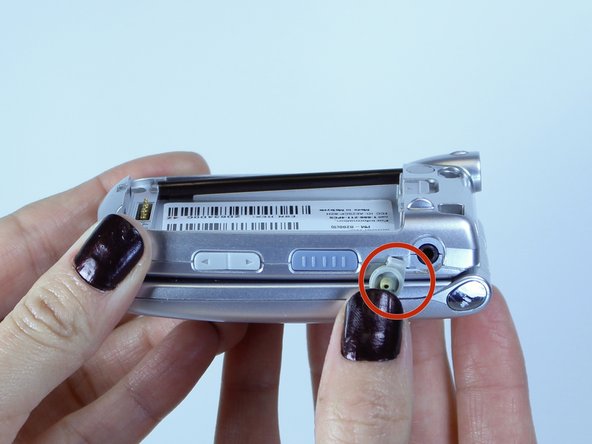
    • Use a push pin or tweezers to remove the neoprene screw-cover located on the upper, left corner of the back casing.

  4. Sanyo-PM 8200 Keypad Replacement: stap 4, afbeelding 1 van 1
    • Unscrew all four, 5mm Tri-Wing screws.

  5. Sanyo-PM 8200 Keypad Replacement: stap 5, afbeelding 1 van 2 Sanyo-PM 8200 Keypad Replacement: stap 5, afbeelding 2 van 2
    • Pry the back casing off the device using a spudger. Work your way along the edges to completely separate the back casing from the device.

    • This step may require extra force. But too much force could break the back casing.

    • Remove the headphone jack cover when separating the back casing. The headphone jack is located on the opposite side of the antenna.

  6. Sanyo-PM 8200 Keypad Replacement, Keypad: stap 6, afbeelding 1 van 2 Sanyo-PM 8200 Keypad Replacement, Keypad: stap 6, afbeelding 2 van 2
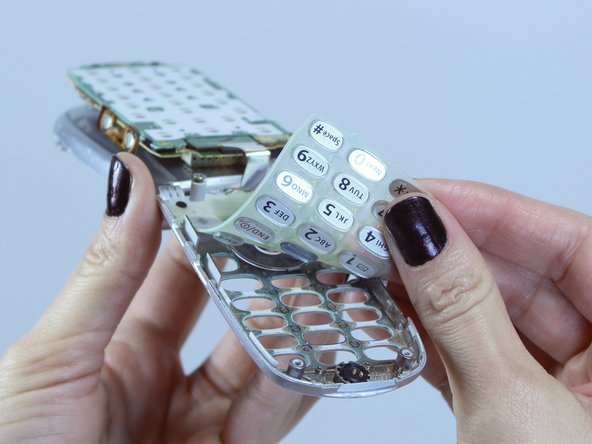
    • Remove the camera and call keys from the side of the phone where the antenna is located.

    • Remove the Readylink and volume control buttons from the other side of the phone.

  7. Sanyo-PM 8200 Keypad Replacement: stap 7, afbeelding 1 van 1
    • Place the plastic opening tool underneath the motherboard and gently lift up.

    • Be careful not to damage the flex cable ribbon connecting the motherboard to the device.

  8. Sanyo-PM 8200 Keypad Replacement: stap 8, afbeelding 1 van 3 Sanyo-PM 8200 Keypad Replacement: stap 8, afbeelding 2 van 3 Sanyo-PM 8200 Keypad Replacement: stap 8, afbeelding 3 van 3
    • Flip open the phone to reveal the keypad.

    • Place the plastic opening tool underneath the keypad and gently push the keypad towards the motherboard.

    • Remove the keypad.

Conclusie

To reassemble your device, follow these instructions in reverse order.

Cassandra Stavros

Lid sinds: 10/07/14

28 Reputatie

2 handleidingen geschreven

Team

USF Tampa, Team 1-6, Leahy Fall 2014 Lid van USF Tampa, Team 1-6, Leahy Fall 2014

USFT-LEAHY-F14S1G6

6 Leden

10 handleidingen geschreven

Één opmerking

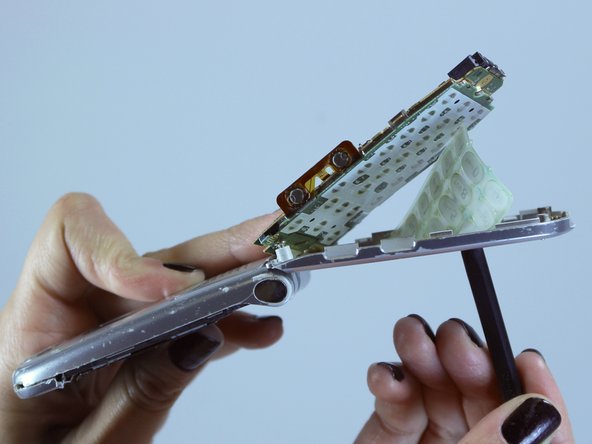
In almost all flip phones, there’s a flex cable ribbon that connects the motherboard to the display side of the phone. It is permanently attached to the display side and plugs into the motherboard. As there are anywhere from 16 to 50 connections in the cable, I recommend being careful NOT to unplug it…aligning it for plugging it back in properly can be tricky!

Kevin Wade - Antwoord

Voeg opmerking toe

Weergavestatistieken:

Afgelopen 24 uren: 1

Afgelopen 7 dagen: 1

Afgelopen 30 dagen: 2

Altijd: 249