Inleiding
This guide will teach someone how to change the LCD screen on the back of a Samsung WB150F camera.
Wat je nodig hebt
-
-
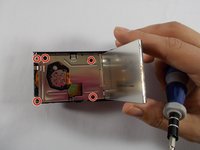
Gather a PHO Phillips head screwdriver and a plastic wedge. If you do not have a plastic wedge like the one pictured, a credit card or a guitar pick can be used.
-
-
-
-
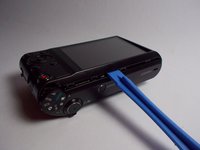
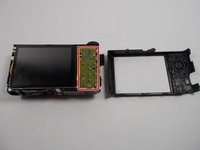
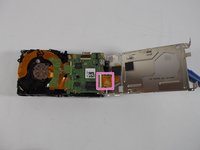
Flip the camera over and pry the back shell of the camera off with the plastic opening tool (or credit card or guitar pick). The screen-side of your camera should now resemble the camera in the second photo.
-
Note: removing the back shell does not require removing anymore screws, it should just snap off.
-


To reassemble your device, follow steps 1-5 in reverse order.
To reassemble your device, follow steps 1-5 in reverse order.
Annuleren: ik heb deze handleiding niet afgemaakt.
7 andere personen hebben deze handleiding voltooid.
Team

UMass Dartmouth, Team 4-4, Vijaybhaskar Spring 2015 Lid van UMass Dartmouth, Team 4-4, Vijaybhaskar Spring 2015
UMASSD-VIJAYBHASKAR-S15S4G4
3 Leden
6 handleidingen geschreven
Één opmerking
This guide is excellent. I bought a used wb150f which powered up, but did not respond to the control buttons on the back. Looking at these great high-res pix, I could see there was a mating connector between the button board and the main board, so I hoped I could re-seat that connector and it would start working. Opening it up was easy, but step 4 required me to separate the case slightly at the edges before I could get a gap to pry into. When I got the case off, I could see that the entire connector had come off the button board, and to fix it would be impossible due to the tiny pitch of the pins. Still, without this guide I would never have known for sure the issue. Back to Goodwill you go!