Inleiding
The logic board is the "motherboard" of the camera that contains all of the main circuits and important components necessary to make the device run efficiently. If the logic board is old, faulty, or damaged, this may prevent the camera from working properly.
Wat je nodig hebt
-
-
With the camera facing LCD side up, slide the battery compartment lid to the right.
-
Remove the old batteries.
-
-
-
Remove all screws along the edges of the camera, using a #00 Phillips screwdriver.
-
-
-
Carefully pull the back case (the side showing the LCD screen) away from the front half.
-
There are clips securing the top of the back case. Do not be afraid to use the proper amount of force to remove the back case.
-
Turn the camera around to the front (the lens side). Carefully remove the front case.
-
There are also clips on the lens' side as well, so do not be afraid to use force.
-
-
-
-
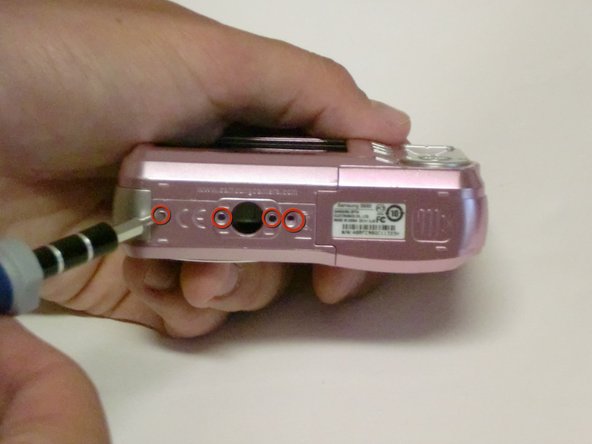
Remove all screws along the edges of the camera, using a #00 Phillips screwdriver.
-
The screws should be 4.3 mm in length.
-
Save them for putting the camera back together.
-
-
-
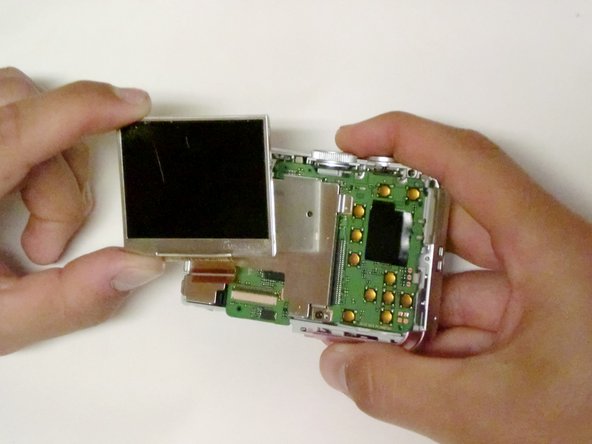
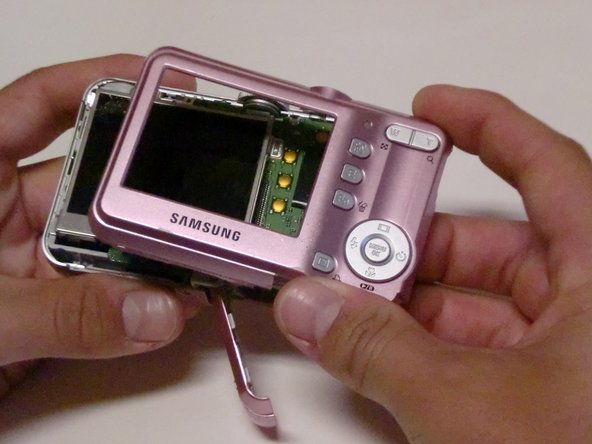
Carefully pull the back of the camera (the LCD screen side) away from the front.
-
There are clips securing the top of the back case. Do not be afraid to use the proper amount of force to remove the back case.
-
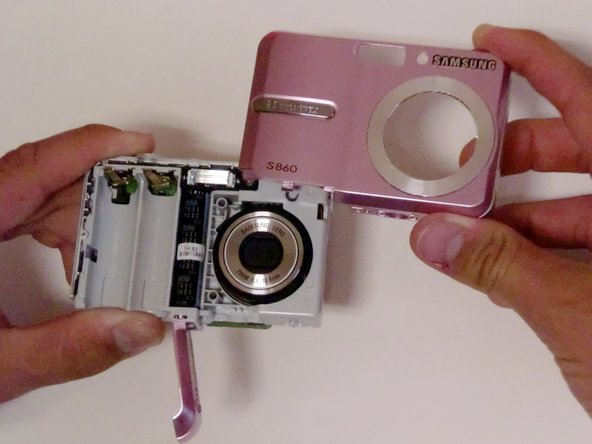
Turn the camera to the front (the flash side). Carefully remove.
-
There are clips on this side as well. Again, do not be afraid to use force.
-
-
-
To separate the logic board from the camera, carefully pull the logic board away from the camera.
-
Be careful not to damage the battery compartment. The battery sensors are attached to the logic board, so be gentle.
-
The USB connector is going to want to hang up on the housing, but once you have that free, the battery leads will slide out relatively easily.
-


To reassemble your device, follow these instructions in reverse order.
To reassemble your device, follow these instructions in reverse order.
Annuleren: ik heb deze handleiding niet afgemaakt.
2 andere personen hebben deze handleiding voltooid.
Team

Cal Poly, Team 33-72, Johann Spring 2010 Lid van Cal Poly, Team 33-72, Johann Spring 2010
CPSU-JOHANN-S10S33G72
4 Leden
6 handleidingen geschreven