Ga door naar hoofdinhoud

Samsung Impression Digitizer or Front Buttons Replacement

Wat je nodig hebt

  1. Samsung Impression Digitizer or Front Buttons Replacement, Battery: stap 1, afbeelding 1 van 1
    • Orient the phone with the screen facing down.

    • Using your thumb, slide the back panel away from the camera to expose the battery.

  2. Samsung Impression Digitizer or Front Buttons Replacement: stap 2, afbeelding 1 van 2 Samsung Impression Digitizer or Front Buttons Replacement: stap 2, afbeelding 2 van 2
    • Insert the tip of the spudger on the left side of the battery, opposite the direction of the white arrow.

    • Pry the battery free. It will pivot in the direction of the white arrow.

  3. Samsung Impression Digitizer or Front Buttons Replacement, Back Cover: stap 3, afbeelding 1 van 1
    • Remove the six 3.5 mm screws using a Phillips #000 screwdriver. Make sure to unscrew in a counterclockwise direction.

  4. Samsung Impression Digitizer or Front Buttons Replacement: stap 4, afbeelding 1 van 1
    • Remove the back cover by gently prying around the top and bottom edges with the spudger.

    • It may help to slide the touchscreen upwards when removing the back panel.

    • The side buttons will become loose and will fall out, so put these in a safe place.

  5. Samsung Impression Digitizer or Front Buttons Replacement, Circuit Board: stap 5, afbeelding 1 van 1
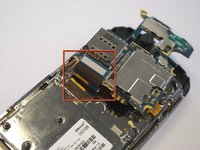
    • To free the circuit board, remove the black wire that is holding it down.

    • You can remove the wire by gently prying up the gold terminator that is attached to the green circuit board. A gentle tug is all it should take.

  6. Samsung Impression Digitizer or Front Buttons Replacement: stap 6, afbeelding 1 van 2 Samsung Impression Digitizer or Front Buttons Replacement: stap 6, afbeelding 2 van 2
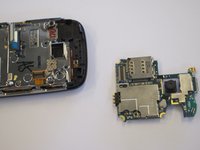
    • The circuit board will still be held on by a blue and black ribbon. Remove the entire circuit board by gently tugging the ribbon upwards.

  7. Samsung Impression Digitizer or Front Buttons Replacement, Keyboard: stap 7, afbeelding 1 van 1
    • Remove the two base screws along the edge of the silver piece, where you just removed the black end piece.

    • The screws are 2.7mm in length.

    • The bottom black end cap will snap out.

  8. Samsung Impression Digitizer or Front Buttons Replacement: stap 8, afbeelding 1 van 2 Samsung Impression Digitizer or Front Buttons Replacement: stap 8, afbeelding 2 van 2
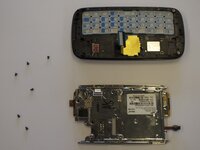
    • Remove 6 screws holding the silver plate on.

    • 2.7mm in length

    • The keys will peel right out of the screen side of the phone.

  9. Samsung Impression Digitizer or Front Buttons Replacement: stap 9, afbeelding 1 van 1
    • The silver piece you are left with is the physical keyboard assembly.

  10. Samsung Impression Digitizer or Front Buttons Replacement, LCD Flex Cable: stap 10, afbeelding 1 van 2 Samsung Impression Digitizer or Front Buttons Replacement, LCD Flex Cable: stap 10, afbeelding 2 van 2
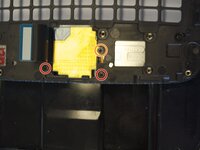
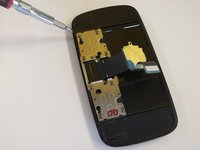
    • Remove the 3 screws holding down the flex cable.

    • The screws are 2.0 mm in length.

    • The screw that goes through the circle port on the flex cable is longer at 2.3mm long.

    • The keyboard slider frame will come off and the flex cable exposed, but not free.

  11. Samsung Impression Digitizer or Front Buttons Replacement: stap 11, afbeelding 1 van 1
    • Remove 4 outer screws.

    • The screws are 3.5mm in length.

  12. Samsung Impression Digitizer or Front Buttons Replacement: stap 12, afbeelding 1 van 3 Samsung Impression Digitizer or Front Buttons Replacement: stap 12, afbeelding 2 van 3 Samsung Impression Digitizer or Front Buttons Replacement: stap 12, afbeelding 3 van 3
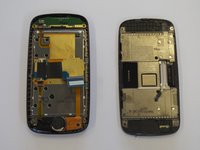
    • Slide the phone apart, and remove a 5th screw (3.5 mm).

    • Remove the outer shell by prying the edges off with your fingers, or a small screwdriver. (second image, taken before the image for above instruction)

    • The device will now be in two pieces

  13. Samsung Impression Digitizer or Front Buttons Replacement: stap 13, afbeelding 1 van 2 Samsung Impression Digitizer or Front Buttons Replacement: stap 13, afbeelding 2 van 2
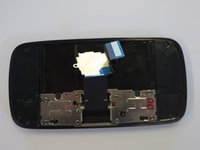
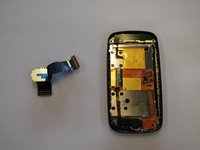
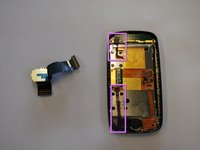
    • Lift the tab underneath the blue tape and gently pull the flex cable.

    • The flex cable will now be completely free.

  14. Samsung Impression Digitizer or Front Buttons Replacement, Ear Speaker: stap 14, afbeelding 1 van 1
    • Remove the single screw.

    • This screw is 2.25 mm in length.

    • Lift the black tab at the end of the ribbon.

    • Gently pull the speaker and ribbon free.

  15. Samsung Impression Digitizer or Front Buttons Replacement, LCD: stap 15, afbeelding 1 van 2 Samsung Impression Digitizer or Front Buttons Replacement, LCD: stap 15, afbeelding 2 van 2
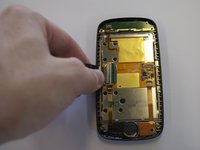
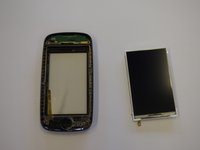
    • Lift the remaining two tabs and free their respective ribbon cables.

    • Gently pry the screen away from the housing.

    • Be careful with this step as you are in direct contact with the LCD screen.

  16. Samsung Impression Digitizer or Front Buttons Replacement, Digitizer or Front Buttons: stap 16, afbeelding 1 van 1
    • If replacing the front buttons, remove the assembly at the bottom of the front panel

    • The digitizer is now free to be pulled out from the front housing.

Conclusie

To reassemble your device, follow these instructions in reverse order.

3 andere personen hebben deze handleiding voltooid.

Saul Villatoro

Lid sinds: 04/25/11

255 Reputatie

7 handleidingen geschreven

Team

Cal Poly, Team 8-10, Regan Spring 2011 Lid van Cal Poly, Team 8-10, Regan Spring 2011

CPSU-REGAN-S11S8G10

4 Leden

22 handleidingen geschreven

0 opmerkingen

Voeg opmerking toe

Weergavestatistieken:

Afgelopen 24 uren: 0

Afgelopen 7 dagen: 0

Afgelopen 30 dagen: 3

Altijd: 6,807