Ga door naar hoofdinhoud

Samsung HMX-W300 Motherboard Replacement

Wat je nodig hebt

  1. Samsung HMX-W300 Motherboard Replacement, Disassembling Samsung HMX-W300: stap 1, afbeelding 1 van 3 Samsung HMX-W300 Motherboard Replacement, Disassembling Samsung HMX-W300: stap 1, afbeelding 2 van 3 Samsung HMX-W300 Motherboard Replacement, Disassembling Samsung HMX-W300: stap 1, afbeelding 3 van 3
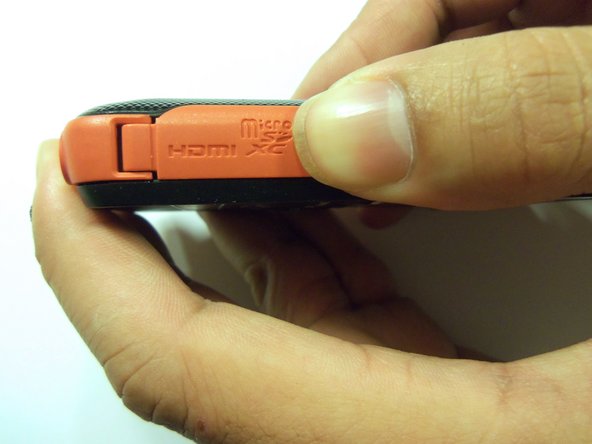
    • To remove the wristband of the device, grab the middle loop and pull the band through.

  2. Samsung HMX-W300 Motherboard Replacement: stap 2, afbeelding 1 van 2 Samsung HMX-W300 Motherboard Replacement: stap 2, afbeelding 2 van 2
    • Remove four screws with a Hex 1.5 mm screwdriver.

  3. Samsung HMX-W300 Motherboard Replacement: stap 3, afbeelding 1 van 3 Samsung HMX-W300 Motherboard Replacement: stap 3, afbeelding 2 van 3 Samsung HMX-W300 Motherboard Replacement: stap 3, afbeelding 3 van 3
    • Open the HDMI door on the side of the camera.

    • Remove the single screw using a Phillips #00 screwdriver.

  4. Samsung HMX-W300 Motherboard Replacement: stap 4, afbeelding 1 van 3 Samsung HMX-W300 Motherboard Replacement: stap 4, afbeelding 2 van 3 Samsung HMX-W300 Motherboard Replacement: stap 4, afbeelding 3 van 3
    • Use the iFixit opening tool on both sides on the device. Pry apart both sections with light force.

    • Do not apply too much force. There is a wire that attaches the front case with the rear case that can be damaged.

  5. Samsung HMX-W300 Motherboard Replacement: stap 5, afbeelding 1 van 3 Samsung HMX-W300 Motherboard Replacement: stap 5, afbeelding 2 van 3 Samsung HMX-W300 Motherboard Replacement: stap 5, afbeelding 3 van 3
    • Pull the wire ribbon out with a pair of tweezers.

  6. Samsung HMX-W300 Motherboard Replacement, Remove tape.: stap 6, afbeelding 1 van 3 Samsung HMX-W300 Motherboard Replacement, Remove tape.: stap 6, afbeelding 2 van 3 Samsung HMX-W300 Motherboard Replacement, Remove tape.: stap 6, afbeelding 3 van 3
    • Use tweezers to remove the tape.

  7. Samsung HMX-W300 Motherboard Replacement, Unplug wire ribbon.: stap 7, afbeelding 1 van 2 Samsung HMX-W300 Motherboard Replacement, Unplug wire ribbon.: stap 7, afbeelding 2 van 2
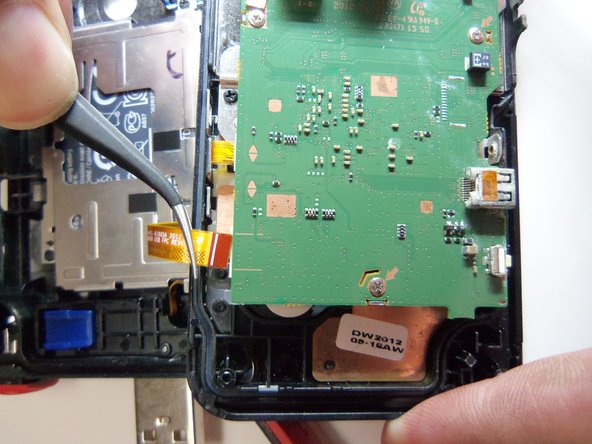
    • Use tweezers to grab the wire ribbon, then pull the wire out of connection.

  8. Samsung HMX-W300 Motherboard Replacement, Remove scerws.: stap 8, afbeelding 1 van 2 Samsung HMX-W300 Motherboard Replacement, Remove scerws.: stap 8, afbeelding 2 van 2
    • There are 5 Phillips size 00 screws. Remove all 5 screws.

    • Wire ribbon is attached to the motherboard.

  9. Samsung HMX-W300 Motherboard Replacement: stap 9, afbeelding 1 van 1
    • Pry the motherboard up using the plastic opening tool.

    • Be careful there is a wire ribbon holding the motherboard.

  10. Samsung HMX-W300 Motherboard Replacement, Disconnect wire ribbon.: stap 10, afbeelding 1 van 2 Samsung HMX-W300 Motherboard Replacement, Disconnect wire ribbon.: stap 10, afbeelding 2 van 2
    • Use tweezers to disconnect the wire as shown. This will loosen the motherboard from the rear case.

Conclusie

To reassemble your device, follow these instructions in reverse order.

Één andere persoon heeft deze handleiding voltooid.

Robert

Lid sinds: 01/21/15

966 Reputatie

8 handleidingen geschreven

Team

USF Tampa, Team 9-2, Blackwell Winter 2015 Lid van USF Tampa, Team 9-2, Blackwell Winter 2015

USFT-BLACKWELL-W15S9G2

4 Leden

16 handleidingen geschreven

0 opmerkingen

Voeg opmerking toe

Weergavestatistieken:

Afgelopen 24 uren: 0

Afgelopen 7 dagen: 0

Afgelopen 30 dagen: 0

Altijd: 313