Inleiding
Does spinning the bezel no longer cause the watch to scroll? Replacing the bezel may solve the problem. This guide can also be used for general cleaning purposes as well.
Wat je nodig hebt
-
-
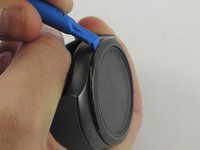
When prying the bezel off, ensure that you don't apply too much force and lose the 3 components needed for reassembly. Doing this over a container to catch the parts is a useful safety measure.
-
1: Metal Bezel Ring
-
2: Plastic Retainer
-
3: The Watch Itself
-
-
-
-
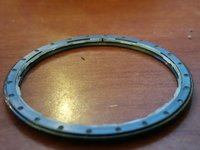
Cleaning the metal bezel can be done using the tool previously used to pry the bezel off. There is a small ridge along the inside that will collect gunk. Running the edge of your pry tool through this ridge will clean out anything stuck in there, and make step 5 much easier.
-
-
-
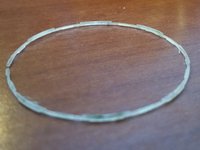
Cleaning the plastic retainer will require much more care than the bezel, due to how fragile it is. Holding it carefully in between two fingers, gently rub a cotton swab against the part that is supported by your finger holding the retainer. Rotate the retainer as you clean the surface to ensure full coverage.
-
-
-
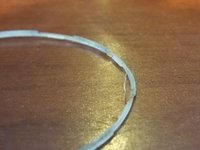
The retainer sits in the groove around the inside of the metal bezel as shown in the image. Take notice of the orientation of the retainer in the image. The retainer should seat in the groove on the bezel without applying force.
-
-
-
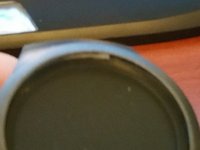
Once you have the retainer seated in the bezel, place the bezel face down on your watch face placing the side with the split in the retainer down first. If you do not do this, the retainer may not seat properly, as shown in the first photo.
-
If that happens, gently pry the bezel and retainer up by hand, re-seat the retainer in the bezel, and try again.
-
Once you have successfully replaced your bezel on the watch, it should feel like new and rotate freely again.
-


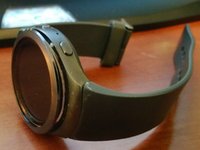


Your Bezel should now be able to rotate freely without any resistance.
Your Bezel should now be able to rotate freely without any resistance.
Annuleren: ik heb deze handleiding niet afgemaakt.
21 andere personen hebben deze handleiding voltooid.
Team

USF Tampa, Team S2-G3, Sullivan Spring 2017 Lid van USF Tampa, Team S2-G3, Sullivan Spring 2017
USFT-SULLIVAN-S17S2G3
3 Leden
23 handleidingen geschreven
20Gids Commentaar
This is kind of a sick joke. The bezel has four of the tiniest screws and ball bearings imaginable which are impossible to find-almost better if you don’t, since you will never get them reinstalled!!
? There are no screws in the bezel, it is exactly as shown here if you have an S2 non-classic
I did not have any screws, but there were 4 very small plastic bearings! Thank goodness I did not loose them. Be careful. If they come out a little spit and put them back in the socket they sit in and they will stay. I had to try 4 times to get the ring back in right. My bezel moved well before I started but the watch did not react to it. Now after cleaning things are working better.
Das Ablösen funktioniert. Allerdings gibt es eine winzige Kugel und eine winzige Feder, die dabei sich ebenfalls lösen und wieder an die richtige Stelle müssen. Die Gefahr diese zu verlieren ist gewaltig (mir passiert). Man kann diese unter rounded.com nachbestellen. Es ist aber sehr schwierig, diese wieder an die richtige Stelle zu bekommen. Daher ist die Anleitung Schrott.
Were I can her the bezel Gera 2