Ga door naar hoofdinhoud

Samsung Galaxy Tab 2 7.0 Auxiliary Port Replacement

Wat je nodig hebt

  1. Samsung Galaxy Tab 2 7.0 Auxiliary Port Replacement, Auxiliary Port: stap 1, afbeelding 1 van 1
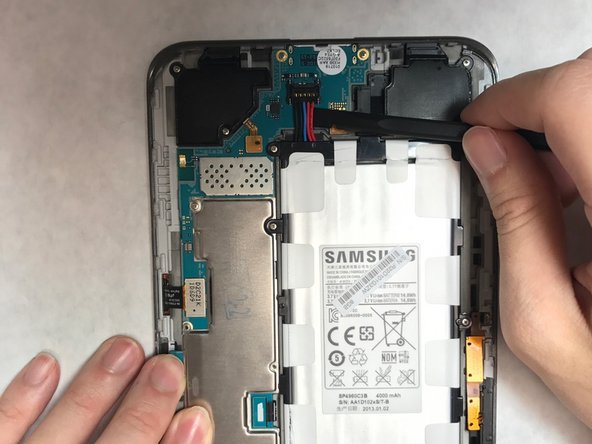
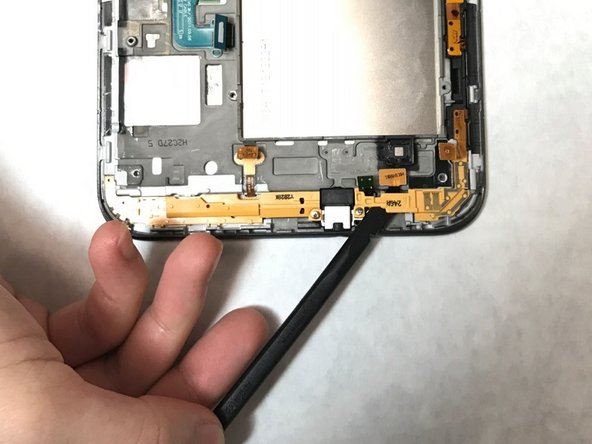
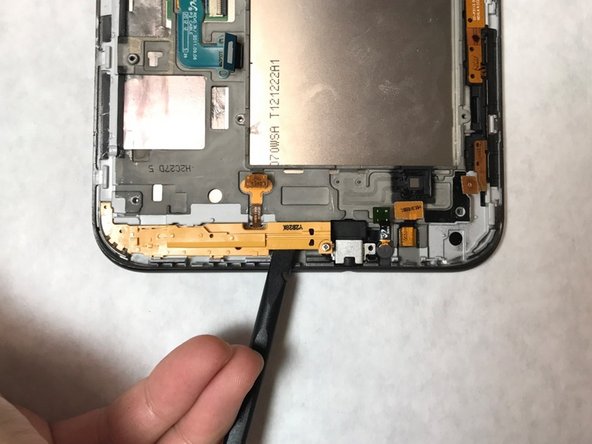
    • Using a nylon spudger or flat plastic opening tool, pry open the back of the device.

    • It is easy to begin this process by starting at the micro SD card insert.

  2. Samsung Galaxy Tab 2 7.0 Auxiliary Port Replacement: stap 2, afbeelding 1 van 1
    • Using a Phillips head screwdriver, remove the 6 4mm screws holding holding the battery on the device.

  3. Samsung Galaxy Tab 2 7.0 Auxiliary Port Replacement: stap 3, afbeelding 1 van 3 Samsung Galaxy Tab 2 7.0 Auxiliary Port Replacement: stap 3, afbeelding 2 van 3 Samsung Galaxy Tab 2 7.0 Auxiliary Port Replacement: stap 3, afbeelding 3 van 3
    • Gently detach the set of wires clips connecting the battery to the device using a nylon spudger.

    • Remove the battery and set it aside.

  4. Samsung Galaxy Tab 2 7.0 Auxiliary Port Replacement: stap 4, afbeelding 1 van 1
    • Using a Phillips head screwdriver, remove the 6 4mm screws holding the motherboard in the device.

  5. Samsung Galaxy Tab 2 7.0 Auxiliary Port Replacement: stap 5, afbeelding 1 van 3 Samsung Galaxy Tab 2 7.0 Auxiliary Port Replacement: stap 5, afbeelding 2 van 3 Samsung Galaxy Tab 2 7.0 Auxiliary Port Replacement: stap 5, afbeelding 3 van 3
    • Locate the flex cables attached to the motherboard. Using a nylon spudger, gently detach each flex cable from the motherboard.

    • Be careful when detaching flex cables. Excessive force and sharp tools have the potential to damage these components.

    • Lift the motherboard from the device and set it aside.

  6. Samsung Galaxy Tab 2 7.0 Auxiliary Port Replacement: stap 6, afbeelding 1 van 3 Samsung Galaxy Tab 2 7.0 Auxiliary Port Replacement: stap 6, afbeelding 2 van 3 Samsung Galaxy Tab 2 7.0 Auxiliary Port Replacement: stap 6, afbeelding 3 van 3
    • Locate the yellow brackets at the bottom of the device.

    • Using a phillips head screwdriver, remove the single 4mm screw on each bracket, located on either side of the auxiliary port.

    • Lift the brackets from the device and set them aside.

    • You may need to use a nylon spudger, or any flat tool, to lift the brackets out of their place.

  7. Samsung Galaxy Tab 2 7.0 Auxiliary Port Replacement: stap 7, afbeelding 1 van 1
    • Using a nylon spudger, or any flat tool, gently pry and lift the small metal covering off of the auxiliary port.

    • This will reveal a rubber covering.

  8. Samsung Galaxy Tab 2 7.0 Auxiliary Port Replacement: stap 8, afbeelding 1 van 1
    • Using a nylon spudger, or any flat tool, gently pry and lift the small rubber covering to expose the auxiliary port.

    • This will reveal the auxiliary port.

  9. Samsung Galaxy Tab 2 7.0 Auxiliary Port Replacement: stap 9, afbeelding 1 van 1
    • Lift the auxiliary port with a nylon spudger.

    • Remove the auxiliary component.

    • It is easiest to lift this piece from the innermost side of the port, opposite of the opening.

Conclusie

To reassemble your device, follow these instructions in reverse order.

5 andere personen hebben deze handleiding voltooid.

Katija Tarailo

Lid sinds: 03/02/17

460 Reputatie

3 handleidingen geschreven

Team

IUPUI, Team S3-G1, Harley Spring 2017 Lid van IUPUI, Team S3-G1, Harley Spring 2017

IUPUI-HARLEY-S17S3G1

4 Leden

3 handleidingen geschreven

0 opmerkingen

Voeg opmerking toe

Weergavestatistieken:

Afgelopen 24 uren: 0

Afgelopen 7 dagen: 3

Afgelopen 30 dagen: 18

Altijd: 2,017