Deze versie kan foutieve bewerkingen bevatten. Schakel over naar de recentste gecontroleerde momentopname.
Wat je nodig hebt
-
Deze stap is niet vertaald. Help het te vertalen
-
Grasp the cap of the stylus and remove it from its slot in the midframe.
-
-
Deze stap is niet vertaald. Help het te vertalen
-
Pry with a plastic opening tool, or your fingernail, in the divot to the right of the rear-facing camera, near the volume rocker.
-
-
Deze stap is niet vertaald. Help het te vertalen
-
Insert your finger in the notch of the battery compartment.
-
Press the battery toward the rear facing camera while pulling outward.
-
-
Deze stap is niet vertaald. Help het te vertalen
-
Use the flat end of a spudger, or your fingernail, to press the microSD card slightly deeper into its slot until you hear a click.
-
After the click, release the card and it will pop out of its slot.
-
-
Deze stap is niet vertaald. Help het te vertalen
-
Remove the microSD card from its slot in the midframe.
-
-
Deze stap is niet vertaald. Help het te vertalen
-
Use a plastic opening tool, or your fingernail, to push the SIM card out of its compartment.
-
-
-
Deze stap is niet vertaald. Help het te vertalen
-
Slide the SIM card out the rest of the way with your thumb and remove it from the device.
-
-
Deze stap is niet vertaald. Help het te vertalen
-
Remove the nine 3.4 mm Phillips #00 screws securing the midframe to the display assembly.
-
-
Deze stap is niet vertaald. Help het te vertalen
-
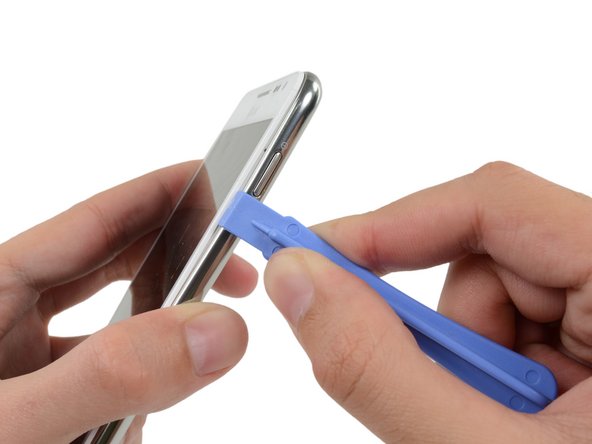
Insert your plastic opening tool to the left of the power button between the midframe and the front panel assembly and pry.
-
-
Deze stap is niet vertaald. Help het te vertalen
-
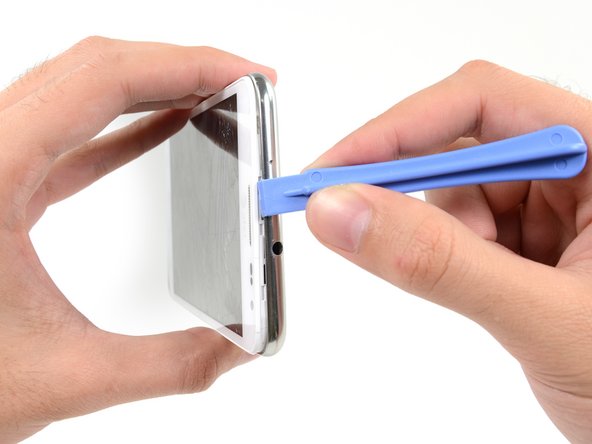
Insert your plastic opening tool to the left of the headphone jack between the midframe and the display assembly.
-
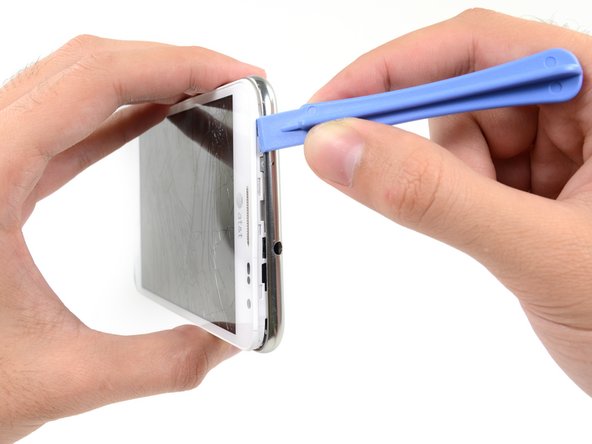
Slide the opening tool along the top edge of the phone.
-
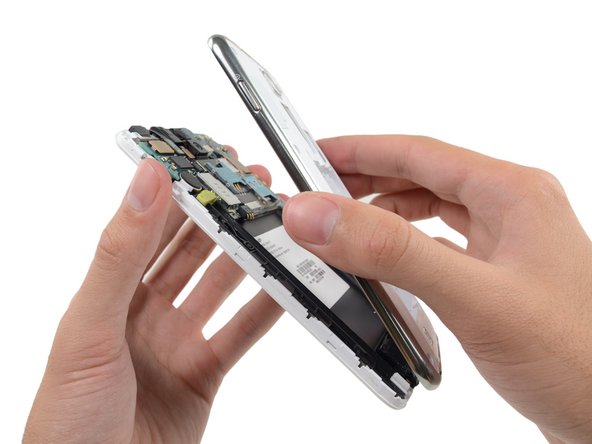
Continue to run the plastic opening tool around the perimeter of the phone until the midframe is separated.
-
-
Deze stap is niet vertaald. Help het te vertalen
-
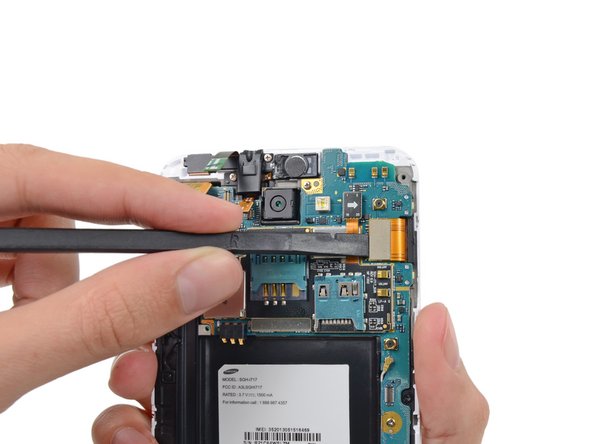
Use the flat end of a spudger to carefully disconnect the display cable connector.
-
-
Deze stap is niet vertaald. Help het te vertalen
-
Use a spudger to disconnect the front-facing camera assembly cable connector.
-
Disconnect the headphone jack/earpiece speaker assembly cable connector.
-
Disconnect the digitizer cable connector.
-
-
Deze stap is niet vertaald. Help het te vertalen
-
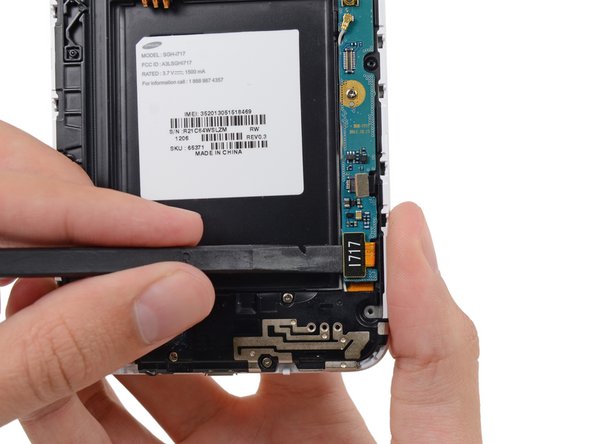
Disconnect the soft button cable connector with the flat end of a spudger.
-
Use a spudger to disconnect the USB board cable connector.
-
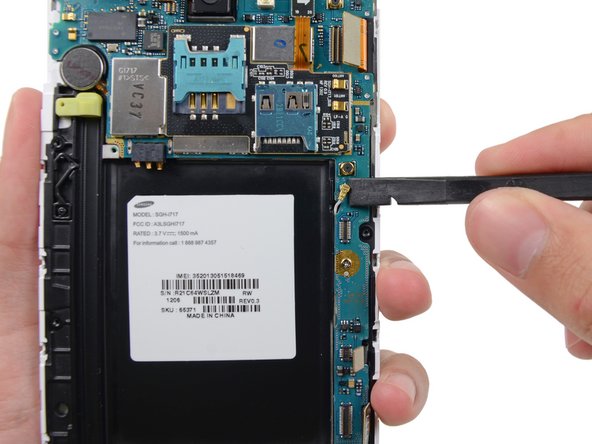
Disconnect the antenna cable connector.
-
-
Deze stap is niet vertaald. Help het te vertalen
-
Remove the two 3.4 mm Phillips #00 screws securing the motherboard to the display assembly.
-
-
Deze stap is niet vertaald. Help het te vertalen
-
Remove the motherboard assembly from the display assembly.
-
-
Deze stap is niet vertaald. Help het te vertalen
-
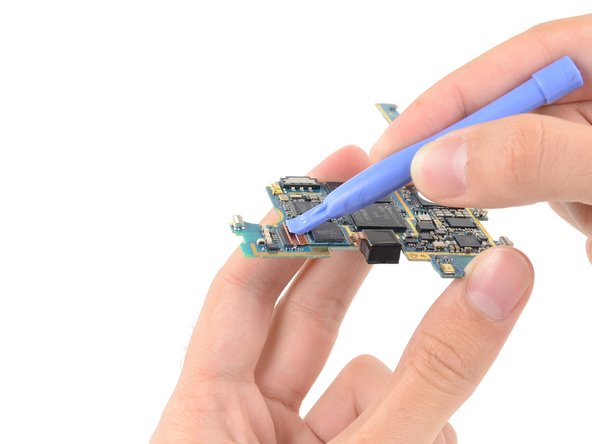
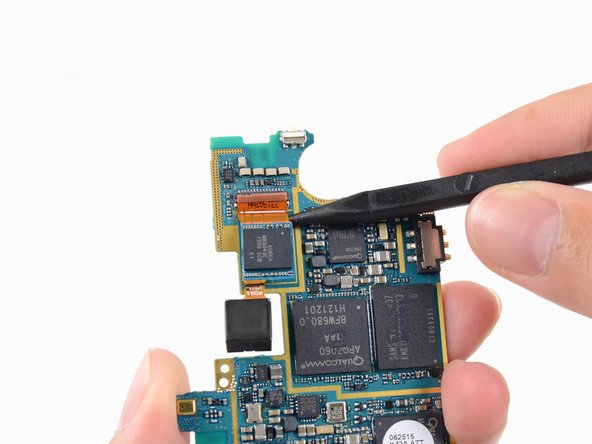
Use a plastic opening tool to flip the release tab on the rear-facing camera cable ZIF connector.
-
-
Deze stap is niet vertaald. Help het te vertalen
-
Slide the tip of a spudger under the rear-facing camera cable to slide it out of the ZIF connector and free it from the light adhesive.
-
Annuleren: ik heb deze handleiding niet afgemaakt.
5 andere personen hebben deze handleiding voltooid.


