Ga door naar hoofdinhoud

Samsung Galaxy Note 3 Rear Facing Camera Replacement

Wat je nodig hebt

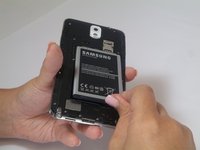
  1. Samsung Galaxy Note 3 Rear Facing Camera Replacement, Remove the rear case: stap 1, afbeelding 1 van 1
    • Insert a fingernail or plastic opening tool in the gap between the rear case and the base of the phone.

  2. Samsung Galaxy Note 3 Rear Facing Camera Replacement, Remove Case from the Base: stap 2, afbeelding 1 van 2 Samsung Galaxy Note 3 Rear Facing Camera Replacement, Remove Case from the Base: stap 2, afbeelding 2 van 2
    • Slide your fingernail or plastic opening tool along the edge of the rear case.

    • Lift the case gently from the base.

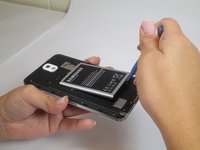
  3. Samsung Galaxy Note 3 Rear Facing Camera Replacement, Battery: stap 3, afbeelding 1 van 2 Samsung Galaxy Note 3 Rear Facing Camera Replacement, Battery: stap 3, afbeelding 2 van 2
    • Insert a fingernail or plastic opening tool into the small gap between the battery and the phone base.

    • Lift the battery out of its recess.

  4. Samsung Galaxy Note 3 Rear Facing Camera Replacement, S Pen: stap 4, afbeelding 1 van 1
    • Place your fingernail in the groove of the stylus pen.

    • Pull the stylus pen away from the phone.

  5. Samsung Galaxy Note 3 Rear Facing Camera Replacement, Unscrew Back Chassis: stap 5, afbeelding 1 van 1
    • Remove the twelve 4mm Phillips #00 screws from the back chassis.

  6. Samsung Galaxy Note 3 Rear Facing Camera Replacement, Remove Back Chassis: stap 6, afbeelding 1 van 1
    • Insert the plastic opening tool into the Stylus Pen placement holder.

    • Lift the plastic opening tool so that the midframe separates from the base.

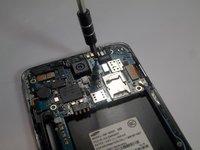
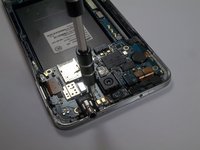
  7. Samsung Galaxy Note 3 Rear Facing Camera Replacement, Screw Removal: stap 7, afbeelding 1 van 2 Samsung Galaxy Note 3 Rear Facing Camera Replacement, Screw Removal: stap 7, afbeelding 2 van 2
    • Remove the single screw beside headphone jack.

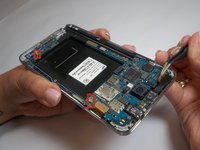
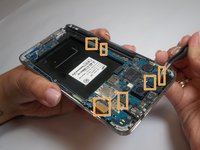
  8. Samsung Galaxy Note 3 Rear Facing Camera Replacement, Unfasten Clips and Cable Connectors: stap 8, afbeelding 1 van 2 Samsung Galaxy Note 3 Rear Facing Camera Replacement, Unfasten Clips and Cable Connectors: stap 8, afbeelding 2 van 2
    • Use tweezers to remove both antenna clips.

    • Use a spudger to disconnect six cable connectors.

  9. Samsung Galaxy Note 3 Rear Facing Camera Replacement, Motherboard Removal: stap 9, afbeelding 1 van 1
    • Pull up on the motherboard with tweezers.

  10. Samsung Galaxy Note 3 Rear Facing Camera Replacement, Unclipping the Camera: stap 10, afbeelding 1 van 1
    • Unclip the camera connecting cable using the plastic opening tool from the motherboard

    • Remove loose camera from base

Conclusie

To reassemble your device, follow these instructions in reverse order.

37 andere personen hebben deze handleiding voltooid.

Brittany Gail

Lid sinds: 09/23/14

8.504 Reputatie

8 handleidingen geschreven

Team

USF Tampa, Team 2-2, Blackwell Fall 2014 Lid van USF Tampa, Team 2-2, Blackwell Fall 2014

USFT-BLACKWELL-F14S2G2

4 Leden

25 handleidingen geschreven

3 opmerkingen

Awesome, phone disassembly and fingernail painting at same time :) Thanks for your time to post this!

Chris G - Antwoord

Hi

Thanks for the nice instructions

Do you know if I can use a Note 4 camera (or any better!) for my Note 3?

Are they different in connections?

Thanks

hameidfehri - Antwoord

I shall be very thankfull for this act of kindness

Malik wajdan ali - Antwoord

Voeg opmerking toe

Weergavestatistieken:

Afgelopen 24 uren: 0

Afgelopen 7 dagen: 3

Afgelopen 30 dagen: 16

Altijd: 13,419