Ga door naar hoofdinhoud

Samsung Galaxy Gear Motherboard Replacement

Wat je nodig hebt

  1. Samsung Galaxy Gear Motherboard Replacement, Display Housing: stap 1, afbeelding 1 van 1
    • Use a T5 Torx screwdriver to remove the four 4.0 mm screws on the back of the device.

    • Be sure your device is turned off.

  2. Samsung Galaxy Gear Motherboard Replacement: stap 2, afbeelding 1 van 1
    • Use a plastic opening tool to separate the display housing from from the device.

    • To ensure you don't damage your device, insert the opening tool and slide it the entire length of the gap on both sides of the device.

  3. Samsung Galaxy Gear Motherboard Replacement: stap 3, afbeelding 1 van 2 Samsung Galaxy Gear Motherboard Replacement: stap 3, afbeelding 2 van 2
    • Gently pry back the metal flap on top of the connector.

    • Locate the two 2.0 mm black screws and unscrew using a Phillips PH00 bit. The connector will detach from the device.

  4. Samsung Galaxy Gear Motherboard Replacement, Motherboard: stap 4, afbeelding 1 van 2 Samsung Galaxy Gear Motherboard Replacement, Motherboard: stap 4, afbeelding 2 van 2
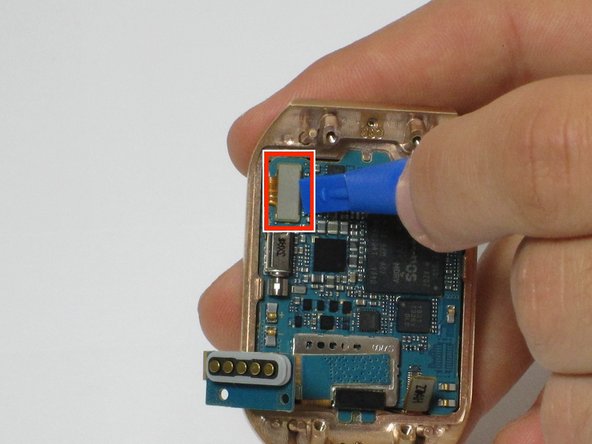
    • On the display, use a plastic opening tool to lift up the two ribbon cables the motherboard.

  5. Samsung Galaxy Gear Motherboard Replacement: stap 5, afbeelding 1 van 1
    • The motherboard is attached to the display using an adhesive

    • Using a heat gun, heat up the display for 4 to 5 minutes, making sure the move the heat gun around to distribute the heat around the display. This heats up the adhesive making the motherboard easier to remove

  6. Samsung Galaxy Gear Motherboard Replacement: stap 6, afbeelding 1 van 2 Samsung Galaxy Gear Motherboard Replacement: stap 6, afbeelding 2 van 2
    • Using a plastic opening tool, carefully insert the opening tool in between the bezel and the motherboard and slide it the entire length of the logic board.

    • Slowly pry up the motherboard from the display.

Conclusie

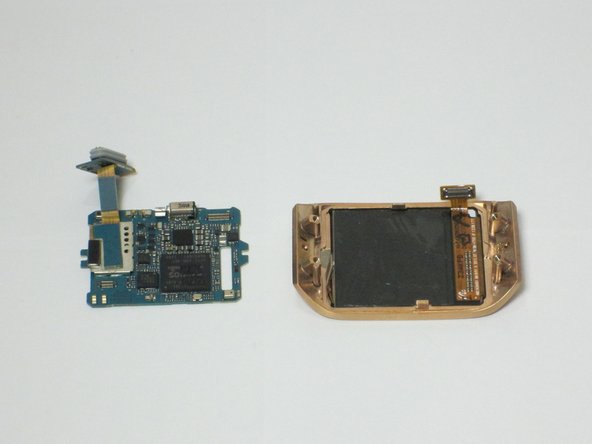
To reassemble your device, follow these instructions in reverse order.

2 andere personen hebben deze handleiding voltooid.

Joe

Lid sinds: 04/11/16

279 Reputatie

2 handleidingen geschreven

Team

Cal Poly, Team 1-9, Maness Spring 2016 Lid van Cal Poly, Team 1-9, Maness Spring 2016

CPSU-MANESS-S16S1G9

4 Leden

7 handleidingen geschreven

Één opmerking

Had to build a cradle, keep breaking, do not know out the 5 brass pronges which is pisitive and negative, how is there no schematic of the gear watch??

Chris martin - Antwoord

Voeg opmerking toe

Weergavestatistieken:

Afgelopen 24 uren: 0

Afgelopen 7 dagen: 1

Afgelopen 30 dagen: 6

Altijd: 2,525