Ga door naar hoofdinhoud

Deze handleiding heeft recentere wijzigingen. Schakel over naar de nieuwste niet-geverifieerde versie.

Samsung Blackjack Speaker Replacement

Wat je nodig hebt

  1. Samsung Blackjack Speaker Replacement, Battery Cover: stap 1, afbeelding 1 van 3 Samsung Blackjack Speaker Replacement, Battery Cover: stap 1, afbeelding 2 van 3 Samsung Blackjack Speaker Replacement, Battery Cover: stap 1, afbeelding 3 van 3
    • Hold the device with the screen facing away from you and the camera towards you.

    • Place your thumb on the bottom half of the phone and slide the cover off while gently pushing down on the cover.

  2. Samsung Blackjack Speaker Replacement, Battery: stap 2, afbeelding 1 van 2 Samsung Blackjack Speaker Replacement, Battery: stap 2, afbeelding 2 van 2
    • Place your fingers on both sides of the bottom of the battery and lift upwards.

    • Pull the battery away from the phone.

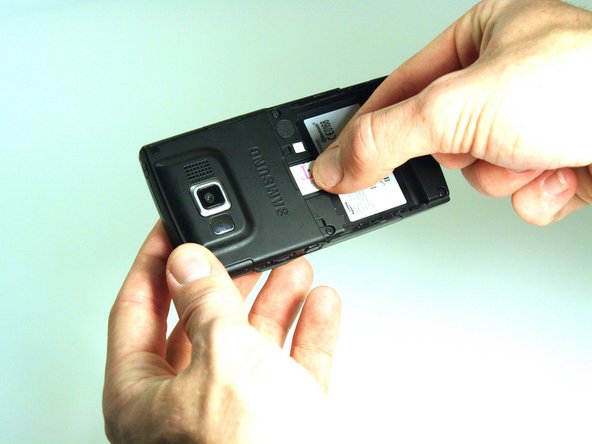
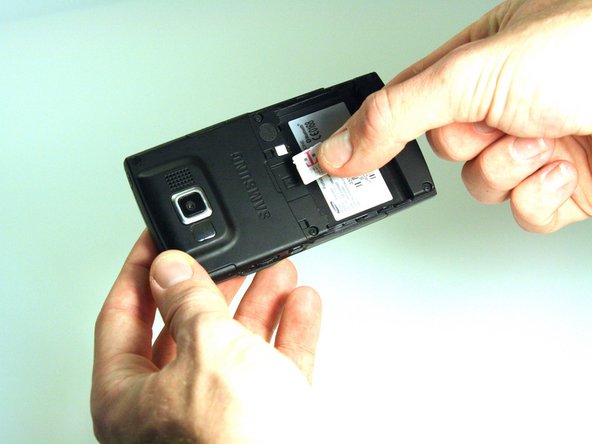
  3. Samsung Blackjack Speaker Replacement, SIM Card: stap 3, afbeelding 1 van 3 Samsung Blackjack Speaker Replacement, SIM Card: stap 3, afbeelding 2 van 3 Samsung Blackjack Speaker Replacement, SIM Card: stap 3, afbeelding 3 van 3
    • Place your thumb on the SIM card.

    • Slide the card out of the slot.

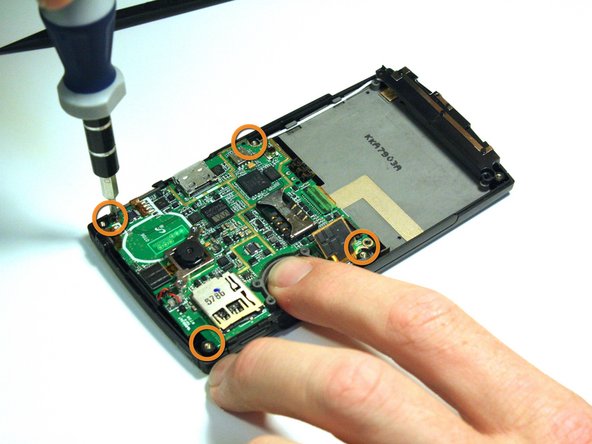
  4. Samsung Blackjack Speaker Replacement, Back Phone Casing: stap 4, afbeelding 1 van 2 Samsung Blackjack Speaker Replacement, Back Phone Casing: stap 4, afbeelding 2 van 2
    • Use the spudger to remove the rubber stoppers from the top of the cover.

    • Use the Phillips 00 screw driver to remove the screws from each of the four corners and the two on sides (six total).

  5. Samsung Blackjack Speaker Replacement: stap 5, afbeelding 1 van 3 Samsung Blackjack Speaker Replacement: stap 5, afbeelding 2 van 3 Samsung Blackjack Speaker Replacement: stap 5, afbeelding 3 van 3
    • Use the spudger to loosen and separate the front and back covers.

    • Pick up the back cover once loosened.

    • The front and back covers will be attached to each other by a gold wire.

    • Remove the gold wire connecting the back cover to the motherboard to completely separate the covers.

  6. Samsung Blackjack Speaker Replacement, Motherboard: stap 6, afbeelding 1 van 2 Samsung Blackjack Speaker Replacement, Motherboard: stap 6, afbeelding 2 van 2
    • Use the spudger to unsnap the black rectangular connection from the motherboard.

    • Use the Phillips 00 screwdriver to remove all of the screws that hold the motherboard in place.

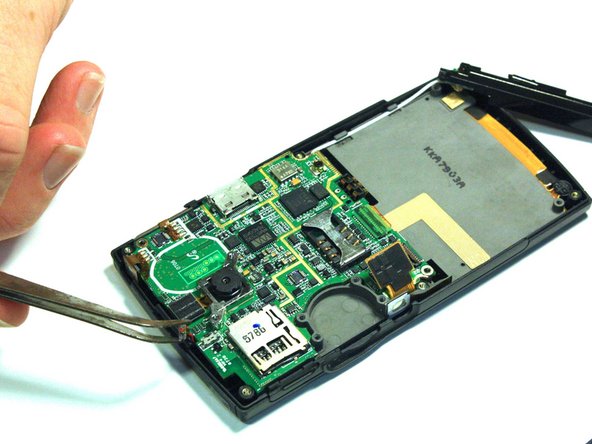
  7. Samsung Blackjack Speaker Replacement: stap 7, afbeelding 1 van 2 Samsung Blackjack Speaker Replacement: stap 7, afbeelding 2 van 2
    • Use the tweezers to unsnap the connection between the motherboard and the speaker. The speaker is attached to the front casing.

  8. Samsung Blackjack Speaker Replacement: stap 8, afbeelding 1 van 2 Samsung Blackjack Speaker Replacement: stap 8, afbeelding 2 van 2
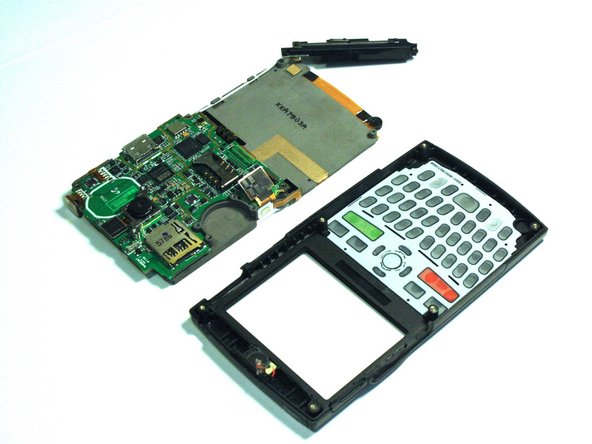
    • Once all of the connections have been snapped off of the motherboard, the motherboard can be removed.

    • Lift up on the motherboard and it will come free of the front casing.

  9. Samsung Blackjack Speaker Replacement, Speaker: stap 9, afbeelding 1 van 2 Samsung Blackjack Speaker Replacement, Speaker: stap 9, afbeelding 2 van 2
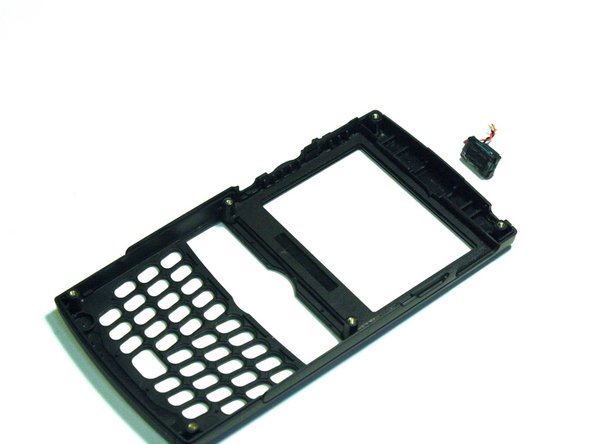
    • Use the spudger to wedge between the speaker and the speaker's casing.

    • Use the spudger to pry on the speaker until it comes free from the casing.

Conclusie

To reassemble your device, follow these instructions in reverse order.

Kristin Manna

Lid sinds: 10/22/12

29 Reputatie

10 handleidingen geschreven

Team

Clemson, Team 14-4, Benson Fall 2012 Lid van Clemson, Team 14-4, Benson Fall 2012

CLEM-BENSON-F12S14G4

3 Leden

14 handleidingen geschreven

0 opmerkingen

Voeg opmerking toe

Weergavestatistieken:

Afgelopen 24 uren: 1

Afgelopen 7 dagen: 2

Afgelopen 30 dagen: 2

Altijd: 398