Deze versie kan foutieve bewerkingen bevatten. Schakel over naar de recentste gecontroleerde momentopname.
Wat je nodig hebt
-
Deze stap is niet vertaald. Help het te vertalen
-
Use the spudger to remove the rubber stoppers from the top of the cover.
-
Use the Phillips 00 screw driver to remove the screws from each of the four corners and the two on sides (six total).
-
-
Deze stap is niet vertaald. Help het te vertalen
-
Use the spudger to loosen and separate the front and back covers.
-
Pick up the back cover once loosened.
-
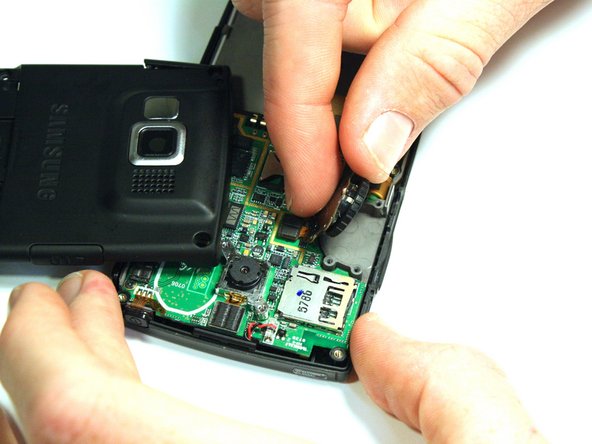
Remove the gold wire connecting the back cover to the motherboard to completely separate the covers.
-
-
Deze stap is niet vertaald. Help het te vertalen
-
Use the screwdriver to unscrew the four screws that hold the scroll wheel in place.
-
Use your fingers to remove the scroll wheel and the metal plate that it is attached to.
-
-
-
Deze stap is niet vertaald. Help het te vertalen
-
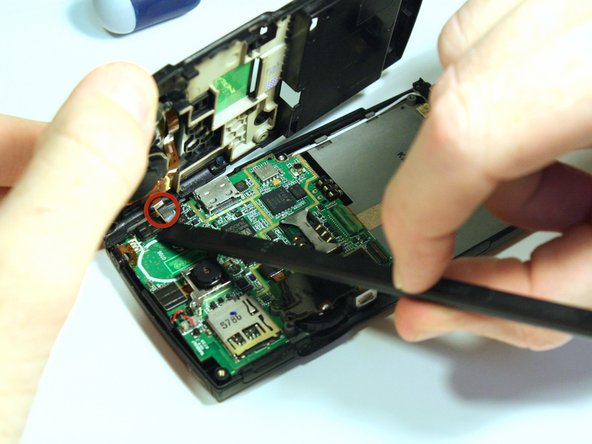
Use the spudger to unsnap the gold wire connection that connects the back casing to the logic board.
-
Use the spudger to unsnap the gold wire connection that connects the scroll wheel assembly to the logic board.
-
-
Deze stap is niet vertaald. Help het te vertalen
-
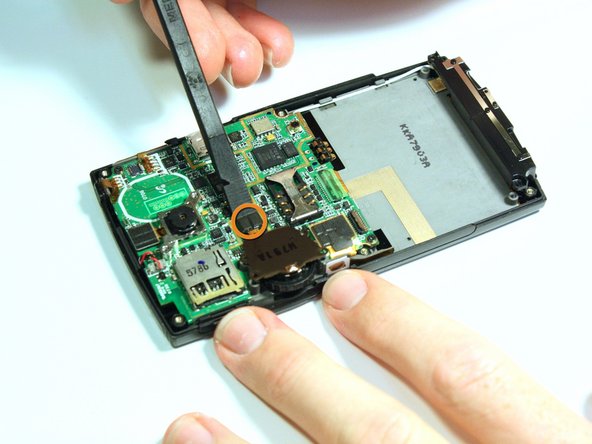
Use the spudger to unsnap the black rectangular connection from the motherboard.
-
Use the Phillips 00 screwdriver to remove all of the screws that hold the motherboard in place.
-
-
Deze stap is niet vertaald. Help het te vertalen
-
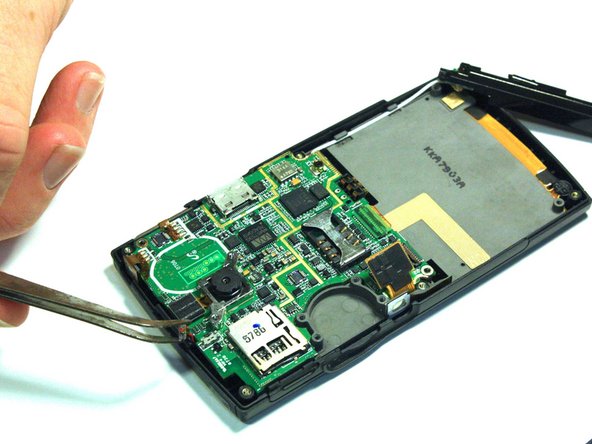
Use the tweezers to unsnap the connection between the motherboard and the speaker. The speaker is attached to the front casing.
-
-
Deze stap is niet vertaald. Help het te vertalen
-
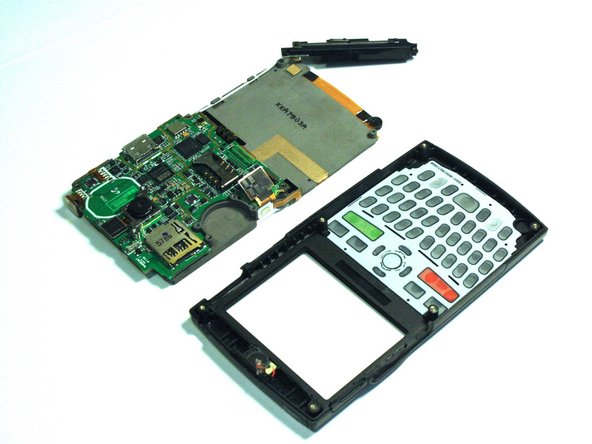
Lift up on the motherboard and it will come free of the front casing.
-


Team

Clemson, Team 14-4, Benson Fall 2012 Lid van Clemson, Team 14-4, Benson Fall 2012
CLEM-BENSON-F12S14G4
3 Leden
14 handleidingen geschreven