Ga door naar hoofdinhoud

Samsung Blackjack Back Phone Casing Replacement

Wat je nodig hebt

  1. Samsung Blackjack Back Phone Casing Replacement, Battery Cover: stap 1, afbeelding 1 van 3 Samsung Blackjack Back Phone Casing Replacement, Battery Cover: stap 1, afbeelding 2 van 3 Samsung Blackjack Back Phone Casing Replacement, Battery Cover: stap 1, afbeelding 3 van 3
    • Hold the device with the screen facing away from you and the camera towards you.

    • Place your thumb on the bottom half of the phone and slide the cover off while gently pushing down on the cover.

  2. Samsung Blackjack Back Phone Casing Replacement, Battery: stap 2, afbeelding 1 van 2 Samsung Blackjack Back Phone Casing Replacement, Battery: stap 2, afbeelding 2 van 2
    • Place your fingers on both sides of the bottom of the battery and lift upwards.

    • Pull the battery away from the phone.

  3. Samsung Blackjack Back Phone Casing Replacement, SIM Card: stap 3, afbeelding 1 van 3 Samsung Blackjack Back Phone Casing Replacement, SIM Card: stap 3, afbeelding 2 van 3 Samsung Blackjack Back Phone Casing Replacement, SIM Card: stap 3, afbeelding 3 van 3
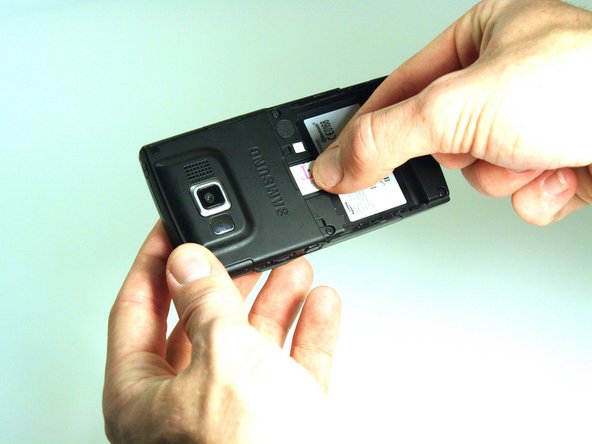
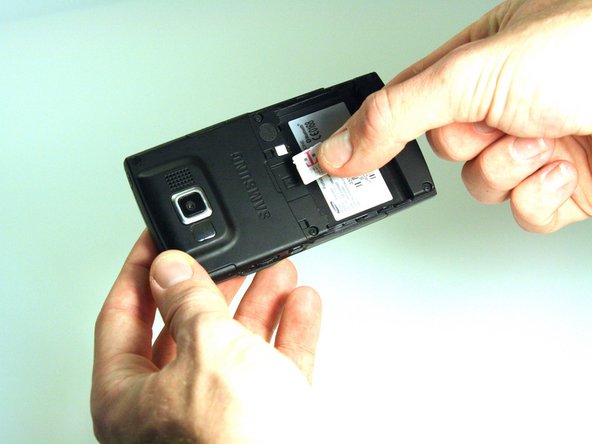
    • Place your thumb on the SIM card.

    • Slide the card out of the slot.

  4. Samsung Blackjack Back Phone Casing Replacement, Back Phone Casing: stap 4, afbeelding 1 van 2 Samsung Blackjack Back Phone Casing Replacement, Back Phone Casing: stap 4, afbeelding 2 van 2
    • Use the spudger to remove the rubber stoppers from the top of the cover.

    • Use the Phillips 00 screw driver to remove the screws from each of the four corners and the two on sides (six total).

  5. Samsung Blackjack Back Phone Casing Replacement: stap 5, afbeelding 1 van 3 Samsung Blackjack Back Phone Casing Replacement: stap 5, afbeelding 2 van 3 Samsung Blackjack Back Phone Casing Replacement: stap 5, afbeelding 3 van 3
    • Use the spudger to loosen and separate the front and back covers.

    • Pick up the back cover once loosened.

    • The front and back covers will be attached to each other by a gold wire.

    • Remove the gold wire connecting the back cover to the motherboard to completely separate the covers.

Conclusie

To reassemble your device, follow these instructions in reverse order.

Kristin Manna

Lid sinds: 10/22/12

29 Reputatie

10 handleidingen geschreven

Team

Clemson, Team 14-4, Benson Fall 2012 Lid van Clemson, Team 14-4, Benson Fall 2012

CLEM-BENSON-F12S14G4

3 Leden

14 handleidingen geschreven

0 opmerkingen

Voeg opmerking toe

Weergavestatistieken:

Afgelopen 24 uren: 0

Afgelopen 7 dagen: 1

Afgelopen 30 dagen: 1

Altijd: 497