Inleiding
If you have gone through the troubleshooting guide, and have determined that the reason your device is not able to power on is in fact a faulty power cord then you can replace it for a new undamaged one with the help of this simple, easy to follow guide.
Make sure the device is not plugged in before working on it.
Wat je nodig hebt
-
-
Use the Phillips #00 Screwdriver to remove the single 9.6mm screw holding the top cover in place.
-
Remove the cover by sliding it up and then out.
-
-
-
Disconnect the two ribbons that connect the disc drive to the motherboard.
-
-
-
-
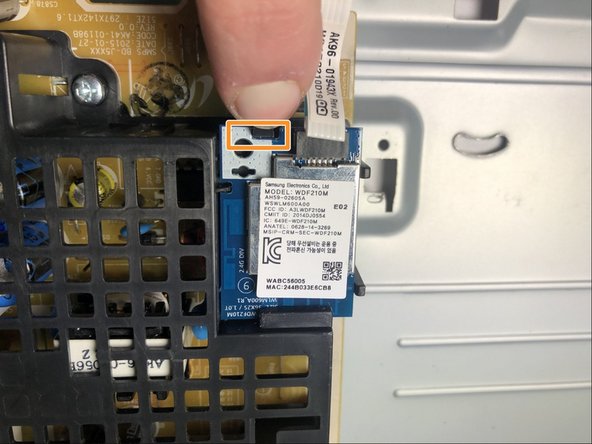
Pull clip to remove the WiFi card ribbon connected to the circuit board.
-
Push the black plastic tab out and slide the WiFi card out from the cage.
-
-
-
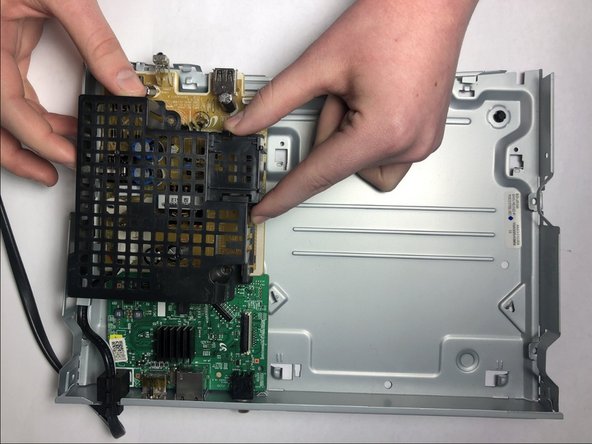
Use the Phillips #00 Screwdriver to remove the two 6.4 mm screws holding the cage in place.
-
Lift the cage up to remove it.
-


To reassemble your device, follow these instructions in reverse order.
To reassemble your device, follow these instructions in reverse order.

Team

Embry-Riddle Aeronautical University, Team S1-G5, Cromer Twal Spring 2020 Lid van Embry-Riddle Aeronautical University, Team S1-G5, Cromer Twal Spring 2020
ERAU-CROMER TWAL-S20S1G5
4 Leden
5 handleidingen geschreven