Ga door naar hoofdinhoud

Samsung ATIV Book 9 Plus Heatsink Assembly Replacement

Wat je nodig hebt

  1. Samsung ATIV Book 9 Plus Heatsink Assembly Replacement, Back Cover: stap 1, afbeelding 1 van 3 Samsung ATIV Book 9 Plus Heatsink Assembly Replacement, Back Cover: stap 1, afbeelding 2 van 3 Samsung ATIV Book 9 Plus Heatsink Assembly Replacement, Back Cover: stap 1, afbeelding 3 van 3
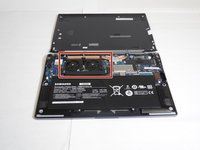
    • Turn the laptop upside down so that the underside of the laptop is facing you.

    • Use a Phillips #000 screwdriver to unscrew the 4.3 mm screws located on the edges and corners of the laptop.

  2. Samsung ATIV Book 9 Plus Heatsink Assembly Replacement: stap 2, afbeelding 1 van 1
    • Lift the cover to reveal the interior of the laptop.

  3. Samsung ATIV Book 9 Plus Heatsink Assembly Replacement, Internal Fans: stap 3, afbeelding 1 van 3 Samsung ATIV Book 9 Plus Heatsink Assembly Replacement, Internal Fans: stap 3, afbeelding 2 van 3 Samsung ATIV Book 9 Plus Heatsink Assembly Replacement, Internal Fans: stap 3, afbeelding 3 van 3
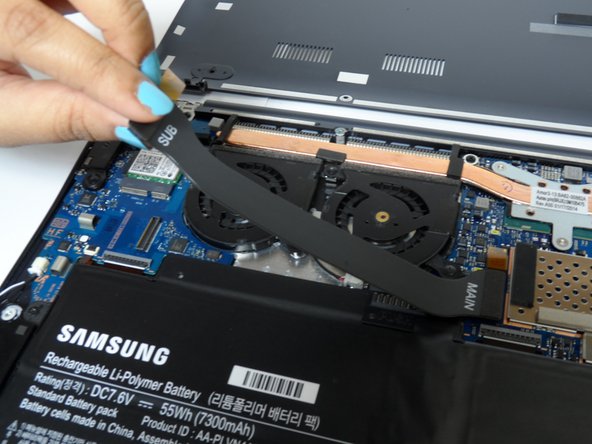
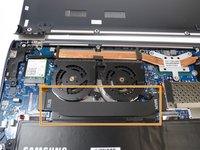
    • The fans should be in the upper left corner of the laptop if the laptop is oriented with the battery in the bottom half.

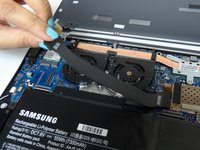
    • Gently lift the fans' black connector strip out of the way.

  4. Samsung ATIV Book 9 Plus Heatsink Assembly Replacement: stap 4, afbeelding 1 van 2 Samsung ATIV Book 9 Plus Heatsink Assembly Replacement: stap 4, afbeelding 2 van 2
    • Using a Phillips head screwdriver, unscrew four 4.55 mm Phillips #000 screws that bind the fans.

  5. Samsung ATIV Book 9 Plus Heatsink Assembly Replacement: stap 5, afbeelding 1 van 1
    • Disconnect the white connectors by gently tugging on them.

    • Lift the fans from their positions.

  6. Samsung ATIV Book 9 Plus Heatsink Assembly Replacement, Heatsink Assembly: stap 6, afbeelding 1 van 1
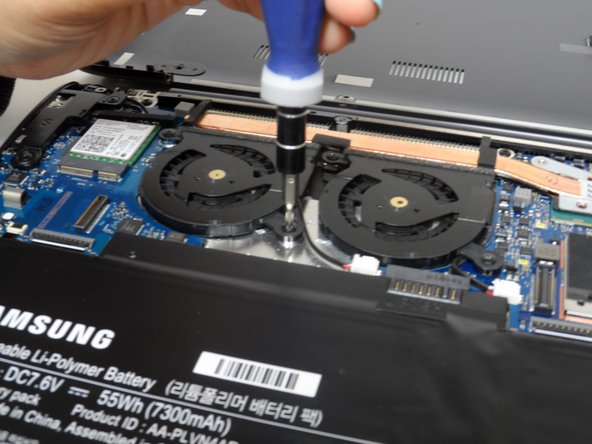
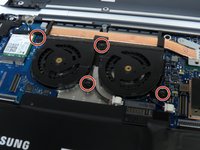
    • Using a Phillips head screwdriver #000 unscrew the motherboard from the rest of the components.

  7. Samsung ATIV Book 9 Plus Heatsink Assembly Replacement: stap 7, afbeelding 1 van 1
    • Disconnect the two cables shown in the picture by gently pulling them off.

  8. Samsung ATIV Book 9 Plus Heatsink Assembly Replacement: stap 8, afbeelding 1 van 1
    • Using a Phillips #000 screwdriver, unscrew the three labeled screws to detach the heatsink assembly.

Conclusie

To reassemble your device, follow these instructions in reverse order.

Ryan Smith

Lid sinds: 04/01/19

193 Reputatie

2 handleidingen geschreven

Team

IUPUI, Team S7-G7, Wilson Spring 2019 Lid van IUPUI, Team S7-G7, Wilson Spring 2019

IUPUI-WILSON-S19S7G7

3 Leden

2 handleidingen geschreven

0 opmerkingen

Voeg opmerking toe

Weergavestatistieken:

Afgelopen 24 uren: 1

Afgelopen 7 dagen: 5

Afgelopen 30 dagen: 12

Altijd: 625