Inleiding
Step by step guide for disassembling your SELP150 Sony Lens. Great for Jammed Lens repairs.
Wat je nodig hebt
-
-
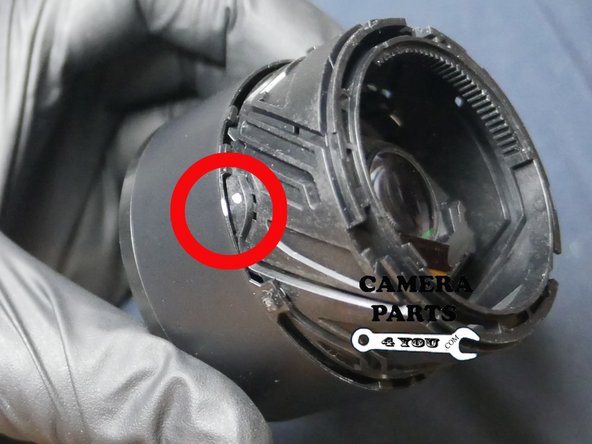
Notice positioning
-
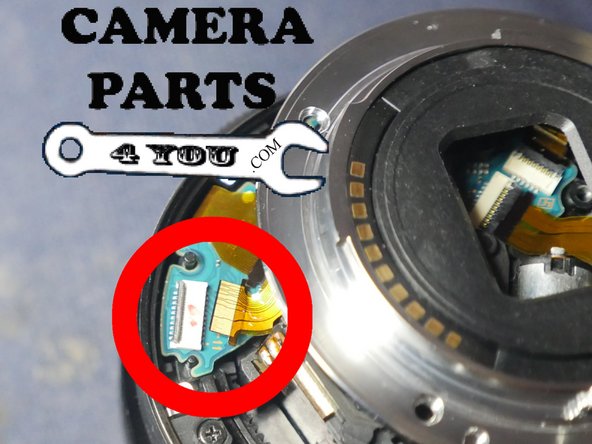
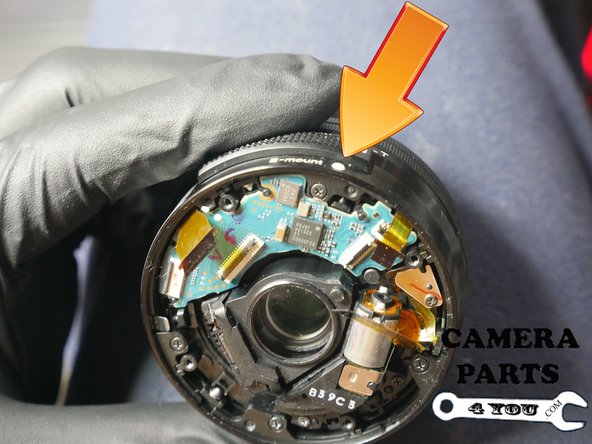
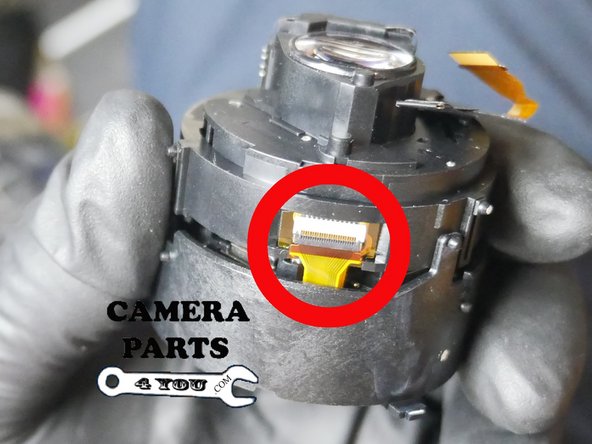
Use spudger or other method to release ziff clamp and remove flex cable.
-
-
-
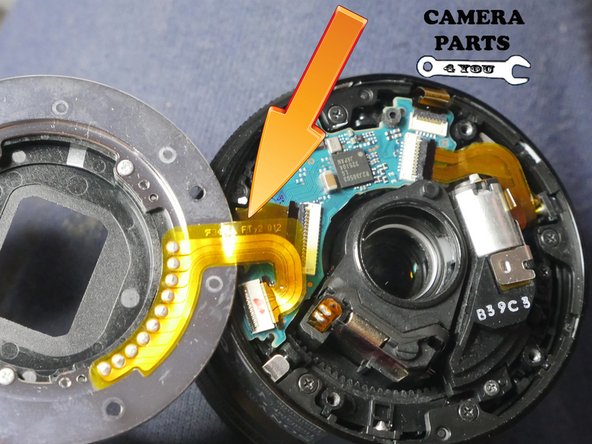
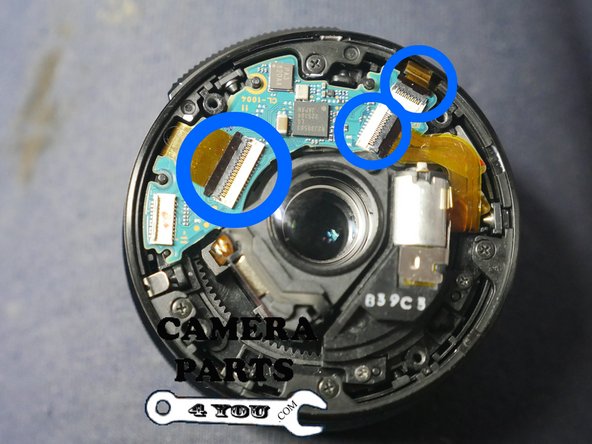
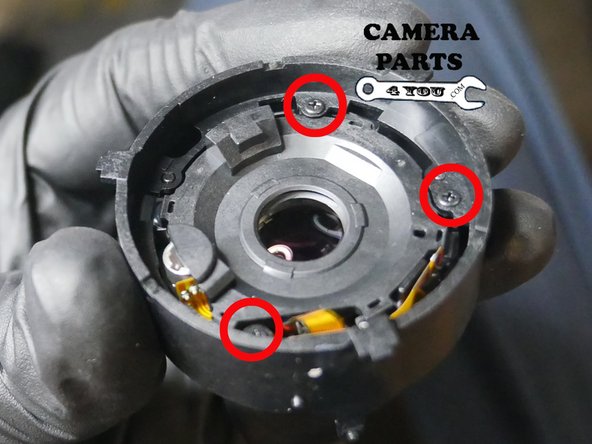
Open the 3 Ziff clamps carefully and remove the Flex Cables.
-
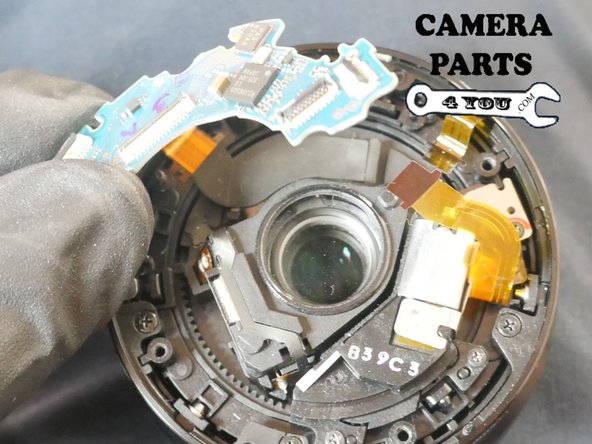
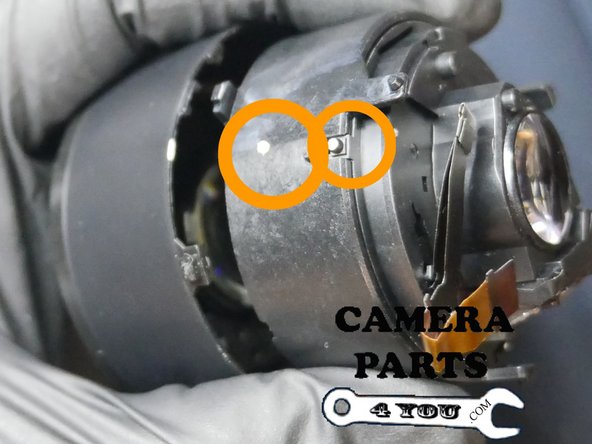
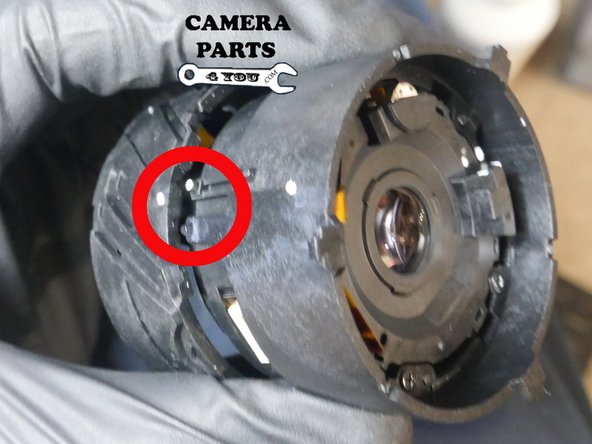
Notice White Mount Dot and Main PCB Orientation to help with re-assembly
-
-
-
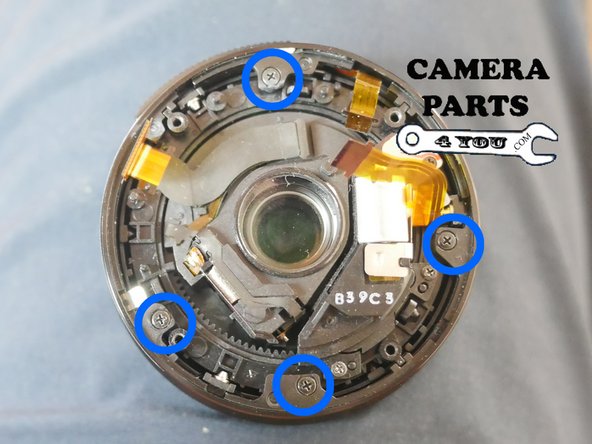
Remove 4 - 4mm screws. Once removed the barrel will release and extend.
-
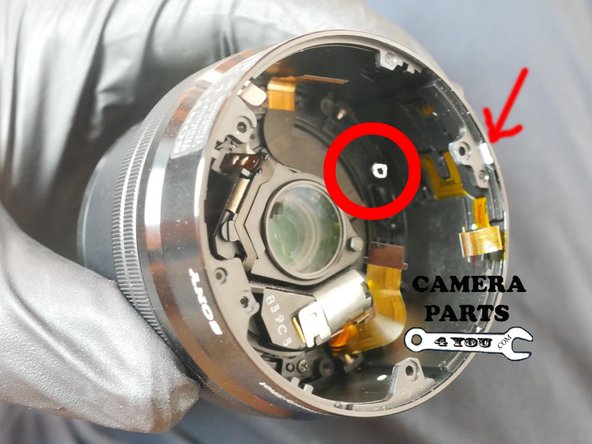
Make a marking (i used white) to align with the White marking on the Focus ring to make re-assembly easier
-
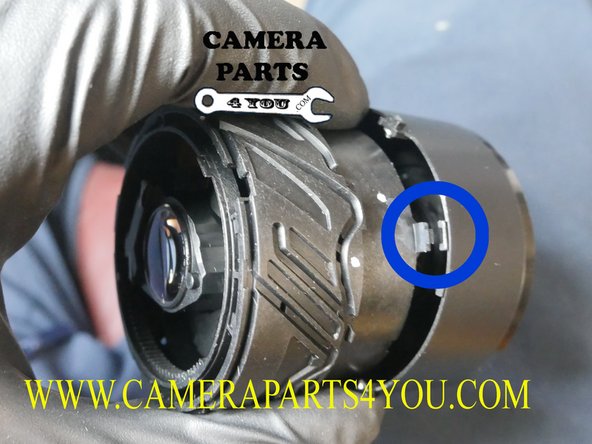
Notice the 3 Grooves. These are the slide grooves where the barrel moves up and down. You will need to release the pins from the grooves at each point - one by one by using pressure.
-
-
-
-
Apply pressure out the outter tip near pin pushing in slightly and gently release the pin from the barrel. Do this on all three locations where the pins are located.
-
-
-
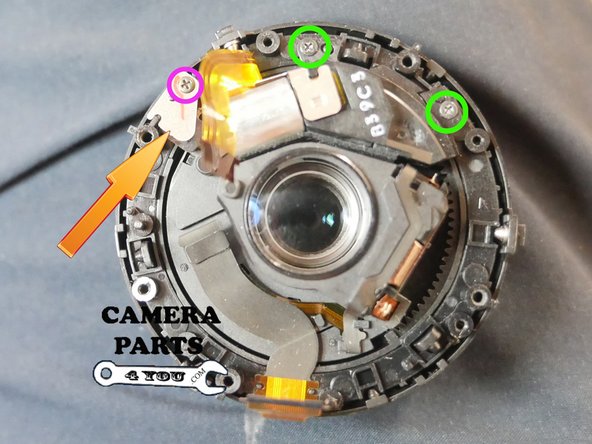
Remove 2 screws 2 x 4mm (black screws with a tight thread)
-
Remove 1 screw 1 x 3mm
-
Remove metal plate (see arrow)... review orientation before removing.
-
-
-
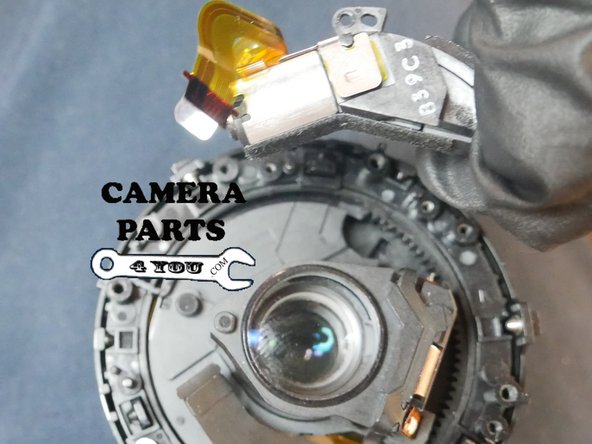
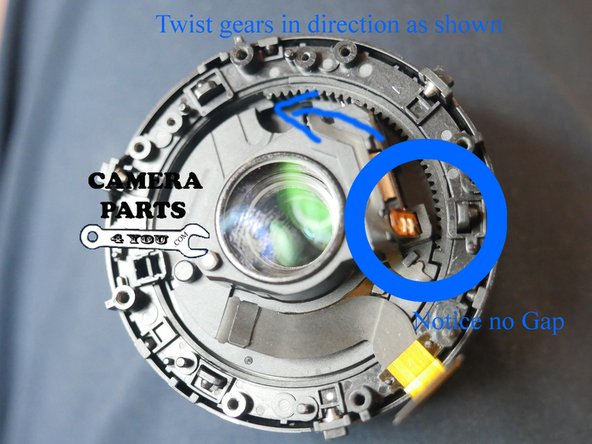
Ok so here is how to remove the inner barrel. Twist the gear teeth in the direction of the arrow as far as it will go until you get a gap similar to picture #2
-
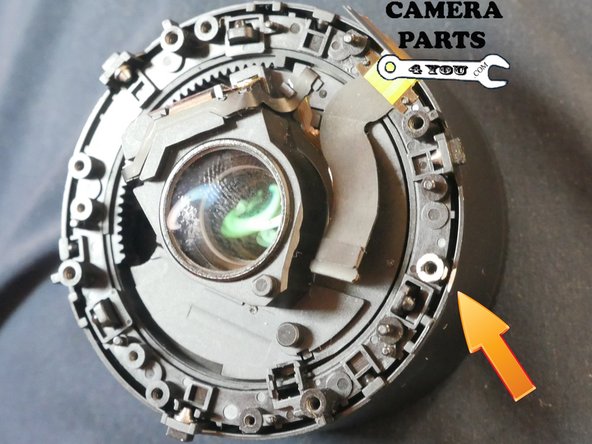
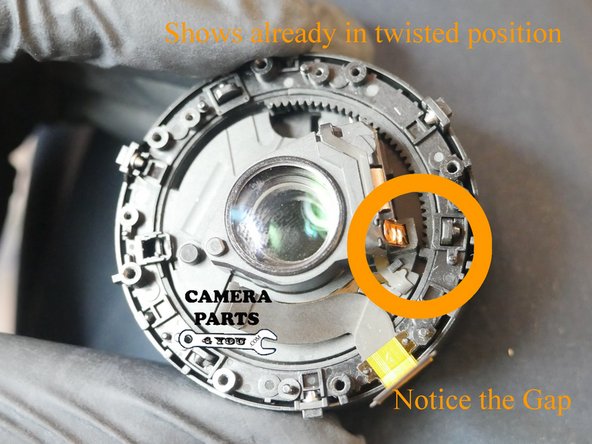
Shows already in twisted position. Now just pull up on the middle barrel (glass housing) until the lens mechanism starts to twist.
-
-
-
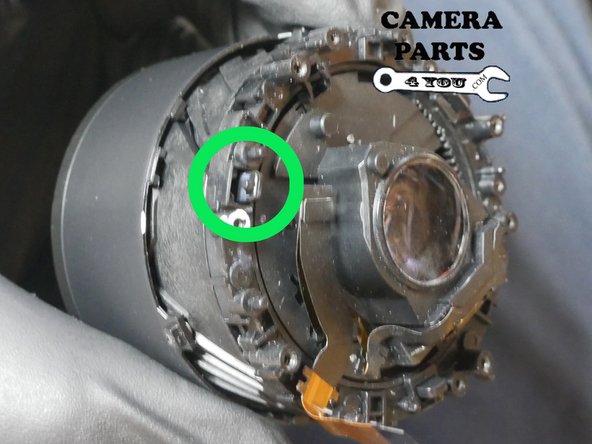
Pull up on inner part (glass housing). The barrel will begin to twist. Notice Extended notch. Twist until the Notch descends. Stop when notch descends.
-
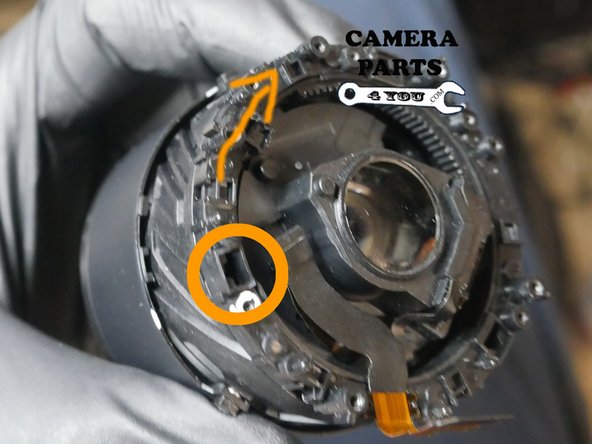
Picture shows notch has descended. Now you can twist rear part until it releases and remove it. Be careful in removing. Make sure it removes freely. There are tabs that can break off if forced.
-
Twist until inner barrel releases and drops from groove. Mark the point where barrel releases and remove groove tube.
-
-
-
For reassembly just re-assemble the aperature unit then attach the groove tube as shown
-
There are two groove notches as shown in the photo. Slide the 2 notches into the 2 grooves exactly as shown.. push in until they twist into the groove.
-
Line up groove and attach the front tube. Use the marks you made to line everything up and reverse the disassembly to finish assembly. If you need help you can always drop us an email.
-


To reassemble your device, follow these instructions in reverse order.
To reassemble your device, follow these instructions in reverse order.
Annuleren: ik heb deze handleiding niet afgemaakt.
16 andere personen hebben deze handleiding voltooid.
8 opmerkingen
moisture got into lens and I need to clean all glass. How do I completely disassemble to get inside of lenses?
This tear down should give you access to the outer glass elements; however, it will not give you access to the 2 part enclosed glass elements.
Very helpful instructions. Despite this, I had enormous difficulty reassembling the lens - it’s the part where all the pegs have to go in their correct slots in the groove tube while a ribbon cable remains neatly folded out of the way that nearly defeated me. Thank you to the author.