Ga door naar hoofdinhoud

Roku Streaming Stick Battery Coil Contact Replacement

Wat je nodig hebt

  1. Roku Streaming Stick Battery Coil Contact Replacement, Battery Coil Contact: stap 1, afbeelding 1 van 2 Roku Streaming Stick Battery Coil Contact Replacement, Battery Coil Contact: stap 1, afbeelding 2 van 2
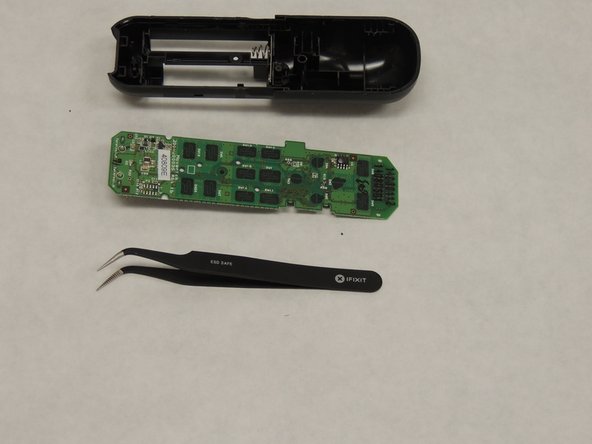
    • Flip the remote so that the buttons lay face down and then remove the back cover.

  2. Roku Streaming Stick Battery Coil Contact Replacement: stap 2, afbeelding 1 van 1
    • Remove the batteries by compressing the spring.

    • This will expose the screw shown in red.

  3. Roku Streaming Stick Battery Coil Contact Replacement: stap 3, afbeelding 1 van 1
    • Remove the screw using a Phillips #00 screwdriver.

  4. Roku Streaming Stick Battery Coil Contact Replacement: stap 4, afbeelding 1 van 2 Roku Streaming Stick Battery Coil Contact Replacement: stap 4, afbeelding 2 van 2
    • Remove the face of the remote with the plastic opening tool.

  5. Roku Streaming Stick Battery Coil Contact Replacement: stap 5, afbeelding 1 van 2 Roku Streaming Stick Battery Coil Contact Replacement: stap 5, afbeelding 2 van 2
    • Using tweezers, remove the motherboard from the remote.

  6. Roku Streaming Stick Battery Coil Contact Replacement: stap 6, afbeelding 1 van 1
    • The contacts should be present with one set being in the bottom of the remote casing and the other set being on the underside of the motherboard for the remote.

  7. Roku Streaming Stick Battery Coil Contact Replacement: stap 7, afbeelding 1 van 2 Roku Streaming Stick Battery Coil Contact Replacement: stap 7, afbeelding 2 van 2
    • This step will require a soldering iron.

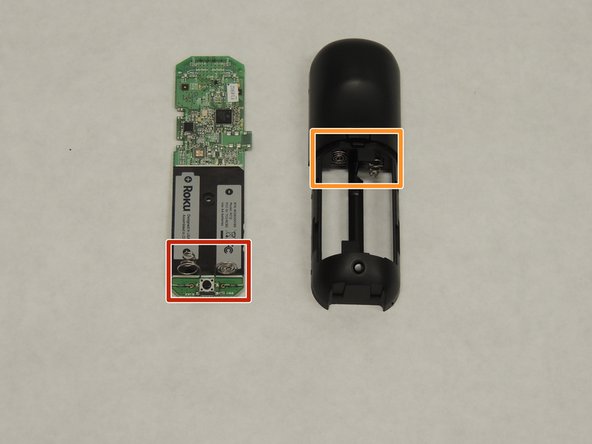
    • Now you will have to remove the existing contacts by way of clipping the line of at an appropriate length away from the contacts.

    • Now solder on your new connections on the board.

    • For the connections to the casing, you should be able to remove them with a little force. If you feel like you are using too much force, feel free to use a heat gun to eliminate some adhesive on the casing side of the contact.

    • Finally, adhere the new contacts to the casing with a "super glue" like Krazy glue.

Conclusie

To reassemble your device, follow these instructions in reverse order.

Thomas Kennedy

Lid sinds: 04/07/18

231 Reputatie

1 Handleiding geschreven

Team

IUPUI, Team S2-G2, Wilson Spring 2018 Lid van IUPUI, Team S2-G2, Wilson Spring 2018

IUPUI-WILSON-S18S2G2

4 Leden

3 handleidingen geschreven

0 opmerkingen

Voeg opmerking toe

Weergavestatistieken:

Afgelopen 24 uren: 2

Afgelopen 7 dagen: 4

Afgelopen 30 dagen: 13

Altijd: 1,756