Ga door naar hoofdinhoud

Roccat Tyon omron switch Replacement

Wat je nodig hebt

  1. Roccat Tyon omron switch Replacement, uncovering the screws: stap 1, afbeelding 1 van 3 Roccat Tyon omron switch Replacement, uncovering the screws: stap 1, afbeelding 2 van 3 Roccat Tyon omron switch Replacement, uncovering the screws: stap 1, afbeelding 3 van 3
    • All screw are hidden below the mouse

    • Peel off the mouse pad to uncover 5 of the 6 screws

    • The last screw is in a hole under the sticker. You don't need to remove the whole sticker to uncover it.

  2. Roccat Tyon omron switch Replacement, remove the screws: stap 2, afbeelding 1 van 2 Roccat Tyon omron switch Replacement, remove the screws: stap 2, afbeelding 2 van 2
    • use the screwdriver to remove all the screws

  3. Roccat Tyon omron switch Replacement, separate the top half: stap 3, afbeelding 1 van 2 Roccat Tyon omron switch Replacement, separate the top half: stap 3, afbeelding 2 van 2
    • Carefully remove the outer shell, the two halves are still connected by wires.

    • remove the white wire connector carefully

  4. Roccat Tyon omron switch Replacement: stap 4, afbeelding 1 van 3 Roccat Tyon omron switch Replacement: stap 4, afbeelding 2 van 3 Roccat Tyon omron switch Replacement: stap 4, afbeelding 3 van 3
    • unplug the remaining connectors

    • carefully pull-down the Ribbon cable to unplug it

  5. Roccat Tyon omron switch Replacement, free the PCB: stap 5, afbeelding 1 van 3 Roccat Tyon omron switch Replacement, free the PCB: stap 5, afbeelding 2 van 3 Roccat Tyon omron switch Replacement, free the PCB: stap 5, afbeelding 3 van 3
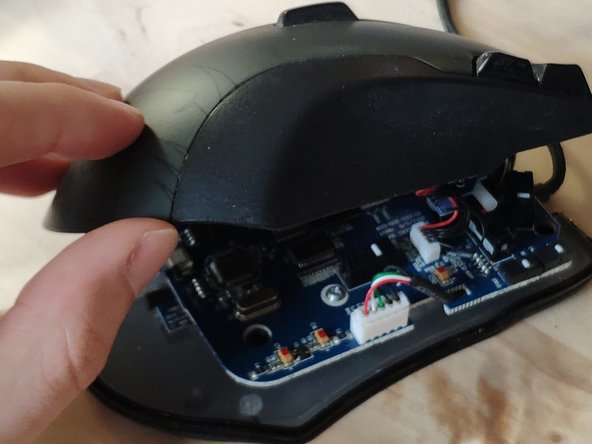
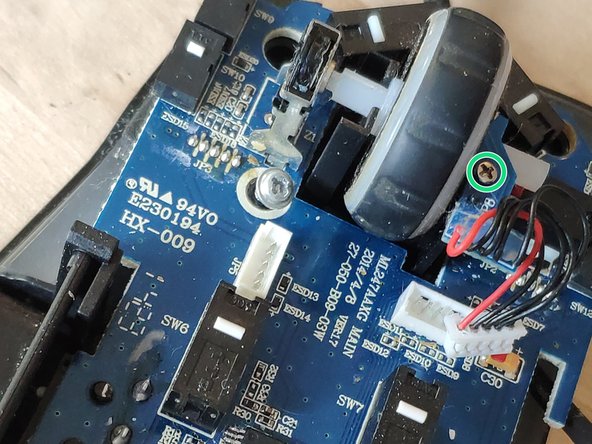
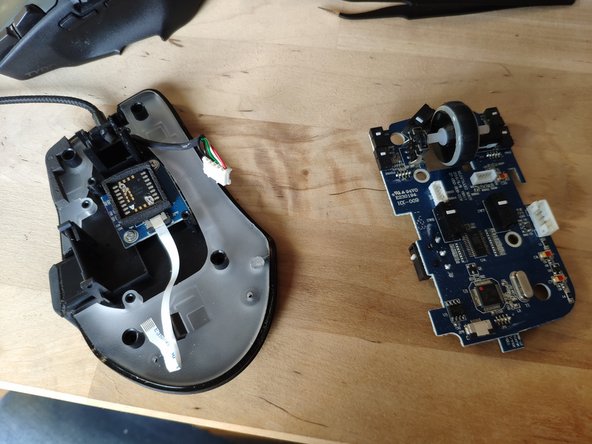
    • remove the last screws and pull the board free

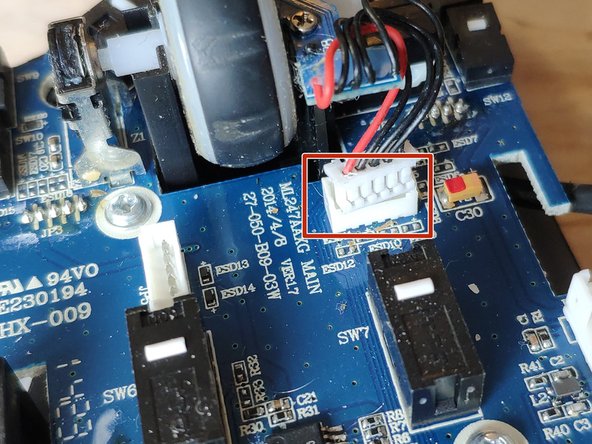
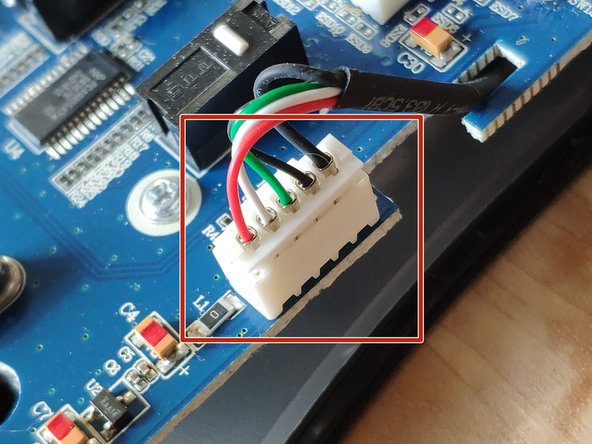
    • the mouse wheel LED assembly is a separate piece you need to unscrew.

  6. Roccat Tyon omron switch Replacement, remove the mouse wheel: stap 6, afbeelding 1 van 2 Roccat Tyon omron switch Replacement, remove the mouse wheel: stap 6, afbeelding 2 van 2
    • you need to pull the mouse wheel to the right to get it out

  7. Roccat Tyon omron switch Replacement, remove the old omron switch: stap 7, afbeelding 1 van 2 Roccat Tyon omron switch Replacement, remove the old omron switch: stap 7, afbeelding 2 van 2
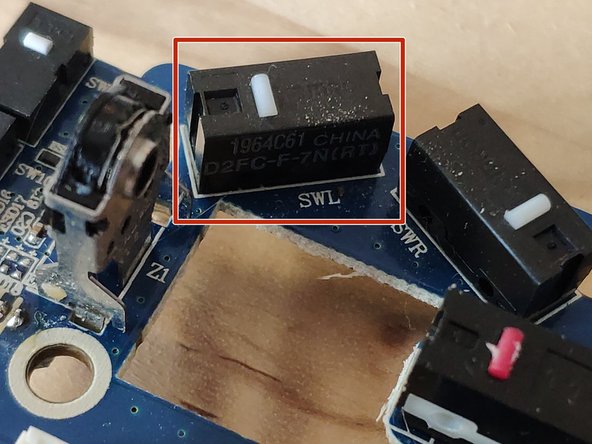
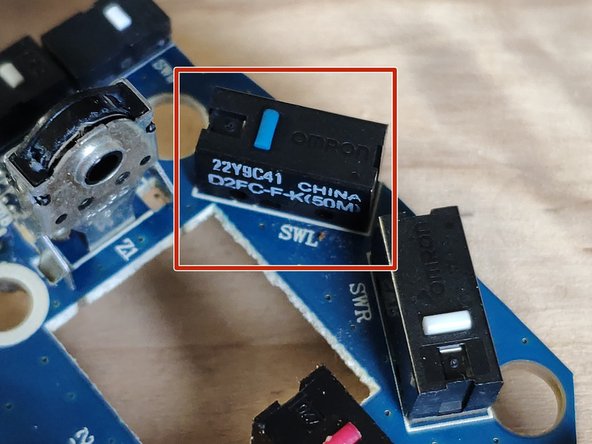
    • I want to change the left switch.

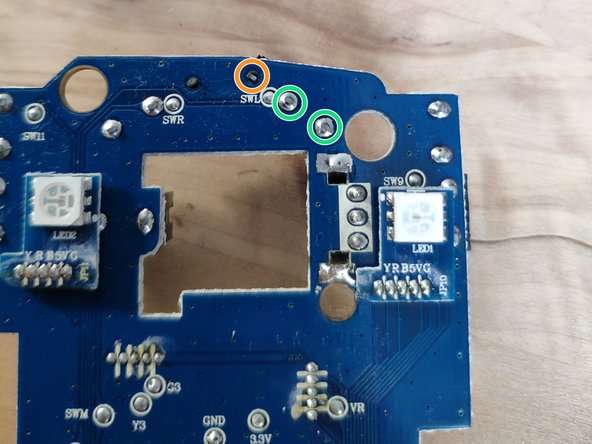
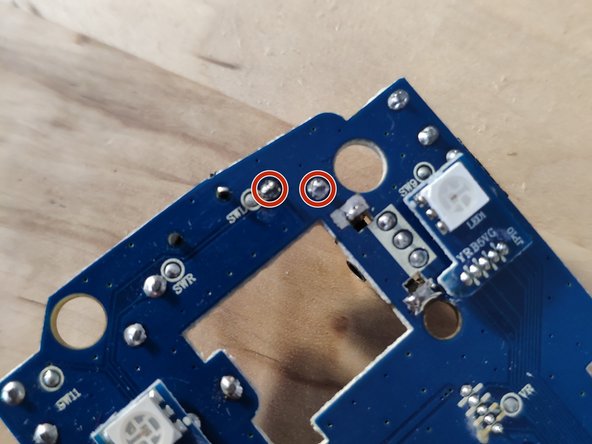
    • flip the board to unsolder the switch.

    • Only two legs are soldered, this is the third one

  8. Roccat Tyon omron switch Replacement, solder the new switch: stap 8, afbeelding 1 van 2 Roccat Tyon omron switch Replacement, solder the new switch: stap 8, afbeelding 2 van 2
    • The new switch replace the old one not working.

    • The button should be on the left

    • I used a slightly different switch (D2FC-F-K(50M)). The official one is a D2FC-F-7N(RT)

Conclusie

To reassemble your device, follow these instructions in reverse order.

7 andere personen hebben deze handleiding voltooid.

marc balemboy

Lid sinds: 10/13/20

417 Reputatie

1 Handleiding geschreven

Één opmerking

Greetings,

Would you happen to know the part number for the x-celerator paddle potentiometer replacement?

Thanks!

Enrique Rumbo - Antwoord

Voeg opmerking toe

Weergavestatistieken:

Afgelopen 24 uren: 2

Afgelopen 7 dagen: 22

Afgelopen 30 dagen: 95

Altijd: 3,202