Deze versie kan foutieve bewerkingen bevatten. Schakel over naar de recentste gecontroleerde momentopname.
Wat je nodig hebt
-
Deze stap is niet vertaald. Help het te vertalen
-
Turn the toaster over and remove the rubber bumper feet.
-
-
Deze stap is niet vertaald. Help het te vertalen
-
Use a Phillips #2 screwdriver to remove four 12 mm screws at the base of the toaster shell.
-
-
Deze stap is niet vertaald. Help het te vertalen
-
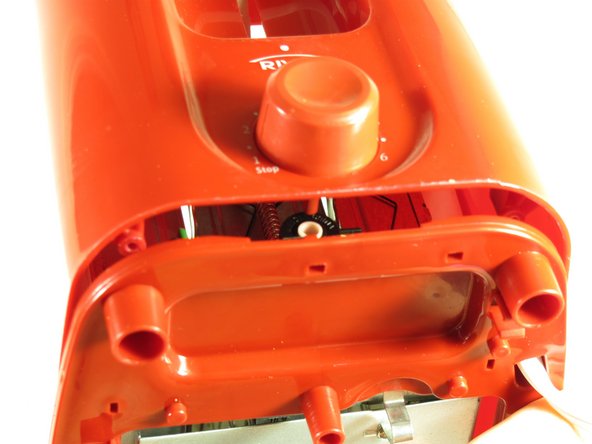
With the dial facing you, push the toaster base up and away until the base is just over the lip of the shell. This will disconnect the browning dial from the rest of the toaster.
-
-
-
Deze stap is niet vertaald. Help het te vertalen
-
Reach into the shell and grab the back white part of the lever.
-
Hold the grey lever with both your index finger and middle finger. Next, pull it.
-
Remove the shell.
-
-
Deze stap is niet vertaald. Help het te vertalen
-
Locate the black, diamond shaped spring behind the white lever bracket.
-
-
Deze stap is niet vertaald. Help het te vertalen
-
To remove the spring, use the tweezers to push the bottom edge of the spring out and around the metal bracket that keeps the springs in place.
-
Repeat this for the other side.
-
-
Deze stap is niet vertaald. Help het te vertalen
-
Pulling the bottom of the spring out, lift the left circle up over the metal bracket that extends out from the bread grabbers.
-
Bring the right circle out, down, and around the bracket the extends out from the shelf that the toast would sits on.
-
Remove the right circle.
-
-
Deze stap is niet vertaald. Help het te vertalen
-
If not, then bend the broken spring to the angles of the correct spring.
-
Annuleren: ik heb deze handleiding niet afgemaakt.
Één andere persoon heeft deze handleiding voltooid.


