Ga door naar hoofdinhoud

Ridgid R2601 Motor Assembly Replacement

Wat je nodig hebt

  1. Ridgid R2601 Motor Assembly Replacement, Top Cover: stap 1, afbeelding 1 van 1
    • Remove the four M3.5 x 16 mm screws from the top cover using a Torx T10 screwdriver.

  2. Ridgid R2601 Motor Assembly Replacement: stap 2, afbeelding 1 van 1
    • Pull off the top cover.

  3. Ridgid R2601 Motor Assembly Replacement, Bearing: stap 3, afbeelding 1 van 1
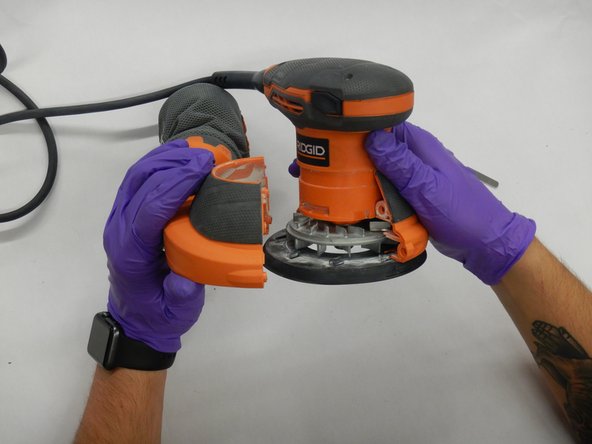
    • Turn the sander upside down so that the base faces you.

    • Remove the four 6.4 mm screws from the bottom of the base using a Torx T-25 screwdriver.

  4. Ridgid R2601 Motor Assembly Replacement: stap 4, afbeelding 1 van 1
    • Remove the base.

  5. Ridgid R2601 Motor Assembly Replacement: stap 5, afbeelding 1 van 1
    • Remove the 10 mm screw from the center of the bearing using a Torx T-20 screwdriver.

  6. Ridgid R2601 Motor Assembly Replacement: stap 6, afbeelding 1 van 1
    • Remove the bearing.

  7. Ridgid R2601 Motor Assembly Replacement, Brake: stap 7, afbeelding 1 van 1
    • Remove the four 16mm screws from the side of the sander using a Torx T20 screwdriver.

  8. Ridgid R2601 Motor Assembly Replacement: stap 8, afbeelding 1 van 1
    • Use a metal spudger to open the sander's plastic housing.

  9. Ridgid R2601 Motor Assembly Replacement: stap 9, afbeelding 1 van 1
    • Remove the plastic housing.

  10. Ridgid R2601 Motor Assembly Replacement: stap 10, afbeelding 1 van 1
    • Remove the brake from its slot in the housing.

  11. Ridgid R2601 Motor Assembly Replacement, Motor Assembly: stap 11, afbeelding 1 van 1
    • Remove the metal flywheel.

  12. Ridgid R2601 Motor Assembly Replacement: stap 12, afbeelding 1 van 1
    • Rotate the sander so that the top is facing you.

    • Remove the power switch.

  13. Ridgid R2601 Motor Assembly Replacement: stap 13, afbeelding 1 van 2 Ridgid R2601 Motor Assembly Replacement: stap 13, afbeelding 2 van 2
    • Use a T20 Torx screwdrivers to remove the four 11.11mm screws from the motor housing.

    • Use a T25 Torx screwdriver to remove the two 12.7mm screws next to the leads.

  14. Ridgid R2601 Motor Assembly Replacement: stap 14, afbeelding 1 van 1
    Gereedschap gebruikt in deze stap:
    Flathead 3/32" or 2.5 mm Screwdriver
    $5.49
    Koop
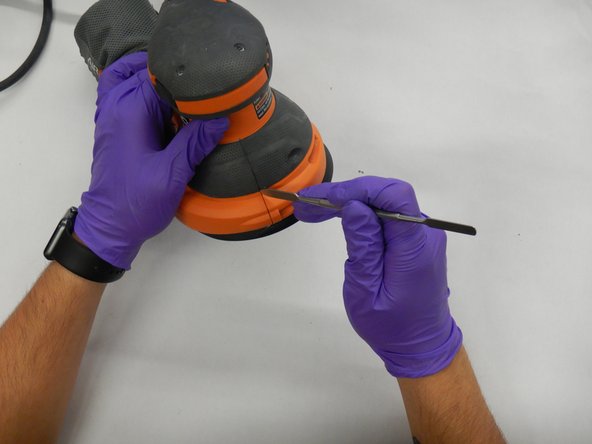
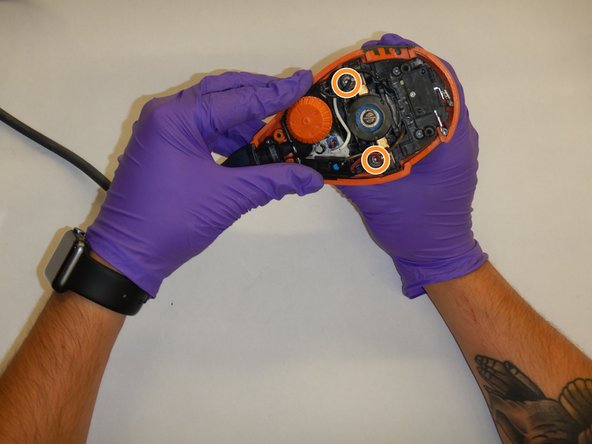
    • Use a 2.5mm flathead screwdriver to loosen but not remove the screws holding the wiring leading to the speed controller.

  15. Ridgid R2601 Motor Assembly Replacement: stap 15, afbeelding 1 van 1
    • Remove the leads.

  16. Ridgid R2601 Motor Assembly Replacement: stap 16, afbeelding 1 van 1
    • Remove the motor housing.

  17. Ridgid R2601 Motor Assembly Replacement: stap 17, afbeelding 1 van 1
    • Remove the motor.

Conclusie

To reassemble your device, follow these instructions in reverse order.

2 andere personen hebben deze handleiding voltooid.

0 opmerkingen

Voeg opmerking toe

Weergavestatistieken:

Afgelopen 24 uren: 0

Afgelopen 7 dagen: 4

Afgelopen 30 dagen: 16

Altijd: 891