Ga door naar hoofdinhoud

Ridgid GEN5X R8642 Gear Assembly Replacement

Wat je nodig hebt

  1. Ridgid GEN5X R8642 Gear Assembly Replacement, Gear Assembly: stap 1, afbeelding 1 van 1
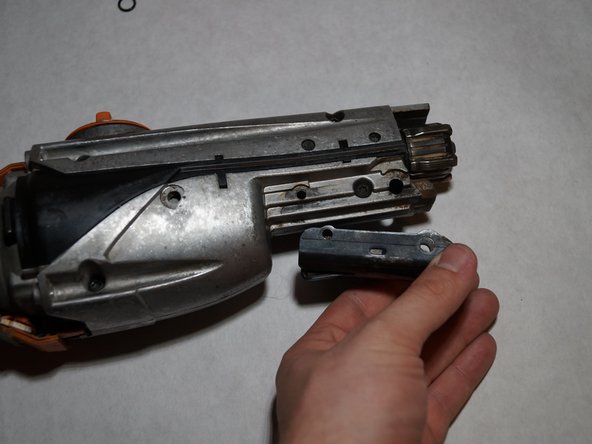
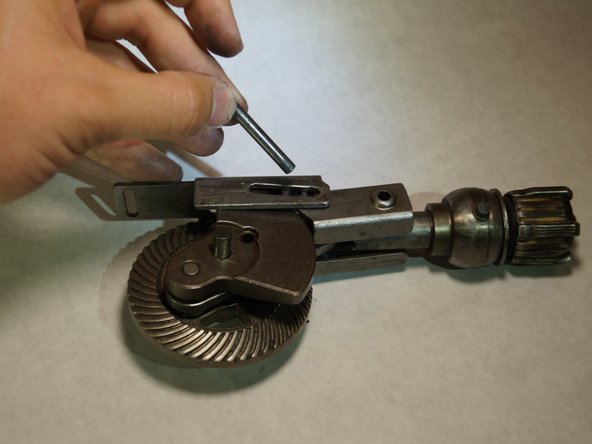
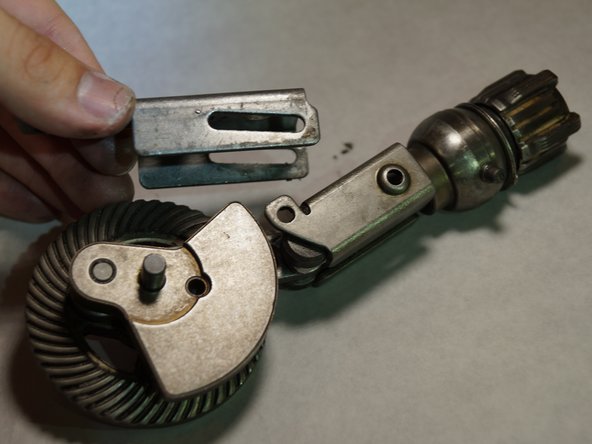
    • Remove the plastic tab holding the handle cover in place by prying upward with the spudger until the tab pops off.

  2. Ridgid GEN5X R8642 Gear Assembly Replacement: stap 2, afbeelding 1 van 1
    • Remove the handle cover by pulling it towards the front of the saw.

    • The grip can sometimes become stuck and may require a decent amount of force to remove.

  3. Ridgid GEN5X R8642 Gear Assembly Replacement: stap 3, afbeelding 1 van 2 Ridgid GEN5X R8642 Gear Assembly Replacement: stap 3, afbeelding 2 van 2
    • Use a T20 Torx screwdriver to remove the nine M4 X 16mm screws from the plastic housing.

  4. Ridgid GEN5X R8642 Gear Assembly Replacement: stap 4, afbeelding 1 van 1
    • Use a JIS #1 screwdriver to remove the two M4 x 25mm screws on both sides of the metal housing.

  5. Ridgid GEN5X R8642 Gear Assembly Replacement: stap 5, afbeelding 1 van 1
    • Remove one half of the plastic housing using a spudger so that the internal system is exposed.

  6. Ridgid GEN5X R8642 Gear Assembly Replacement: stap 6, afbeelding 1 van 2 Ridgid GEN5X R8642 Gear Assembly Replacement: stap 6, afbeelding 2 van 2
    • Remove the one 16mm T20 screw that holds the grip support onto the saw.

  7. Ridgid GEN5X R8642 Gear Assembly Replacement: stap 7, afbeelding 1 van 3 Ridgid GEN5X R8642 Gear Assembly Replacement: stap 7, afbeelding 2 van 3 Ridgid GEN5X R8642 Gear Assembly Replacement: stap 7, afbeelding 3 van 3
    • Remove the five T20 Torx screws from the gear assembly cover and pull the cover off.

  8. Ridgid GEN5X R8642 Gear Assembly Replacement: stap 8, afbeelding 1 van 2 Ridgid GEN5X R8642 Gear Assembly Replacement: stap 8, afbeelding 2 van 2
    • Carefully remove the motor making sure not to harm any of the wires that are attached. Place motor gently out of the way.

  9. Ridgid GEN5X R8642 Gear Assembly Replacement: stap 9, afbeelding 1 van 3 Ridgid GEN5X R8642 Gear Assembly Replacement: stap 9, afbeelding 2 van 3 Ridgid GEN5X R8642 Gear Assembly Replacement: stap 9, afbeelding 3 van 3
    • Remove the orbital switch by pulling straight up on it.

    • Be careful to not lose the spring and pin that is inside of the switch.

  10. Ridgid GEN5X R8642 Gear Assembly Replacement: stap 10, afbeelding 1 van 3 Ridgid GEN5X R8642 Gear Assembly Replacement: stap 10, afbeelding 2 van 3 Ridgid GEN5X R8642 Gear Assembly Replacement: stap 10, afbeelding 3 van 3
    • Remove the gear assembly by pulling it straight up.

  11. Ridgid GEN5X R8642 Gear Assembly Replacement: stap 11, afbeelding 1 van 3 Ridgid GEN5X R8642 Gear Assembly Replacement: stap 11, afbeelding 2 van 3 Ridgid GEN5X R8642 Gear Assembly Replacement: stap 11, afbeelding 3 van 3
    • Pull the pin holding the metal guide housing in place.

    • Slide the metal guide housing back off the gear assembly.

  12. Ridgid GEN5X R8642 Gear Assembly Replacement: stap 12, afbeelding 1 van 2 Ridgid GEN5X R8642 Gear Assembly Replacement: stap 12, afbeelding 2 van 2
    • Remove the guide bushing by pulling up on it.

    • Then slide the pin out that holds the gear assembly and blade clamp assembly.

  13. Ridgid GEN5X R8642 Gear Assembly Replacement: stap 13, afbeelding 1 van 1
    • Slide the blade clamp assembly off the gear assembly.

Conclusie

To reassemble your device, follow these instructions in reverse order.

3 andere personen hebben deze handleiding voltooid.

Één opmerking

When reassembling with new gear, does gear needs to be greased?

Syoma Zv - Antwoord

Voeg opmerking toe

Weergavestatistieken:

Afgelopen 24 uren: 1

Afgelopen 7 dagen: 6

Afgelopen 30 dagen: 30

Altijd: 1,993