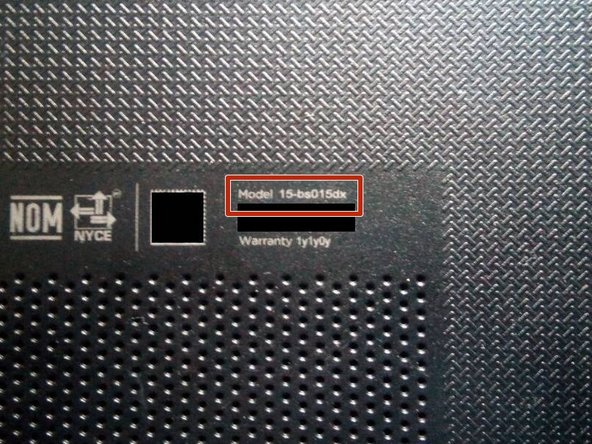
Ga door naar hoofdinhoud

Replacing the hard drive of the HP 15-bs015dx laptop

Wat je nodig hebt

  1. Replacing the hard drive of the HP 15-bs015dx laptop, Remove the Battery - Part 1: stap 1, afbeelding 1 van 3 Replacing the hard drive of the HP 15-bs015dx laptop, Remove the Battery - Part 1: stap 1, afbeelding 2 van 3 Replacing the hard drive of the HP 15-bs015dx laptop, Remove the Battery - Part 1: stap 1, afbeelding 3 van 3
    • Put the laptop facing down

    • Move the left battery safe lock to the right

  2. Replacing the hard drive of the HP 15-bs015dx laptop, Remove the Battery - Part 2: stap 2, afbeelding 1 van 3 Replacing the hard drive of the HP 15-bs015dx laptop, Remove the Battery - Part 2: stap 2, afbeelding 2 van 3 Replacing the hard drive of the HP 15-bs015dx laptop, Remove the Battery - Part 2: stap 2, afbeelding 3 van 3
    • Slide the right battery safe lock to the left

    • This lock is harder than the previous, with this the battery should pop-up.

  3. Replacing the hard drive of the HP 15-bs015dx laptop, Remove the 6 visibles screws: stap 3, afbeelding 1 van 3 Replacing the hard drive of the HP 15-bs015dx laptop, Remove the 6 visibles screws: stap 3, afbeelding 2 van 3 Replacing the hard drive of the HP 15-bs015dx laptop, Remove the 6 visibles screws: stap 3, afbeelding 3 van 3
    • Use a Philips 0 screwdriver

  4. Replacing the hard drive of the HP 15-bs015dx laptop, Remove the 4 hidden screws: stap 4, afbeelding 1 van 3 Replacing the hard drive of the HP 15-bs015dx laptop, Remove the 4 hidden screws: stap 4, afbeelding 2 van 3 Replacing the hard drive of the HP 15-bs015dx laptop, Remove the 4 hidden screws: stap 4, afbeelding 3 van 3
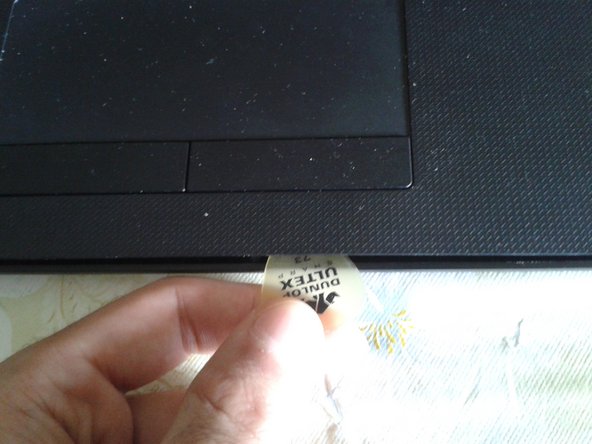
    • Use a straw to take off just enough of the rubber feet of the 4 corners

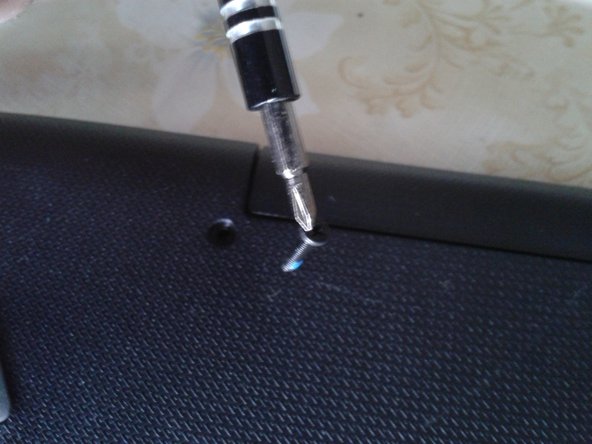
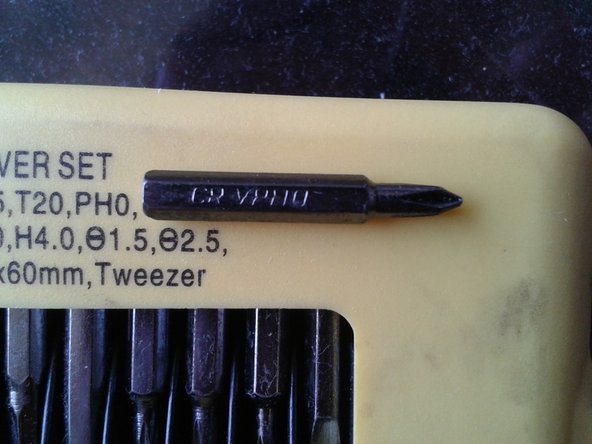
    • Use a Phillips screwdriver 0

    • Replace each rubber foot in place after removing the screws

    • You will have a total of 10 screws

  5. Replacing the hard drive of the HP 15-bs015dx laptop, Remove the DVD unit: stap 5, afbeelding 1 van 2 Replacing the hard drive of the HP 15-bs015dx laptop, Remove the DVD unit: stap 5, afbeelding 2 van 2
    • It will go out easily with or without a straw

    • You can check the model number

  6. Replacing the hard drive of the HP 15-bs015dx laptop, Separate the pieces of the chassis part 1: stap 6, afbeelding 1 van 3 Replacing the hard drive of the HP 15-bs015dx laptop, Separate the pieces of the chassis part 1: stap 6, afbeelding 2 van 3 Replacing the hard drive of the HP 15-bs015dx laptop, Separate the pieces of the chassis part 1: stap 6, afbeelding 3 van 3
    • Flip the laptop and open it

    • Use a plastic tool or a straw to separate the pieces of the chassis

  7. Replacing the hard drive of the HP 15-bs015dx laptop, Separate the pieces of the chassis part 2: stap 7, afbeelding 1 van 3 Replacing the hard drive of the HP 15-bs015dx laptop, Separate the pieces of the chassis part 2: stap 7, afbeelding 2 van 3 Replacing the hard drive of the HP 15-bs015dx laptop, Separate the pieces of the chassis part 2: stap 7, afbeelding 3 van 3
    • Flip the laptop and separate the inferior cover of the chassis

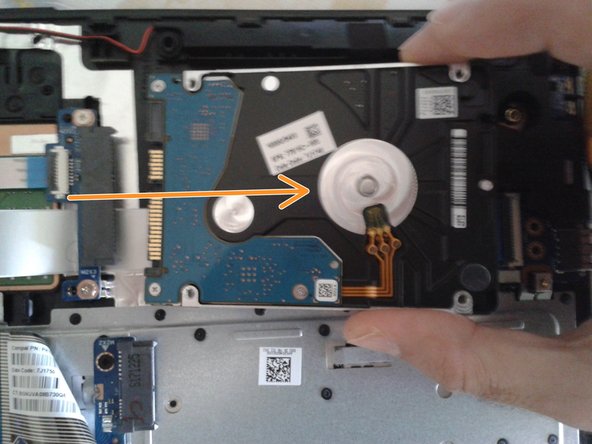
    • Hard Drive 2.5" SATA

    • 2 RAM memory slots type DDR4 SO-DIMM

    • CPU Intel 7th generation

    • Active heat sink (fan)

    • Wireless card

    • Watch battery, 3V. CR2030

  8. Replacing the hard drive of the HP 15-bs015dx laptop, Remove the three screws from the frame: stap 8, afbeelding 1 van 3 Replacing the hard drive of the HP 15-bs015dx laptop, Remove the three screws from the frame: stap 8, afbeelding 2 van 3 Replacing the hard drive of the HP 15-bs015dx laptop, Remove the three screws from the frame: stap 8, afbeelding 3 van 3
    • 3 screws

    • Use a Phillips 0 screwdriver
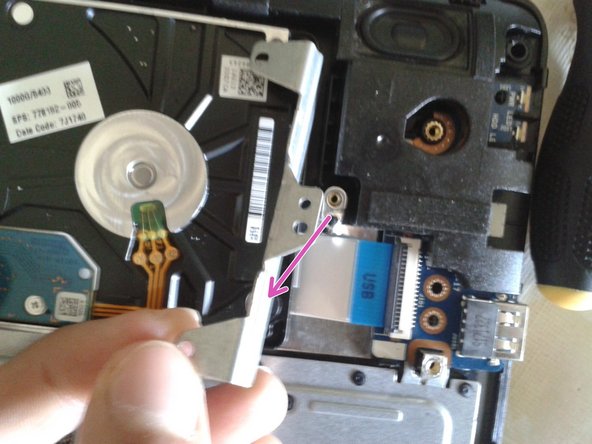
    • Remove the frame

  9. Replacing the hard drive of the HP 15-bs015dx laptop, Remove the hard drive: stap 9, afbeelding 1 van 3 Replacing the hard drive of the HP 15-bs015dx laptop, Remove the hard drive: stap 9, afbeelding 2 van 3 Replacing the hard drive of the HP 15-bs015dx laptop, Remove the hard drive: stap 9, afbeelding 3 van 3
    • Tilt the hard drive up

    • Disconnect the hard drive from its SATA port

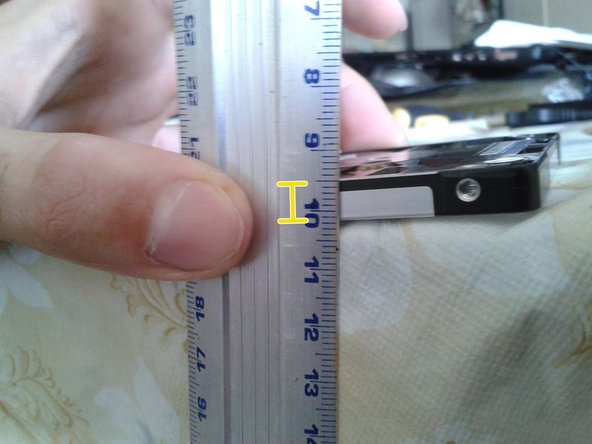
    • The hard drive is 7mm high. 1TB capacity.

Conclusie

For re-assembly of your device, follow these instructions in reverse.

9 andere personen hebben deze handleiding voltooid.

Met dank aan deze vertalers:

es en

100%

Deze vertalers helpen ons de wereld te repareren! Wil je bijdragen?
Begin met vertalen ›

Marcos Mora

Lid sinds: 12/17/17

3.561 Reputatie

11 handleidingen geschreven

6 opmerkingen

Disculpa, yo tengo esta laptop, mi hard drive hdd se estropeó y quisiera cambiarlo por un ssd, sin embargo no se que tipo de ssd necesito, si eres tan amable de aclararme mi duda, se agradecería.

el_kevinsillo.777 - Antwoord

Saludos. Te toca comprar un SSD tipo SATA. Puedes revisar mi perfil, ahí tengo mis RRSS y me puede contactar.

Marcos Mora -

Great but how do you get the software to reinstall on the new hard drive?

Jared Brice - Antwoord

That would require a whole new guide. I have some of those on my YouTube channel, link in my ifixit profile.

Bottom line: A flash drive with a Windows installer on it.

Marcos Mora -

Follow this POS guide and you WILL break the 4 mounting tabs for the hinges as NOTHING was mentioned about the 4 screws holding them down!

Mochanic - Antwoord

Voeg opmerking toe

Weergavestatistieken:

Afgelopen 24 uren: 5

Afgelopen 7 dagen: 21

Afgelopen 30 dagen: 104

Altijd: 6,813