Deze versie kan foutieve bewerkingen bevatten. Schakel over naar de recentste gecontroleerde momentopname.
Wat je nodig hebt
-
Deze stap is niet vertaald. Help het te vertalen
-
Remove the eight screws holding the wood-patterned cover to the microwave frame.
-
The first four screws are located on either side of the microwave front.
-
-
Deze stap is niet vertaald. Help het te vertalen
-
Remove the additional four screws securing the wood-paneled case to the microwave frame.
-
-
-
Deze stap is niet vertaald. Help het te vertalen
-
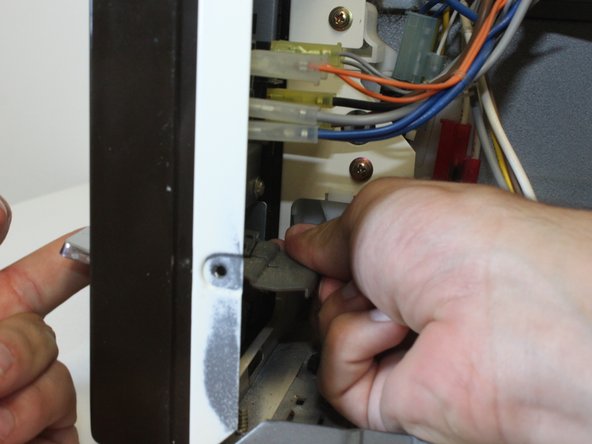
Placing your hands on either side of the case, slide the case back gently until you feel it completely separate from the microwave frame.
-
Lift the case upward slowly until the case is free of the microwave.
-
-
Deze stap is niet vertaald. Help het te vertalen
-
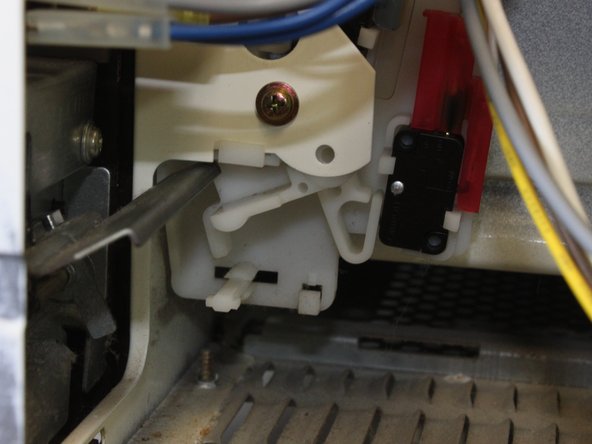
Observe the lever mechanism found just behind the door handle, inside the microwave.
-
-
Deze stap is niet vertaald. Help het te vertalen
-
Lift up on the outside lever.
-
Push up on the white plastic piece.
-
Push metal bar down, snapping the white plastic piece above it.
-
-
Deze stap is niet vertaald. Help het te vertalen
-
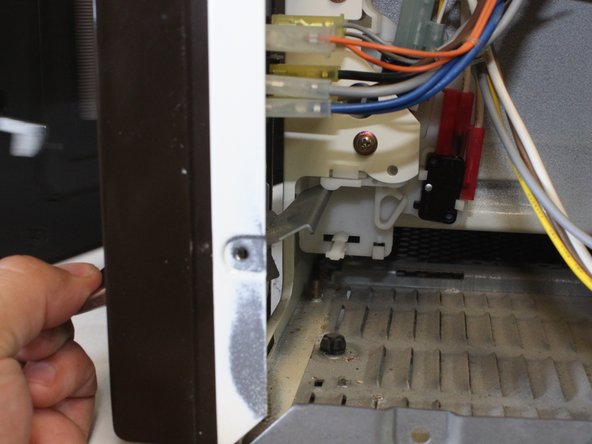
This is how the fixed mechanism should look.
-
Press the button and enjoy your newly fixed door!
-


Annuleren: ik heb deze handleiding niet afgemaakt.
Één andere persoon heeft deze handleiding voltooid.
Team

Cal Poly, Team 2-12, Propen Fall 2012 Lid van Cal Poly, Team 2-12, Propen Fall 2012
CPSU-PROPEN-F12S2G12
3 Leden
6 handleidingen geschreven