Ga door naar hoofdinhoud

Repair a Tear in Stretched Canvas

Wat je nodig hebt

  1. Repair a Tear in Stretched Canvas, Repair a Tear in Stretched Canvas: stap 1, afbeelding 1 van 2 Repair a Tear in Stretched Canvas, Repair a Tear in Stretched Canvas: stap 1, afbeelding 2 van 2
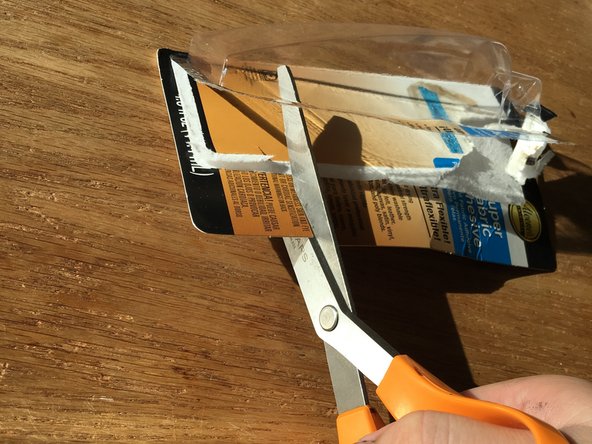
    • A tear can come in all shapes and sizes. Identify your tear and obtain a spare sheet, roll, or square of canvas to fully cover the torn area.

  2. Repair a Tear in Stretched Canvas: stap 2, afbeelding 1 van 2 Repair a Tear in Stretched Canvas: stap 2, afbeelding 2 van 2
    • I purchased a small pre-stretchered square of canvas large enough to cover the entire tear. Remove as much of the canvas from the frame as you can.

  3. Repair a Tear in Stretched Canvas: stap 3, afbeelding 1 van 3 Repair a Tear in Stretched Canvas: stap 3, afbeelding 2 van 3 Repair a Tear in Stretched Canvas: stap 3, afbeelding 3 van 3
    • Once you have your square of canvas, ensure the size is correct for the tear you are repairing. Round the edges off with your scissors. This will create an evenly balanced edge which will remove unwanted corners and points that can arise after the gluing process.

  4. Repair a Tear in Stretched Canvas: stap 4, afbeelding 1 van 2 Repair a Tear in Stretched Canvas: stap 4, afbeelding 2 van 2
    • PRO-TIP!! When applying your glue to the repair piece of canvas be sure you are putting it on the WHITE side. This will create a cleaner, more blended look to your job and is noticeable to a trained eye. The difference can be seen in the pictures provided.

  5. Repair a Tear in Stretched Canvas: stap 5, afbeelding 1 van 3 Repair a Tear in Stretched Canvas: stap 5, afbeelding 2 van 3 Repair a Tear in Stretched Canvas: stap 5, afbeelding 3 van 3
    • IMPORTANT!! Remove the super fabric adhesive from its packaging. Use your scissors to cut out a rectangular piece from the back of the packaging.

  6. Repair a Tear in Stretched Canvas: stap 6, afbeelding 1 van 3 Repair a Tear in Stretched Canvas: stap 6, afbeelding 2 van 3 Repair a Tear in Stretched Canvas: stap 6, afbeelding 3 van 3
    • Apply your glue to the white side of the repair piece of canvas and follow up with the cardboard square to spread the glue around on the canvas. An even layer of glue is preferred and should cover the entire piece of canvas.

  7. Repair a Tear in Stretched Canvas: stap 7, afbeelding 1 van 3 Repair a Tear in Stretched Canvas: stap 7, afbeelding 2 van 3 Repair a Tear in Stretched Canvas: stap 7, afbeelding 3 van 3
    • Proceed by firmly pressing the repair piece of canvas into the canvas like you would a puzzle piece into a puzzle, not pulling in any direction but pushing down. Follow by placing a weight or book on top of the patch and let dry for 1 hour.

  8. Repair a Tear in Stretched Canvas: stap 8, afbeelding 1 van 3 Repair a Tear in Stretched Canvas: stap 8, afbeelding 2 van 3 Repair a Tear in Stretched Canvas: stap 8, afbeelding 3 van 3
    • Once the glue has dried, assess the patch job. You will notice that the tear has almost disappeared but their is still the matter of the cut in the canvas.

  9. Repair a Tear in Stretched Canvas: stap 9, afbeelding 1 van 3 Repair a Tear in Stretched Canvas: stap 9, afbeelding 2 van 3 Repair a Tear in Stretched Canvas: stap 9, afbeelding 3 van 3
    • Evenly spread the texture paste in, over, and around the cut. The smoother you can make the edges of your paste, the easier it will be to clean up later. The paste usually takes about an hour or two to dry fully. The goal here is to fully mask the cut with paste.

  10. Repair a Tear in Stretched Canvas: stap 10, afbeelding 1 van 3 Repair a Tear in Stretched Canvas: stap 10, afbeelding 2 van 3 Repair a Tear in Stretched Canvas: stap 10, afbeelding 3 van 3
    • Once the paste has dried fully, grab your sand paper and begin to carefully smooth out any bumps or edges you can feel.

    • Make sure you have some solid surface behind the area being sanded to avoid creating bumps and deformities in the canvas.

  11. Repair a Tear in Stretched Canvas: stap 11, afbeelding 1 van 3 Repair a Tear in Stretched Canvas: stap 11, afbeelding 2 van 3 Repair a Tear in Stretched Canvas: stap 11, afbeelding 3 van 3
    • After the sanding process is finished, we apply a final layer of Acrylic Gesso. You can apply it with a small or medium brush. Let it dry for 1 hour.

  12. Repair a Tear in Stretched Canvas: stap 12, afbeelding 1 van 1
    • After your Acrylic Gesso has dried, you are done! Congratulations! Your canvas should be repaired and fully usable for your painting needs. I hope this tutorial was helpful and informative.

Conclusie

These steps should help you to completely repair a tear in stretched canvas.

Luke Dixon

Lid sinds: 10/04/17

121 Reputatie

1 Handleiding geschreven

Team

Michigan Tech, Team S5-G12, Galliah Fall 2017 Lid van Michigan Tech, Team S5-G12, Galliah Fall 2017

MTU-GALLIAH-F17S5G12

1 Lid

2 handleidingen geschreven

2 opmerkingen

Have you seen this product? "fixmytear". It's a repair tape which sticks very well to vinyl, canvas, rubber, leather and most other surfaces. Absolutely life saving tape.

https://www.amazon.com/Fixmytear-Magic-R...

https://www.amazon.com/fixmytear-Magic-R...

bobhunter50023 - Antwoord

Hi Luke, great tutorial, this is precisely what I was looking for. I'm in the process of stretching canvas for a rather big piece, 3.5'x8', I stretched a little too hard causing a small tear. I've been working out ;-). Should I repair the tear now, or finish wrapping the canvas first?

Dragon Bodhing - Antwoord

Voeg opmerking toe

Weergavestatistieken:

Afgelopen 24 uren: 10

Afgelopen 7 dagen: 20

Afgelopen 30 dagen: 106

Altijd: 14,390