Ga door naar hoofdinhoud

Removing Samsung DVD-P230 Tray

Wat je nodig hebt

  1. Removing Samsung DVD-P230 Tray, Outer Cover & Faceplate: stap 1, afbeelding 1 van 3 Removing Samsung DVD-P230 Tray, Outer Cover & Faceplate: stap 1, afbeelding 2 van 3 Removing Samsung DVD-P230 Tray, Outer Cover & Faceplate: stap 1, afbeelding 3 van 3
    • Open the tray by pressing the eject button

    • Remove the DVD tray faceplate by pushing the faceplate up off of the tray.

  2. Removing Samsung DVD-P230 Tray: stap 2, afbeelding 1 van 1
    • Press the eject button to insert the tray

    • After the tray is closed unplug DVD player

  3. Removing Samsung DVD-P230 Tray: stap 3, afbeelding 1 van 1
    • Unscrew the 3 screws in the back.

  4. Removing Samsung DVD-P230 Tray: stap 4, afbeelding 1 van 2 Removing Samsung DVD-P230 Tray: stap 4, afbeelding 2 van 2
    • Pull the outer case upward and then towards you.

  5. Removing Samsung DVD-P230 Tray: stap 5, afbeelding 1 van 3 Removing Samsung DVD-P230 Tray: stap 5, afbeelding 2 van 3 Removing Samsung DVD-P230 Tray: stap 5, afbeelding 3 van 3
    • There are six symmetrically placed tabs holding in the front faceplate. Unhook these six tabs to loosen the faceplate.

  6. Removing Samsung DVD-P230 Tray: stap 6, afbeelding 1 van 2 Removing Samsung DVD-P230 Tray: stap 6, afbeelding 2 van 2
    • Pull off front faceplate. This may take a couple of tries to get all six tabs unhooked simultaneously.

  7. Removing Samsung DVD-P230 Tray, Power Cord: stap 7, afbeelding 1 van 3 Removing Samsung DVD-P230 Tray, Power Cord: stap 7, afbeelding 2 van 3 Removing Samsung DVD-P230 Tray, Power Cord: stap 7, afbeelding 3 van 3
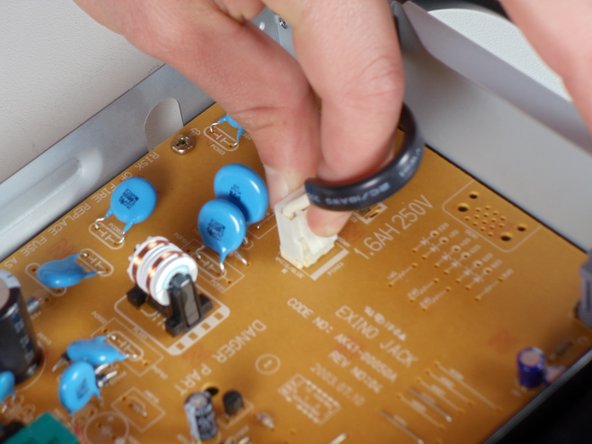
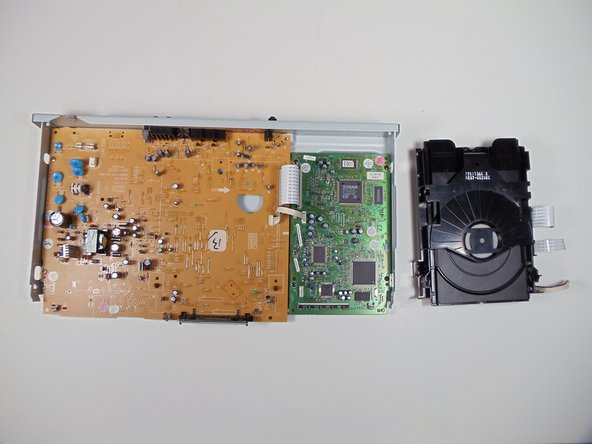
    • Locate the white clip that attaches the cord to the motherboard

    • Grasp clip and squeeze to release

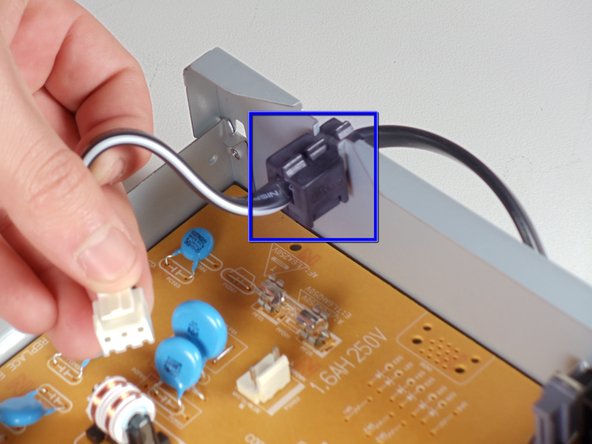
    • Lift up and remove power cord

    • Slide cord mount from outer case

  8. Removing Samsung DVD-P230 Tray, Tray: stap 8, afbeelding 1 van 3 Removing Samsung DVD-P230 Tray, Tray: stap 8, afbeelding 2 van 3 Removing Samsung DVD-P230 Tray, Tray: stap 8, afbeelding 3 van 3
    • Remove the three screws holding in the DVD tray

  9. Removing Samsung DVD-P230 Tray: stap 9, afbeelding 1 van 2 Removing Samsung DVD-P230 Tray: stap 9, afbeelding 2 van 2
    • Remove the power cord and first two ribbons by pulling them directly out of their sockets.

  10. Removing Samsung DVD-P230 Tray: stap 10, afbeelding 1 van 2 Removing Samsung DVD-P230 Tray: stap 10, afbeelding 2 van 2
    • Gently lift the DVD tray off of the motherboard.

Conclusie

To reassemble your device, follow these instructions in reverse order.

Één andere persoon heeft deze handleiding voltooid.

Evan Domingue

Lid sinds: 01/28/11

410 Reputatie

3 handleidingen geschreven

Team

Cal Poly, Team 3-30, Regan Winter 2011 Lid van Cal Poly, Team 3-30, Regan Winter 2011

CPSU-REGAN-W11S3G30

4 Leden

8 handleidingen geschreven

0 opmerkingen

Voeg opmerking toe

Weergavestatistieken:

Afgelopen 24 uren: 0

Afgelopen 7 dagen: 0

Afgelopen 30 dagen: 0

Altijd: 1,909