Deze versie kan foutieve bewerkingen bevatten. Schakel over naar de recentste gecontroleerde momentopname.
Wat je nodig hebt
-
Deze stap is niet vertaald. Help het te vertalen
-
Pry off the four white feet with the pointed end of the spudger
-
-
Deze stap is niet vertaald. Help het te vertalen
-
Gently unscrew the four 15.5 mm Phillips #2 screws that hold the bottom panel to the dock.
-
-
-
Deze stap is niet vertaald. Help het te vertalen
-
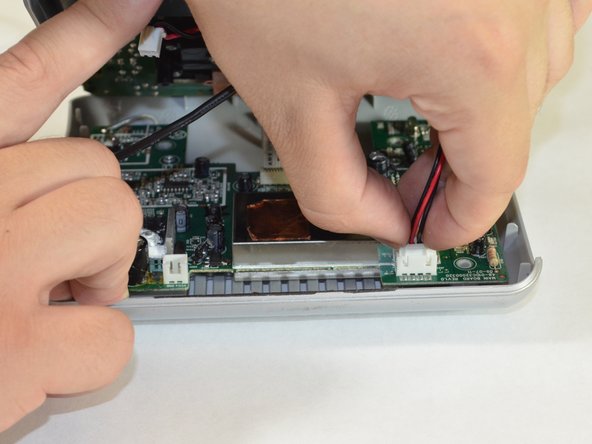
Use the flat end of the spudger to pry the lid off from the two connectors holding it to the body of the dock.
-
-
Deze stap is niet vertaald. Help het te vertalen
-
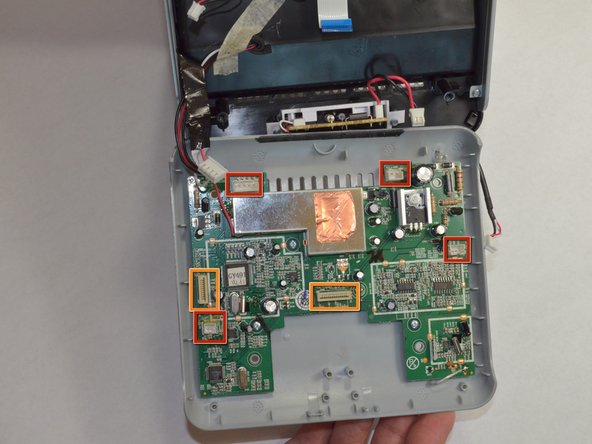
Carefully pull up and out the four electrical connectors and two ribbon connectors that connect the bottom panel to the dock.
-
Electrical Connectors
-
Ribbon Connectors
-


Annuleren: ik heb deze handleiding niet afgemaakt.
2 andere personen hebben deze handleiding voltooid.
Team

Cal Poly, Team 3-48, Amido Spring 2013 Lid van Cal Poly, Team 3-48, Amido Spring 2013
CPSU-AMIDO-S13S3G48
4 Leden
6 handleidingen geschreven