Deze versie kan foutieve bewerkingen bevatten. Schakel over naar de recentste gecontroleerde momentopname.
Wat je nodig hebt
-
Deze stap is niet vertaald. Help het te vertalen
-
Remove the four 6mm screws by using a JIS #1 screwdriver.
-
-
Deze stap is niet vertaald. Help het te vertalen
-
Separate the top mouse housing from the bottom mouse housing using the opening pick.
-
-
Deze stap is niet vertaald. Help het te vertalen
-
Unlock the ribbon connector that is held down by the main board clips using the spudger's pointed end.
-
-
-
Deze stap is niet vertaald. Help het te vertalen
-
Remove the top housing LED 3-Pin connector that is near the main board.
-
-
Deze stap is niet vertaald. Help het te vertalen
-
Remove one 4mm black Phillips #000 screw from the left side of the mouse holding the scroll wheel LED controller board.
-
Then pull the LED controller board upwards and out.
-
-
Deze stap is niet vertaald. Help het te vertalen
-
Pry and remove the scroll wheel feedback bar from its hold-down clips using the hook end of a halberd spudger.
-
-
Deze stap is niet vertaald. Help het te vertalen
-
Remove the scroll wheel feedback bar from the scroll wheel by holding down the spring and using angled tweezers to remove it from its placement.
-
-
Deze stap is niet vertaald. Help het te vertalen
-
Remove the scroll wheel optical encoder 3-pin connector from the main board by wiggling the connector upwards.
-
-
Deze stap is niet vertaald. Help het te vertalen
-
Using the opening tool, pry the black bracket holding the scroll wheel in place backwards until the scroll wheel housing pops out.
-
-
Deze stap is niet vertaald. Help het te vertalen
-
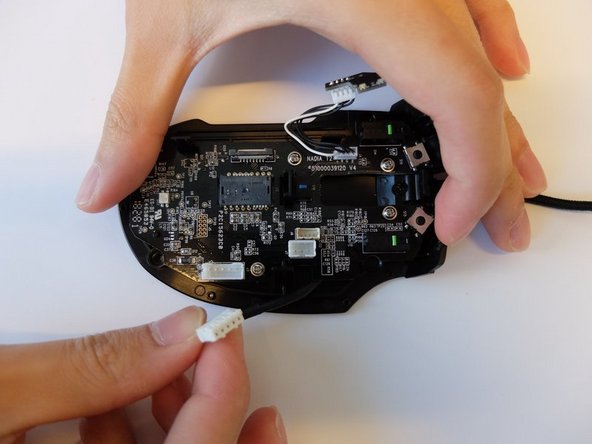
Remove the USB Type A to 5-Pin connector on the main board by pinching and pulling it upwards with your fingers.
-
-
Deze stap is niet vertaald. Help het te vertalen
-
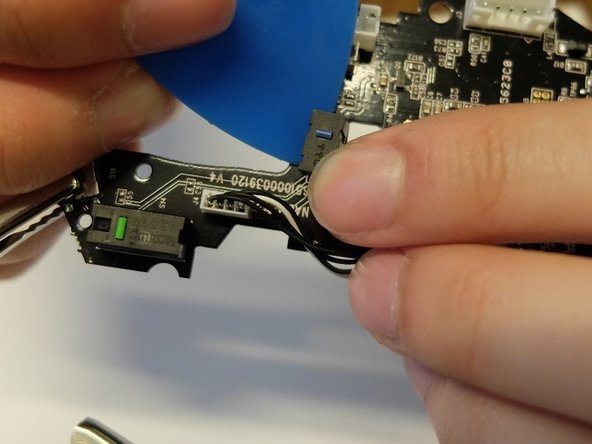
Remove four 3mm JIS #1 screws holding the main board.
-
-
Deze stap is niet vertaald. Help het te vertalen
-
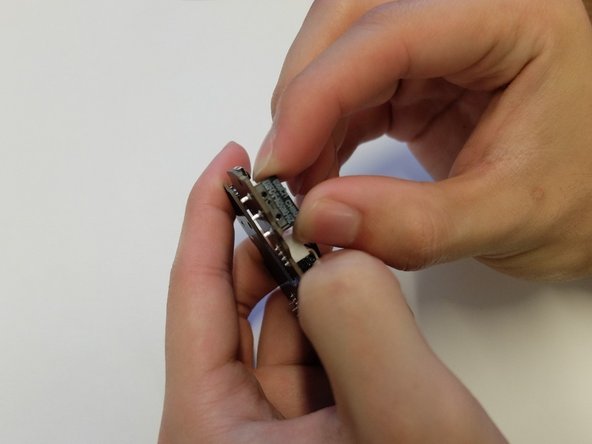
Place the tip of the soldering iron onto the micro switch contact pins.
-
Work around the micro switch pins while prying the switch with an opening pick.
-
-
Deze stap is niet vertaald. Help het te vertalen
-
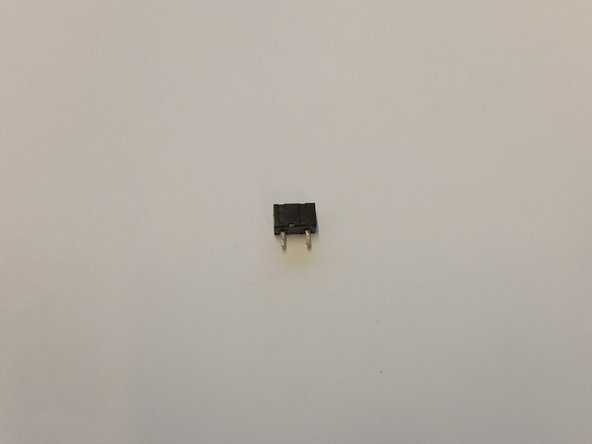
Remove and resolder the TTC subminiature micro switch.
-
Ensure the micro switch is bonded properly by performing a tug test.
-


Annuleren: ik heb deze handleiding niet afgemaakt.
3 andere personen hebben deze handleiding voltooid.

Team

Embry-Riddle Aeronautical University, Team S6-G2, Salas Fall 2019 Lid van Embry-Riddle Aeronautical University, Team S6-G2, Salas Fall 2019
ERAU-SALAS-F19S6G2
4 Leden
6 handleidingen geschreven
4 opmerkingen
I had real difficulty sourcing the part for this, I don’t think this is actually an Omron switch for the middle mouse button. The part I pulled from the Razer mouse is actually branded ‘TTC’. I ended up sourcing them from Aliexpress:
I'm trying to fix a Razer Naga Pro where the middle mouse button is double registering clicks and I stumbled across this guide. The switch appears to be very similar so I was hoping to be able to order a replacement based on the guide but I can't find anything from searching 'OMRON D2 Subminiature Micro Switch', and the switches that Andy Smith linked aren't right (I ordered some and they're too thin) so I'm somewhat out of ideas. This would be less of an issue if Razer even offered out-of-warranty repairs, but they consider peripherals to be 'irreparable'.
I think I managed to find them! If anyone else is looking for information on these switches, they appear to be the TTC switches here: http://www.ttcswitch.cn/product/72.html specifically the 5.6mm variant. I have ordered some from a website called Mouse Club and will update when they arrive.
As mentioned by the other comments, the correct replacement switch is the linked TTC switch, specifically the 5.6mm high variant. However, I didn't manage to find a viable seller for this type of switch.
In the end I purchased the 3.5mm variant (as linked by Andy Smith; it's available from different brands, I chose this one from HUANO). Of course this switch is about 2mm too short, so I made a little spacer from a 2mm plastic sheet (should also work with 3 layers of old credit card pieces), drilled two holes for the leads and installed the switch. The leads are just barely long enough to stick through the board with the spacer so they can be soldered in place. (photo)
Now my mouse works perfectly again, but I'm still baffled that I couldn't find the 5.6mm switch on Aliexpress.