Ga door naar hoofdinhoud

Razer Blade Stealth 2017 Keyboard Replacement

Wat je nodig hebt

  1. Razer Blade Stealth 2017 Keyboard Replacement, Battery: stap 1, afbeelding 1 van 2 Razer Blade Stealth 2017 Keyboard Replacement, Battery: stap 1, afbeelding 2 van 2
    • Before you begin, be sure to turn off your laptop and discharge the battery down to 25%.

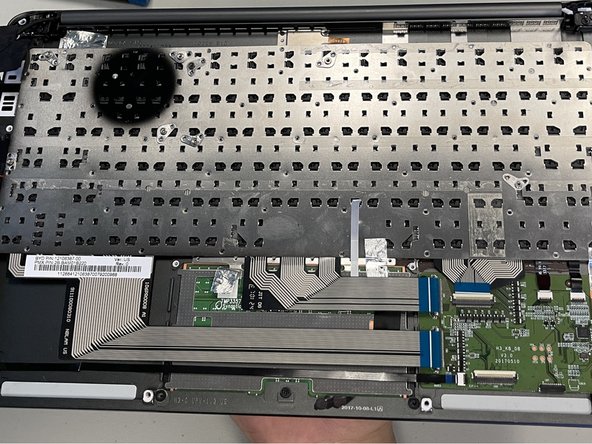
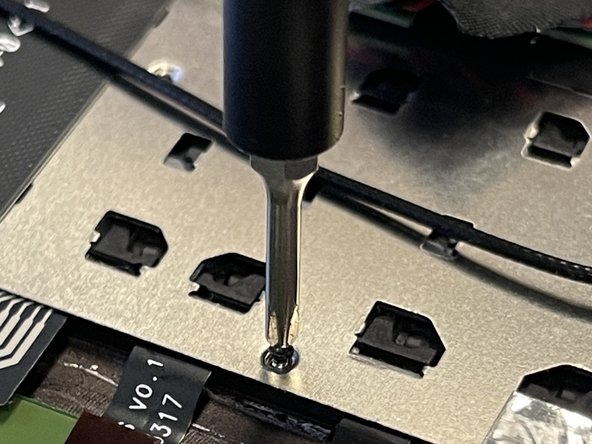
    • Use a Torx T5 screwdriver to remove the eight, 3mm screws on the bottom cover of the laptop.

    • Whenever you remove screws from the device, remember to save and label them.

  2. Razer Blade Stealth 2017 Keyboard Replacement: stap 2, afbeelding 1 van 1
    • Remove the bottom cover of the laptop by sliding it away from the hinge.

    • Do not force the cover up!

  3. Razer Blade Stealth 2017 Keyboard Replacement: stap 3, afbeelding 1 van 2 Razer Blade Stealth 2017 Keyboard Replacement: stap 3, afbeelding 2 van 2
    • Use your fingernail to pry up and disconnect the battery from the motherboard.

  4. Razer Blade Stealth 2017 Keyboard Replacement: stap 4, afbeelding 1 van 1
    • Use a Phillips #00 screwdriver to remove the six, 5mm screws securing the battery.

  5. Razer Blade Stealth 2017 Keyboard Replacement: stap 5, afbeelding 1 van 2 Razer Blade Stealth 2017 Keyboard Replacement: stap 5, afbeelding 2 van 2
    • Remove any tape attached to the battery.

    • Use the plastic spudger to pry out the battery.

  6. Razer Blade Stealth 2017 Keyboard Replacement, Motherboard: stap 6, afbeelding 1 van 3 Razer Blade Stealth 2017 Keyboard Replacement, Motherboard: stap 6, afbeelding 2 van 3 Razer Blade Stealth 2017 Keyboard Replacement, Motherboard: stap 6, afbeelding 3 van 3
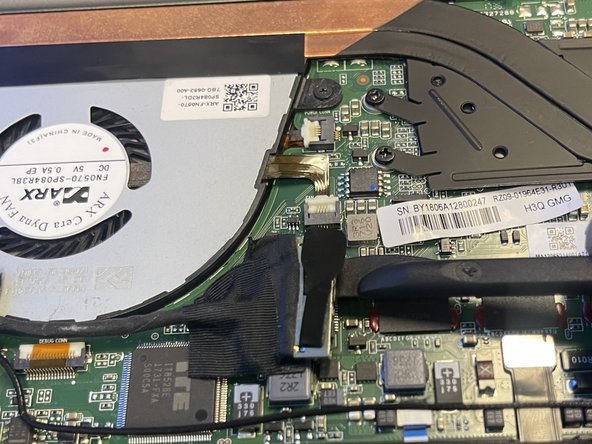
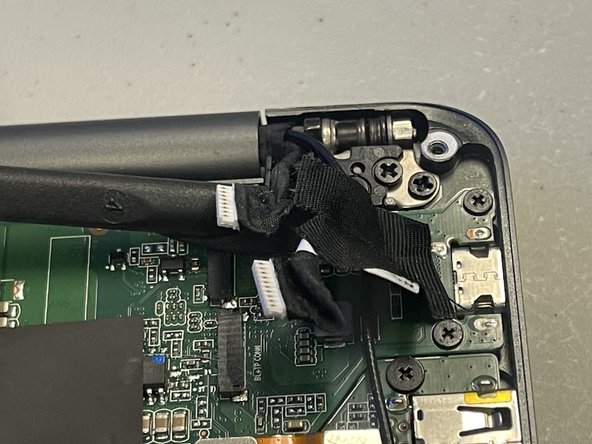
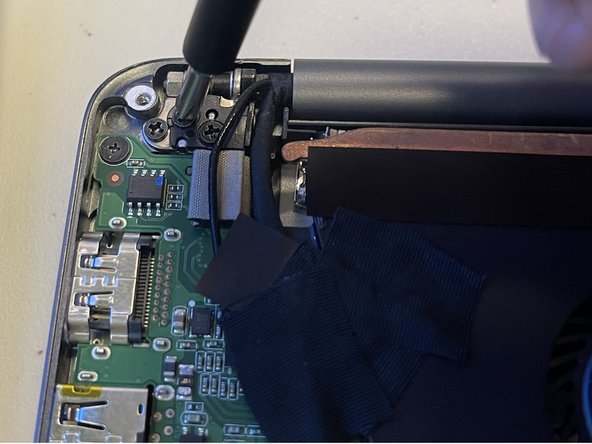
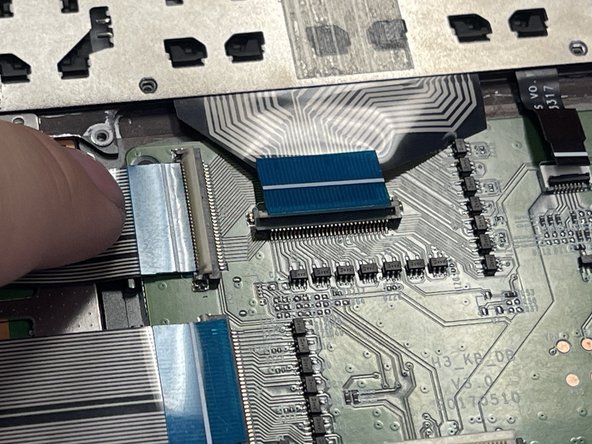
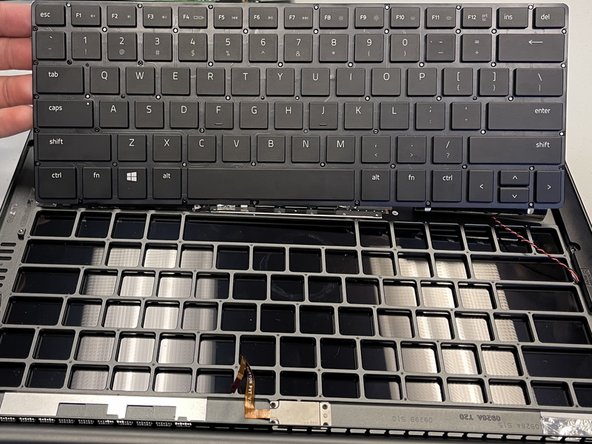
    • Use a plastic spudger to gently undo the connections to the motherboard.

  7. Razer Blade Stealth 2017 Keyboard Replacement: stap 7, afbeelding 1 van 3 Razer Blade Stealth 2017 Keyboard Replacement: stap 7, afbeelding 2 van 3 Razer Blade Stealth 2017 Keyboard Replacement: stap 7, afbeelding 3 van 3
    • Use a Phillips #00 screwdriver to remove the six 4 mm screws holding the display hinges on both side.

    • Remove the small plastic brackets holding the display hinges.

  8. Razer Blade Stealth 2017 Keyboard Replacement: stap 8, afbeelding 1 van 1
    • Remove the 2.6 mm screw holding the Wi-Fi card down with a Phillips #00 screwdriver.

    • Remove the motherboard from the laptop.

  9. Razer Blade Stealth 2017 Keyboard Replacement, Keyboard: stap 9, afbeelding 1 van 2 Razer Blade Stealth 2017 Keyboard Replacement, Keyboard: stap 9, afbeelding 2 van 2
    • Carefully remove tape from the keyboard.

  10. Razer Blade Stealth 2017 Keyboard Replacement: stap 10, afbeelding 1 van 2 Razer Blade Stealth 2017 Keyboard Replacement: stap 10, afbeelding 2 van 2
    • Pull out the cables carefully.

  11. Razer Blade Stealth 2017 Keyboard Replacement: stap 11, afbeelding 1 van 2 Razer Blade Stealth 2017 Keyboard Replacement: stap 11, afbeelding 2 van 2
    • Use a Phillips #000 screwdriver to remove the fifty-five 1.6mm screws securing the keyboard.

    • Not all the screws are highlighted.

  12. Razer Blade Stealth 2017 Keyboard Replacement: stap 12, afbeelding 1 van 3 Razer Blade Stealth 2017 Keyboard Replacement: stap 12, afbeelding 2 van 3 Razer Blade Stealth 2017 Keyboard Replacement: stap 12, afbeelding 3 van 3
    • Carefully pick up the keyboard from both sides in order to remove the keyboard.

    • Use a spudger if necessary to remove the keyboard.

Conclusie

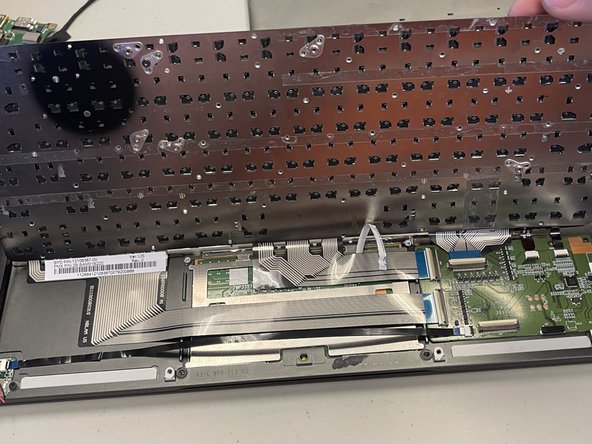
To reassemble your device, follow these instructions in reverse order.

Één andere persoon heeft deze handleiding voltooid.

Nolan Wilkins

Lid sinds: 02/08/24

109 Reputatie

1 Handleiding geschreven

0 opmerkingen

Voeg opmerking toe

Weergavestatistieken:

Afgelopen 24 uren: 0

Afgelopen 7 dagen: 0

Afgelopen 30 dagen: 7

Altijd: 56