Ga door naar hoofdinhoud

RIDGID R860052 Motor Replacement

Wat je nodig hebt

  1. RIDGID R860052 Motor Replacement, Motor: stap 1, afbeelding 1 van 2 RIDGID R860052 Motor Replacement, Motor: stap 1, afbeelding 2 van 2
    • Remove the battery from the drill before you begin.

    • Use a T10 Torx screwdriver to remove the ten screws on the information label side of the drill.

    • These ten screws are 19 mm long.

  2. RIDGID R860052 Motor Replacement: stap 2, afbeelding 1 van 1
    • Lift off and remove the cover with the informational label.

  3. RIDGID R860052 Motor Replacement: stap 3, afbeelding 1 van 3 RIDGID R860052 Motor Replacement: stap 3, afbeelding 2 van 3 RIDGID R860052 Motor Replacement: stap 3, afbeelding 3 van 3
    • Remove the switch assembly, chuck, and motor from all drill covers.

  4. RIDGID R860052 Motor Replacement: stap 4, afbeelding 1 van 2 RIDGID R860052 Motor Replacement: stap 4, afbeelding 2 van 2
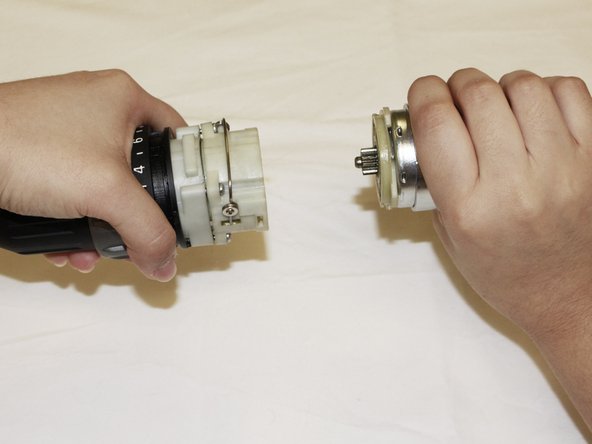
    • Twist the chuck and motor in the opposite direction and gently pull them apart.

  5. RIDGID R860052 Motor Replacement: stap 5, afbeelding 1 van 3 RIDGID R860052 Motor Replacement: stap 5, afbeelding 2 van 3 RIDGID R860052 Motor Replacement: stap 5, afbeelding 3 van 3
    • Desolder the black and red wires from the motor.

    • Replace motor and resolder the black and red wires back onto the motor.

    • Be aware of the heat level of the metal part on the soldering tool.

Conclusie

To reassemble your device, follow these instructions in reverse order.

Andrea Hernandez

Lid sinds: 02/05/19

204 Reputatie

1 Handleiding geschreven

Team

UC Davis, Team S18-G4, Lore Winter 2019 Lid van UC Davis, Team S18-G4, Lore Winter 2019

UCD-LORE-W19S18G4

3 Leden

6 handleidingen geschreven

0 opmerkingen

Voeg opmerking toe

Weergavestatistieken:

Afgelopen 24 uren: 1

Afgelopen 7 dagen: 1

Afgelopen 30 dagen: 8

Altijd: 482