Deze versie kan foutieve bewerkingen bevatten. Schakel over naar de recentste gecontroleerde momentopname.
Wat je nodig hebt
-
Deze stap is niet vertaald. Help het te vertalen
-
Remove the six 7.9mm Phillips #0 screws on the back and bottom.
-
Remove the one 3.8mm Phillips #0 screw on the bottom.
-
Remove the two 7.5mm Phillips #0 screws on the back and bottom.
-
-
Deze stap is niet vertaald. Help het te vertalen
-
Remove 5.8mm Phillips #1 screw from the side button panel.
-
Slide the viewfinder all the way to the right and remove the 7.9mm Phillips #0 screw.
-
-
Deze stap is niet vertaald. Help het te vertalen
-
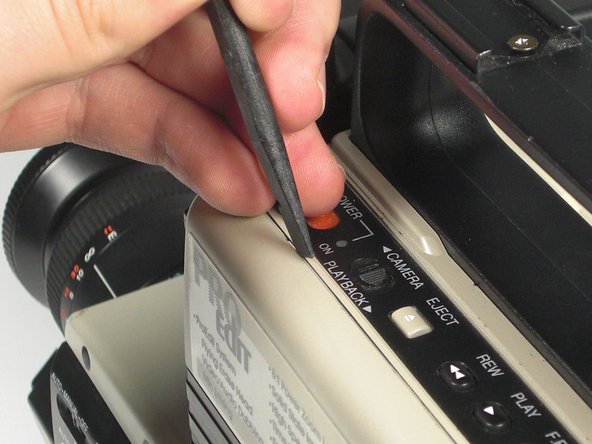
Pry along the seam on the top side near the buttons with a spudger.
-
-
-
Deze stap is niet vertaald. Help het te vertalen
-
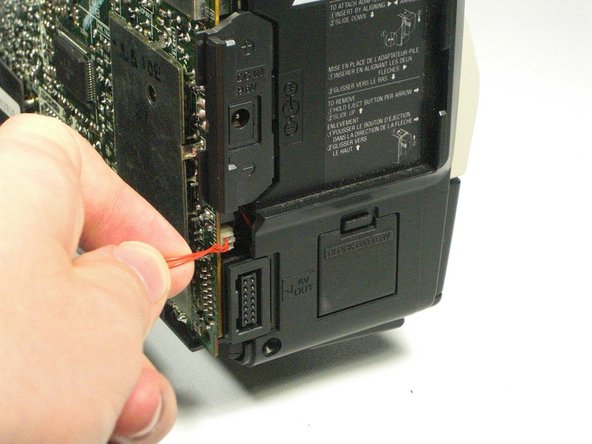
Pull the left panel away from the rest of the camcorder.
-
Unplug the red speaker cable located at the rear of the device.
-
-
Deze stap is niet vertaald. Help het te vertalen
-
Pull back the plastic tabs along the edges of the motherboard.
-
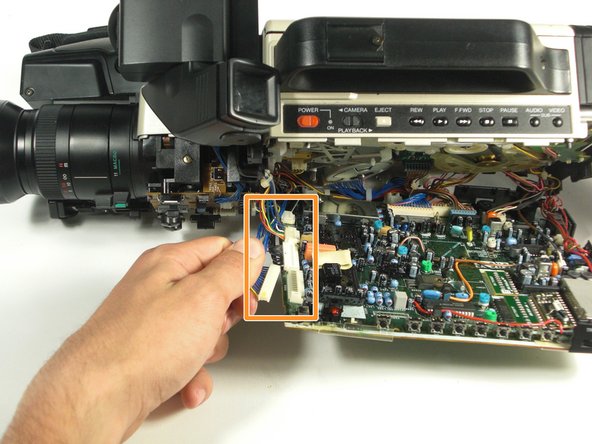
Disconnect all the cables along the left side of the motherboard.
-
-
Deze stap is niet vertaald. Help het te vertalen
-
Disconnect all cables along the bottom of the motherboard.
-
Pull the motherboard away from the camcorder.
-
-
Deze stap is niet vertaald. Help het te vertalen
-
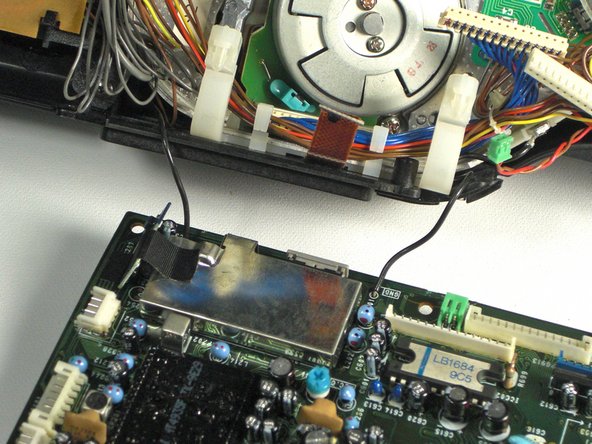
Desolder the two black wires holding the motherboard to the camcorder using a soldering iron.
-


Annuleren: ik heb deze handleiding niet afgemaakt.
Één andere persoon heeft deze handleiding voltooid.
Team

Cal Poly, Team 5-20, Amido Winter 2011 Lid van Cal Poly, Team 5-20, Amido Winter 2011
CPSU-AMIDO-W11S5G20
4 Leden
7 handleidingen geschreven