Ga door naar hoofdinhoud

RCA CC310 Main Motherboard Replacement

Wat je nodig hebt

  1. RCA CC310 Main Motherboard Replacement, Disassembling RCA CC310 Left Cover: stap 1, afbeelding 1 van 2 RCA CC310 Main Motherboard Replacement, Disassembling RCA CC310 Left Cover: stap 1, afbeelding 2 van 2
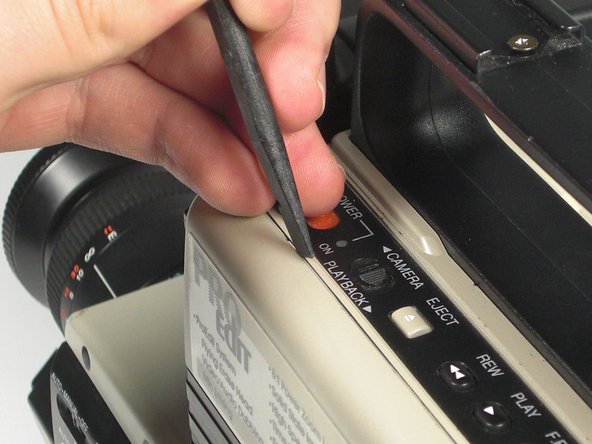
    • Remove the six 7.9mm Phillips #0 screws on the back and bottom.

    • Remove the one 3.8mm Phillips #0 screw on the bottom.

    • Remove the two 7.5mm Phillips #0 screws on the back and bottom.

  2. RCA CC310 Main Motherboard Replacement: stap 2, afbeelding 1 van 2 RCA CC310 Main Motherboard Replacement: stap 2, afbeelding 2 van 2
    • Remove 5.8mm Phillips #1 screw from the side button panel.

    • Slide the viewfinder all the way to the right and remove the 7.9mm Phillips #0 screw.

  3. RCA CC310 Main Motherboard Replacement: stap 3, afbeelding 1 van 2 RCA CC310 Main Motherboard Replacement: stap 3, afbeelding 2 van 2
    • Pry along the seam on the top side near the buttons with a spudger.

  4. RCA CC310 Main Motherboard Replacement: stap 4, afbeelding 1 van 2 RCA CC310 Main Motherboard Replacement: stap 4, afbeelding 2 van 2
    • Pull the left panel away from the rest of the camcorder.

    • Unplug the red speaker cable located at the rear of the device.

    • Be careful to not pull too hard. The speaker cable is still connected to the panel and it can rip.

  5. RCA CC310 Main Motherboard Replacement, Main Motherboard: stap 5, afbeelding 1 van 2 RCA CC310 Main Motherboard Replacement, Main Motherboard: stap 5, afbeelding 2 van 2
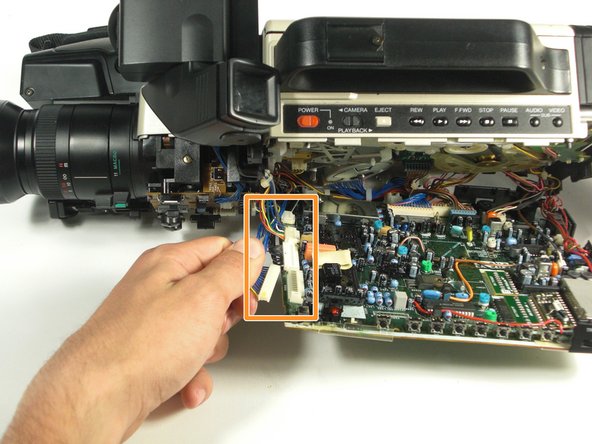
    • Pull back the plastic tabs along the edges of the motherboard.

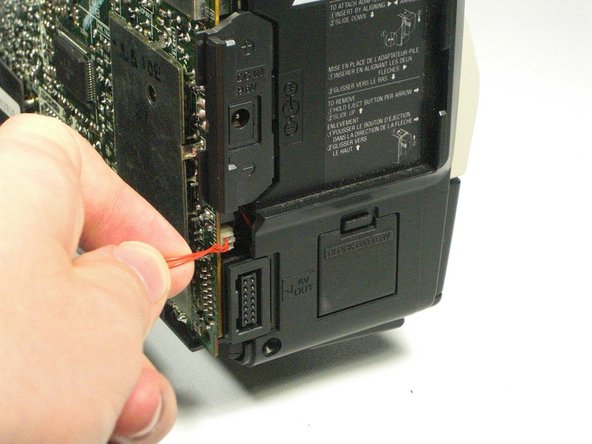
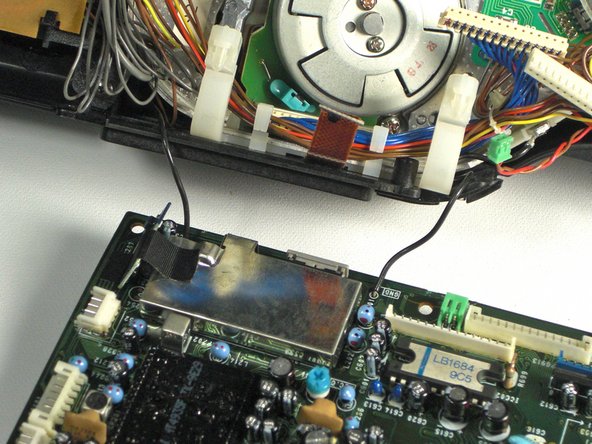
    • Disconnect all the cables along the left side of the motherboard.

  6. RCA CC310 Main Motherboard Replacement: stap 6, afbeelding 1 van 2 RCA CC310 Main Motherboard Replacement: stap 6, afbeelding 2 van 2
    • Disconnect all cables along the bottom of the motherboard.

    • Pull the motherboard away from the camcorder.

  7. RCA CC310 Main Motherboard Replacement: stap 7, afbeelding 1 van 1
    • Desolder the two black wires holding the motherboard to the camcorder using a soldering iron.

Conclusie

To reassemble your device, follow these instructions in reverse order.

Één andere persoon heeft deze handleiding voltooid.

Oliver Adams

Lid sinds: 01/19/11

629 Reputatie

6 handleidingen geschreven

Team

Cal Poly, Team 5-20, Amido Winter 2011 Lid van Cal Poly, Team 5-20, Amido Winter 2011

CPSU-AMIDO-W11S5G20

4 Leden

7 handleidingen geschreven

0 opmerkingen

Voeg opmerking toe

Weergavestatistieken:

Afgelopen 24 uren: 0

Afgelopen 7 dagen: 1

Afgelopen 30 dagen: 7

Altijd: 2,695