Ga door naar hoofdinhoud

Deze handleiding heeft recentere wijzigingen. Schakel over naar de nieuwste niet-geverifieerde versie.

Quick Antenna Connection Check for Delphi MyFi XM2GO

Wat je nodig hebt

  1. Quick Antenna Connection Check for Delphi MyFi XM2GO, Battery Cover: stap 1, afbeelding 1 van 3 Quick Antenna Connection Check for Delphi MyFi XM2GO, Battery Cover: stap 1, afbeelding 2 van 3 Quick Antenna Connection Check for Delphi MyFi XM2GO, Battery Cover: stap 1, afbeelding 3 van 3
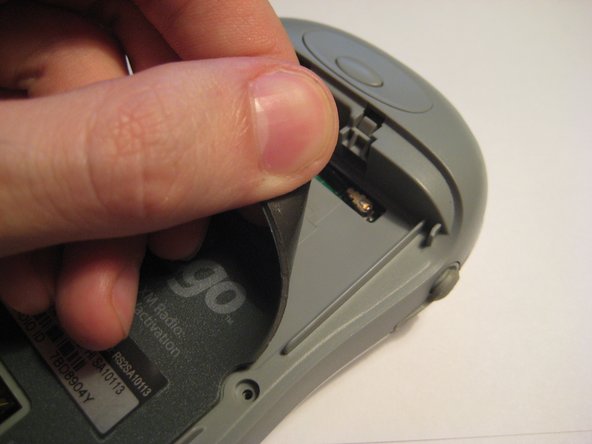
    • Locate the large button on the top of the device.

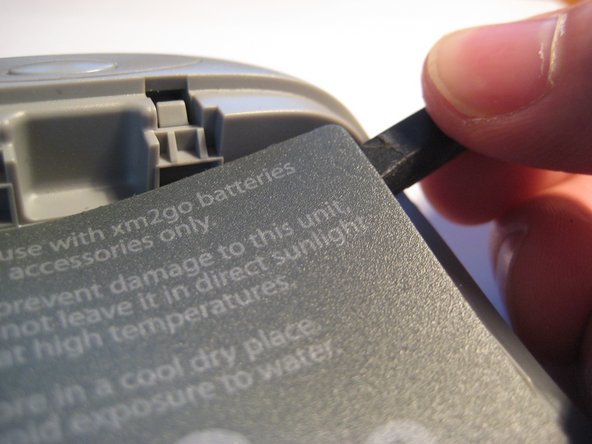
    • Push down on the button and slide the cover away from the button.

    • The battery removal tab may pop up.

  2. Quick Antenna Connection Check for Delphi MyFi XM2GO, Battery: stap 2, afbeelding 1 van 3 Quick Antenna Connection Check for Delphi MyFi XM2GO, Battery: stap 2, afbeelding 2 van 3 Quick Antenna Connection Check for Delphi MyFi XM2GO, Battery: stap 2, afbeelding 3 van 3
    • Grab the red pull tab and pull down to unlock the latch.

    • Pull the battery out.

  3. Quick Antenna Connection Check for Delphi MyFi XM2GO, Quick Antenna Connection Check for Delphi MyFi XM2GO: stap 3, afbeelding 1 van 1
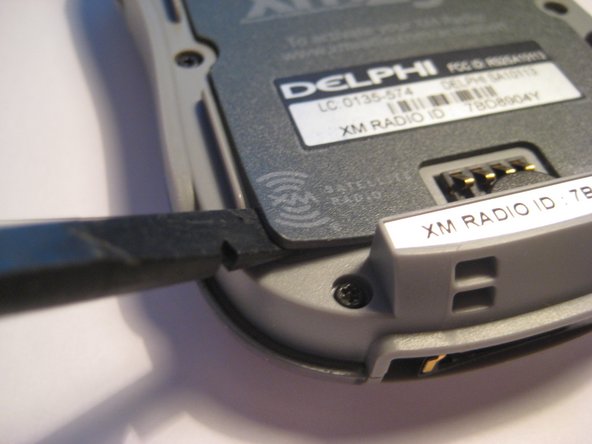
    • Under the battery is a magnetic mat, shown in red, that shields battery interference with the reception of the XM Satellite antenna.

    • This mat is stuck to the back of the device like a sticker and can be removed.

    • CAUTION: Do not operate the device without this magnetic shield.

  4. Quick Antenna Connection Check for Delphi MyFi XM2GO: stap 4, afbeelding 1 van 3 Quick Antenna Connection Check for Delphi MyFi XM2GO: stap 4, afbeelding 2 van 3 Quick Antenna Connection Check for Delphi MyFi XM2GO: stap 4, afbeelding 3 van 3
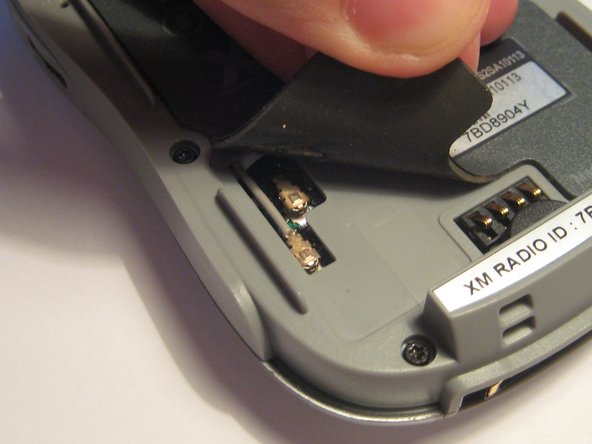
    • On the bottom left side of the magnetic mat, the corner can be lifted up to reveal the U.FL antenna connector. A spudger or your fingernails can be used to pry up the corners.

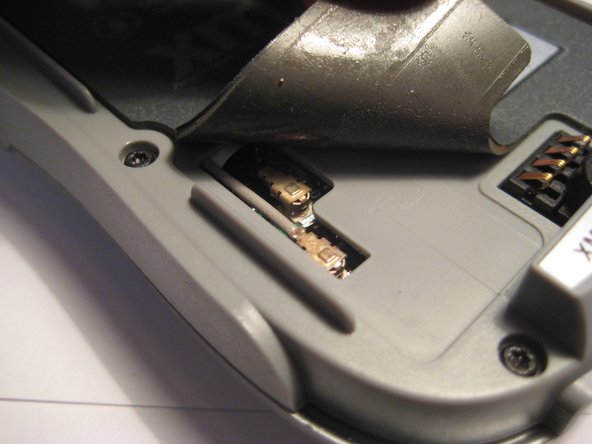
    • These U.FL antenna connections are standard for most portable devices and WiFi cards. They may become detached through use and may be checked if no reception is present.

    • Lift up the corner and notice the two connectors going to the PCB.

  5. Quick Antenna Connection Check for Delphi MyFi XM2GO: stap 5, afbeelding 1 van 2 Quick Antenna Connection Check for Delphi MyFi XM2GO: stap 5, afbeelding 2 van 2
    • Both of these connectors must be firmly attached to the PCB. Try pressing them firmly to make sure they are making full contact.

  6. Quick Antenna Connection Check for Delphi MyFi XM2GO: stap 6, afbeelding 1 van 3 Quick Antenna Connection Check for Delphi MyFi XM2GO: stap 6, afbeelding 2 van 3 Quick Antenna Connection Check for Delphi MyFi XM2GO: stap 6, afbeelding 3 van 3
    • On the top right corner, the magnetic mat can be lifted up to check another U.FL connector as with the 3rd step.

    • This mat can be pressed down again to secure after checking the connector.

  7. Quick Antenna Connection Check for Delphi MyFi XM2GO: stap 7, afbeelding 1 van 1
    • Try pressing down on the U.FL connector, as seen in this picture, to ensure a secure connection.

Conclusie

To reassemble your device, follow these instructions in reverse order.

Scott Byer

Lid sinds: 03/09/12

61 Reputatie

5 handleidingen geschreven

Team

Clemson, Team 1-2, Benson Spring 2012 Lid van Clemson, Team 1-2, Benson Spring 2012

CLEM-BENSON-S12S1G2

3 Leden

9 handleidingen geschreven

0 opmerkingen

Voeg opmerking toe

Weergavestatistieken:

Afgelopen 24 uren: 0

Afgelopen 7 dagen: 0

Afgelopen 30 dagen: 1

Altijd: 3,071