Ga door naar hoofdinhoud

Playstation 3 Motherboard Enclosure Replacement

Gearchiveerde handleiding
Deze handleiding wordt enkel nog bijgehouden voor historische doeleinden. Gebruik de laatste versie van deze gids om uw reparatie uit te voeren.

Wat je nodig hebt

  1. Playstation 3 Motherboard Enclosure Replacement, Top Cover: stap 1, afbeelding 1 van 2 Playstation 3 Motherboard Enclosure Replacement, Top Cover: stap 1, afbeelding 2 van 2
    • Remove the rubber screw cover near the hard drive cover with a spudger.

  2. Playstation 3 Motherboard Enclosure Replacement: stap 2, afbeelding 1 van 1
    • Remove the screw holding the top cover in place with a Torx T10 screwdriver.

  3. Playstation 3 Motherboard Enclosure Replacement: stap 3, afbeelding 1 van 2 Playstation 3 Motherboard Enclosure Replacement: stap 3, afbeelding 2 van 2
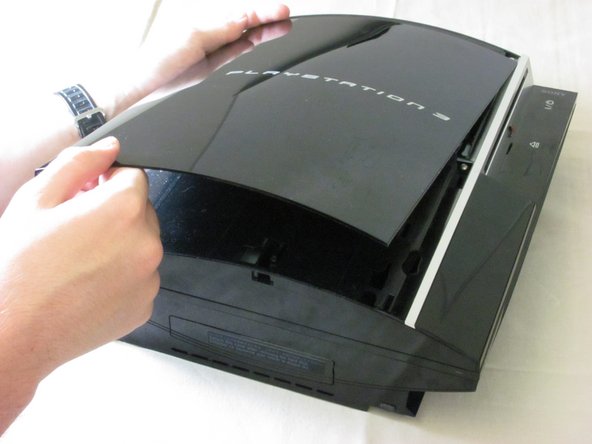
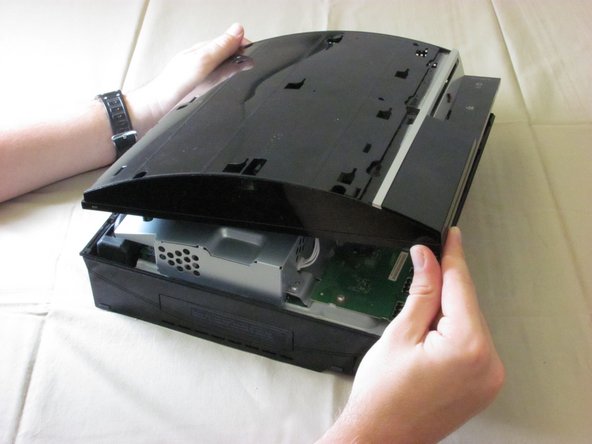
    • Slide the top cover down about half an inch.

    • Lift the cover off of the PS3.

  4. Playstation 3 Motherboard Enclosure Replacement: stap 4, afbeelding 1 van 2 Playstation 3 Motherboard Enclosure Replacement: stap 4, afbeelding 2 van 2
    • Remove the seven screws in the top cover with a Phillips #2 screwdriver.

    • One of the screws is shorter than the others. The short screw is marked in yellow.

  5. Playstation 3 Motherboard Enclosure Replacement: stap 5, afbeelding 1 van 3 Playstation 3 Motherboard Enclosure Replacement: stap 5, afbeelding 2 van 3 Playstation 3 Motherboard Enclosure Replacement: stap 5, afbeelding 3 van 3
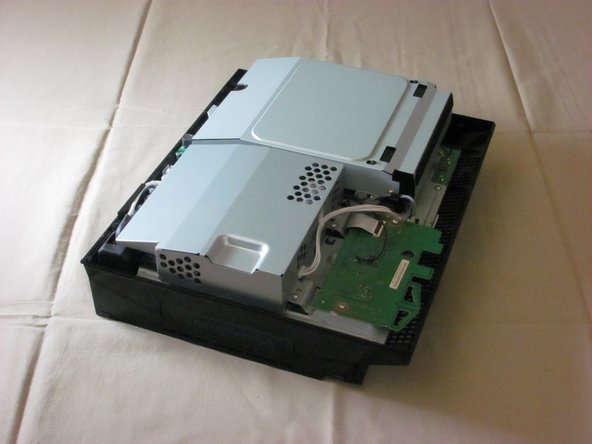
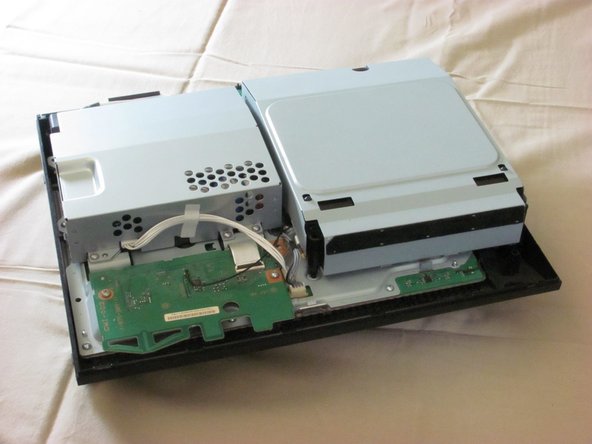
    • You can now lift off the top cover.

  6. Playstation 3 Motherboard Enclosure Replacement, Power Supply: stap 6, afbeelding 1 van 2 Playstation 3 Motherboard Enclosure Replacement, Power Supply: stap 6, afbeelding 2 van 2
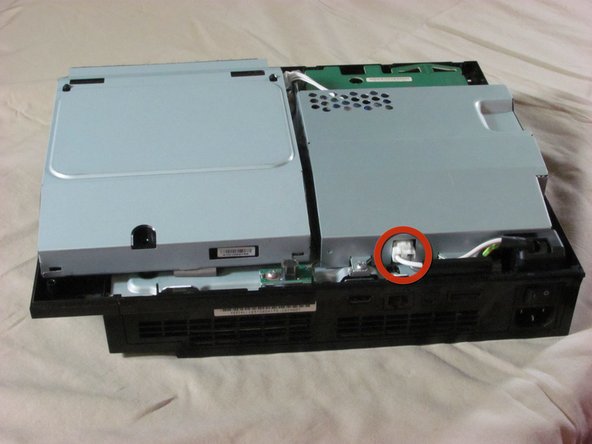
    • Unplug the white wires connected to the wireless board. There are two sets of wires: one set in the front, one in the back.

    • Push down the tab on the connector to disconnect the wires.

    • Remove the two screws on the front of the power supply.

  7. Playstation 3 Motherboard Enclosure Replacement: stap 7, afbeelding 1 van 1
    • Remove the screws on the back of the power supply with a Phillips #2 screwdriver.

  8. Playstation 3 Motherboard Enclosure Replacement: stap 8, afbeelding 1 van 2 Playstation 3 Motherboard Enclosure Replacement: stap 8, afbeelding 2 van 2
    • Remove the power supply by lifting it straight up.

  9. Playstation 3 Motherboard Enclosure Replacement, Motherboard Enclosure: stap 9, afbeelding 1 van 2 Playstation 3 Motherboard Enclosure Replacement, Motherboard Enclosure: stap 9, afbeelding 2 van 2
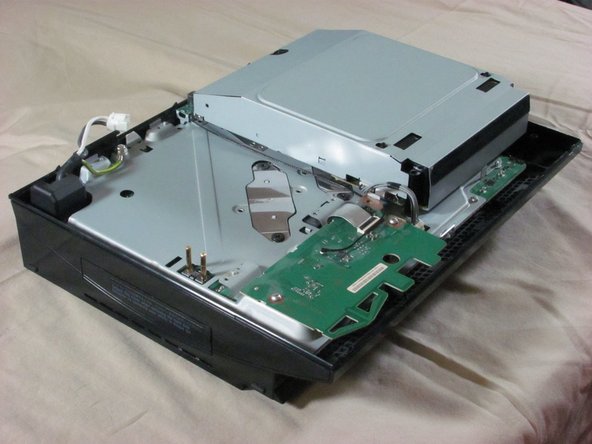
    • Unplug the optical drive power cable.

    • Detach the ribbon cable that connects the optical drive to the motherboard.

    • Set the optical drive aside.

  10. Playstation 3 Motherboard Enclosure Replacement: stap 10, afbeelding 1 van 2 Playstation 3 Motherboard Enclosure Replacement: stap 10, afbeelding 2 van 2
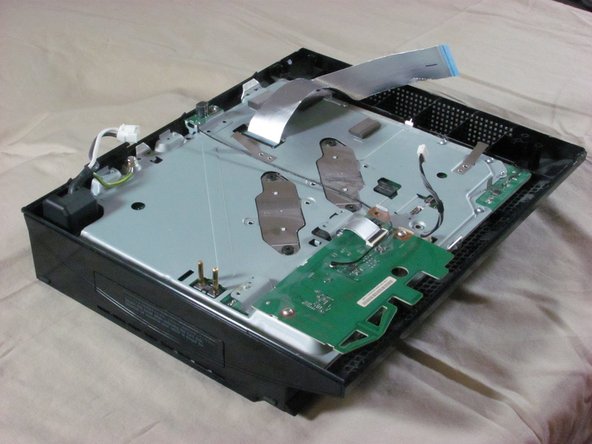
    • Remove three screws (Phillips #2) from the wireless board and antenna.

    • Detach the ribbon cable that connects the wireless board to the motherboard.

  11. Playstation 3 Motherboard Enclosure Replacement: stap 11, afbeelding 1 van 1
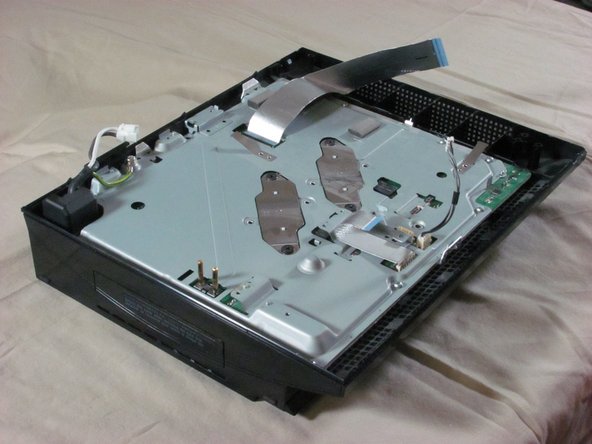
    • Remove nine screws (Phillips #2) from the perimeter of the metal plate covering the motherboard.

  12. Playstation 3 Motherboard Enclosure Replacement: stap 12, afbeelding 1 van 3 Playstation 3 Motherboard Enclosure Replacement: stap 12, afbeelding 2 van 3 Playstation 3 Motherboard Enclosure Replacement: stap 12, afbeelding 3 van 3
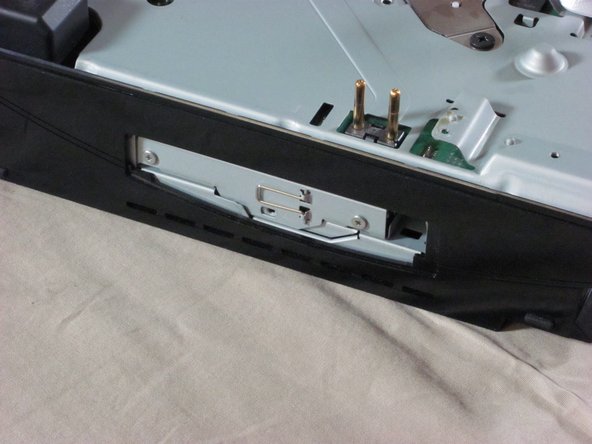
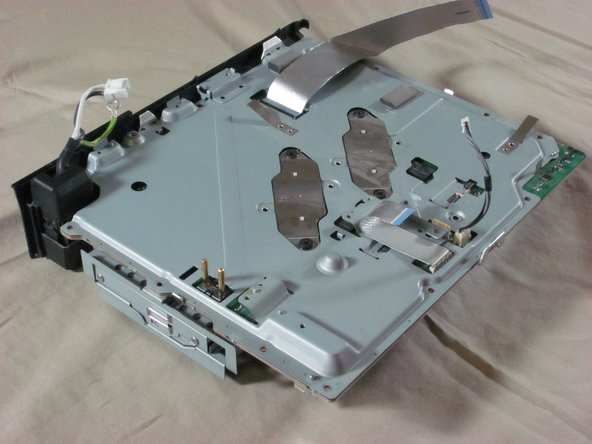
    • Remove the hard drive door with a spudger.

    • Lift the metal enclosure out of the plastic bottom case.

Conclusie

To reassemble your device, follow these instructions in reverse order.

2 andere personen hebben deze handleiding voltooid.

iDeleted

Lid sinds: 07/07/10

2.101 Reputatie

39 handleidingen geschreven

0 opmerkingen

Voeg opmerking toe

Weergavestatistieken:

Afgelopen 24 uren: 0

Afgelopen 7 dagen: 0

Afgelopen 30 dagen: 1

Altijd: 1,901