Ga door naar hoofdinhoud

Deze handleiding heeft recentere wijzigingen. Schakel over naar de nieuwste niet-geverifieerde versie.

PlayStation Move Battery Replacement

Wat je nodig hebt

  1. PlayStation Move  Battery Replacement, Battery: stap 1, afbeelding 1 van 1
    • Using a Phillips #0 screwdriver, remove the four 10mm screws from the corners of the trigger button.

  2. PlayStation Move  Battery Replacement: stap 2, afbeelding 1 van 3 PlayStation Move  Battery Replacement: stap 2, afbeelding 2 van 3 PlayStation Move  Battery Replacement: stap 2, afbeelding 3 van 3
    • Using a Phillips #0 screwdriver, remove the four 10mm screws located at the back of the device.

  3. PlayStation Move  Battery Replacement: stap 3, afbeelding 1 van 2 PlayStation Move  Battery Replacement: stap 3, afbeelding 2 van 2
    • Insert the plastic opening tool at the indent along the front and back surfaces of the controller.

    • Gently use a forward and backward motion to safely pop open the cover.

    • Use your hands to further pull it apart and pop it open.

  4. PlayStation Move  Battery Replacement: stap 4, afbeelding 1 van 2 PlayStation Move  Battery Replacement: stap 4, afbeelding 2 van 2
    • Once the device is opened, lift the battery out of the black plastic holder.

    • Carefully pull the battery out and ensure that it's wires are still connected to the inside.

  5. PlayStation Move  Battery Replacement: stap 5, afbeelding 1 van 3 PlayStation Move  Battery Replacement: stap 5, afbeelding 2 van 3 PlayStation Move  Battery Replacement: stap 5, afbeelding 3 van 3
    • Using a Phillips head screwdriver, remove the 9mm screw located to the right of the battery, which is connected to the inner plastic frame.

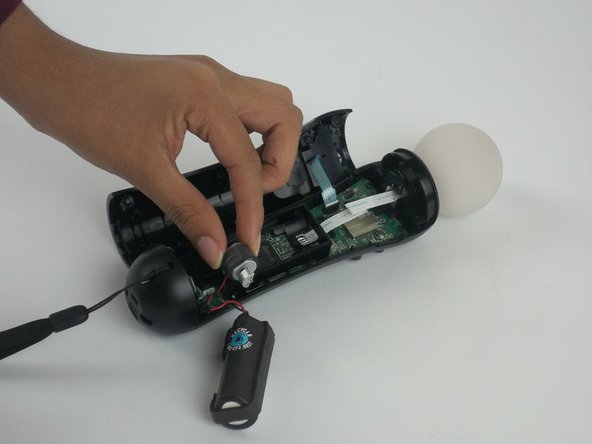
    • Use the plastic opening tool to carefully take out the grey cylindrical piece (vibrator) that is also attached to a wire.

  6. PlayStation Move  Battery Replacement: stap 6, afbeelding 1 van 2 PlayStation Move  Battery Replacement: stap 6, afbeelding 2 van 2
    • Gently pull out the small cylindrical grey piece (vibrator).

    • Removing this piece makes it easier to access the wire connection of the battery and remove it.

  7. PlayStation Move  Battery Replacement: stap 7, afbeelding 1 van 2 PlayStation Move  Battery Replacement: stap 7, afbeelding 2 van 2
    • Use tweezers to remove the small piece with a cylindrical top that is located to the left of the inner plastic frame.

  8. PlayStation Move  Battery Replacement: stap 8, afbeelding 1 van 3 PlayStation Move  Battery Replacement: stap 8, afbeelding 2 van 3 PlayStation Move  Battery Replacement: stap 8, afbeelding 3 van 3
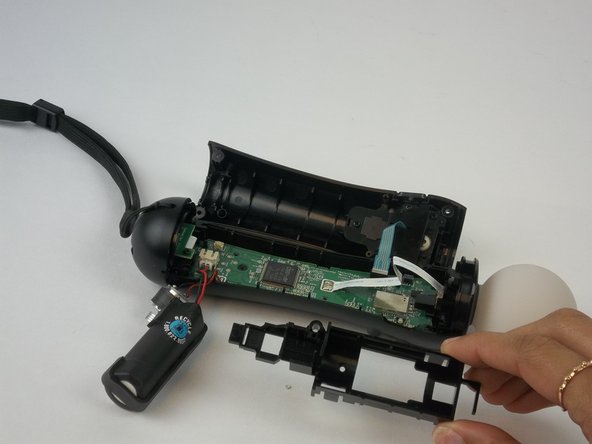
    • Use one hand to hold the bottom of the device, and the other hand to squeeze the inner plastic frame.

    • While squeezing the inner plastic frame, pull it up and then pull it towards you to detach it.

    • While removing the frame, be extremely careful because it could damage the frame or the motherboard.

  9. PlayStation Move  Battery Replacement: stap 9, afbeelding 1 van 2 PlayStation Move  Battery Replacement: stap 9, afbeelding 2 van 2
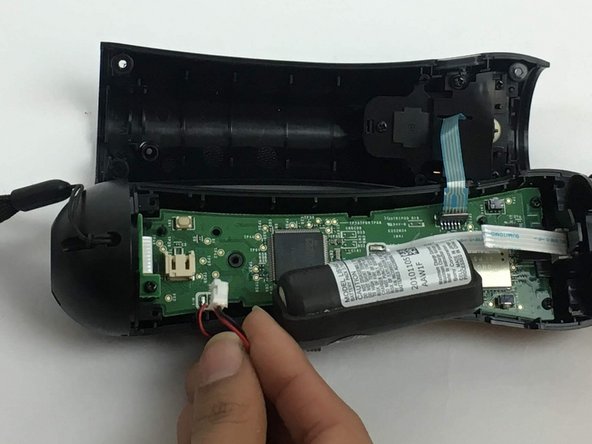
    • Gently pull on the end of the red and black wires which is closest to the connector to disconnect the battery.

Conclusie

To reassemble your device, follow these instructions in reverse order.

8 andere personen hebben deze handleiding voltooid.

Jenelle Mohammed

Lid sinds: 09/28/16

217 Reputatie

1 Handleiding geschreven

Team

USF Tampa, Team 3-3, Passmore Fall 2016 Lid van USF Tampa, Team 3-3, Passmore Fall 2016

USFT-PASSMORE-F16S3G3

4 Leden

8 handleidingen geschreven

4 opmerkingen

When putting the plastic battery rig back in on my second time doing this, I bent one of the little plastic pins that fits into a hole in the PCB. Definitely want to be careful with that. To make it a bit easier, I unscrewed the bottom port PCB part of the way so I could take the bottom plastic housing and put the plastic battery rig in straight. It made it a lot easier.

Burke Cates - Antwoord

No need to take out the motor, just use sharp tweezers and grab the connector (NOT the wires) and with small wiggling pull it out. Worked for mine.

crus - Antwoord

Worked great! Thanks for this. I did not need to take out the black battery / motor piece. Tweezers worked great to remove and install the battery cable

Harry Skigis - Antwoord

Any recommended online / physical store to buy new batteries for this because ifixit doesn’t have them?

Silas Stewart - Antwoord

Voeg opmerking toe

Weergavestatistieken:

Afgelopen 24 uren: 3

Afgelopen 7 dagen: 19

Afgelopen 30 dagen: 82

Altijd: 14,237