Ga door naar hoofdinhoud

PlayStation 4 Slim Disc Rollers Replacement

Wat je nodig hebt

  1. PlayStation 4 Slim Disc Rollers Replacement, Disc Rollers: stap 1, afbeelding 1 van 3 PlayStation 4 Slim Disc Rollers Replacement, Disc Rollers: stap 1, afbeelding 2 van 3 PlayStation 4 Slim Disc Rollers Replacement, Disc Rollers: stap 1, afbeelding 3 van 3
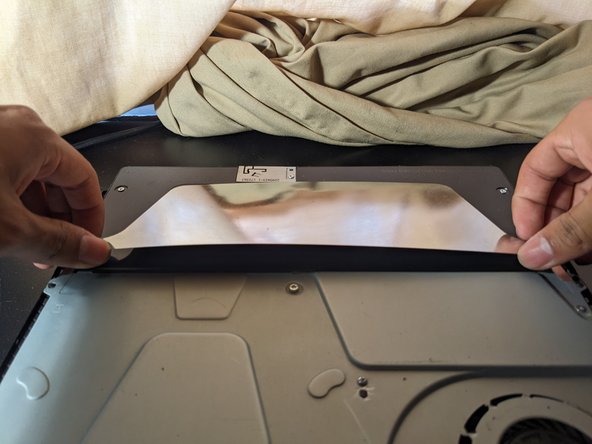
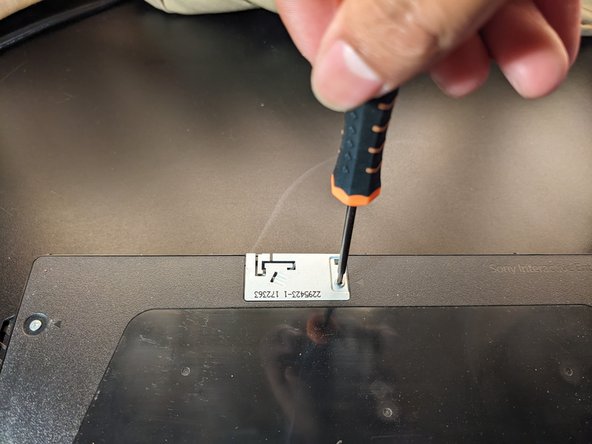
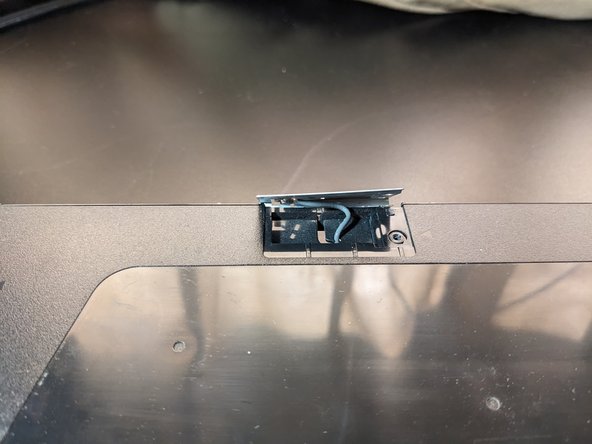
    • Flip your system upside down and remove the warranty sticker located by the three ports.

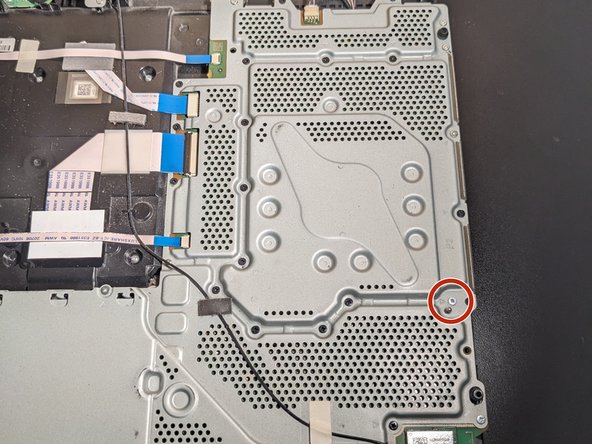
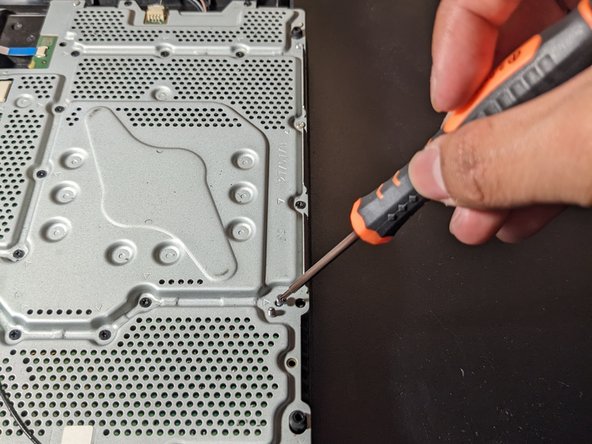
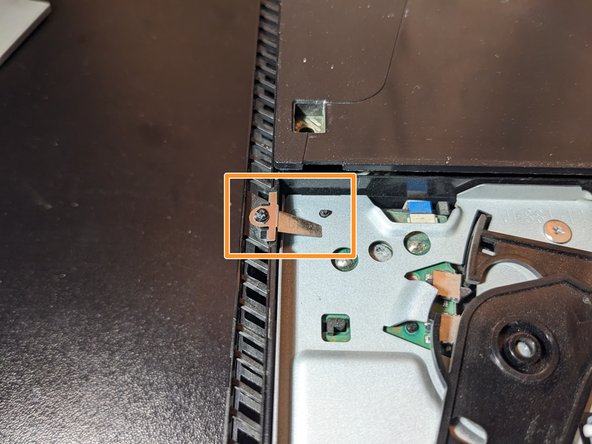
    • Unscrew the 5.0mm screw using a T8 security Torx screwdriver.

  2. PlayStation 4 Slim Disc Rollers Replacement: stap 2, afbeelding 1 van 3 PlayStation 4 Slim Disc Rollers Replacement: stap 2, afbeelding 2 van 3 PlayStation 4 Slim Disc Rollers Replacement: stap 2, afbeelding 3 van 3
    • In the same position, pry up both of the corners of the bottom cover until you hear a loud click from both sides.

    • This requires a bit of force so take your time.

    • Continue by sliding the cover towards the back and then lift up.

  3. PlayStation 4 Slim Disc Rollers Replacement: stap 3, afbeelding 1 van 3 PlayStation 4 Slim Disc Rollers Replacement: stap 3, afbeelding 2 van 3 PlayStation 4 Slim Disc Rollers Replacement: stap 3, afbeelding 3 van 3
    • Located towards the right side, unscrew the 4.0mm screw using a Phillips #00 screwdriver.

    • There is a small arrow pointing at the desired screw.

  4. PlayStation 4 Slim Disc Rollers Replacement: stap 4, afbeelding 1 van 2 PlayStation 4 Slim Disc Rollers Replacement: stap 4, afbeelding 2 van 2
    • Flip your system right side up, facing you.

    • Pry up the front two corners of the top cover

    • The same as removing the bottom cover, this part requires some force.

    • Continue by sliding the top cover towards the backside and lift up.

  5. PlayStation 4 Slim Disc Rollers Replacement: stap 5, afbeelding 1 van 2 PlayStation 4 Slim Disc Rollers Replacement: stap 5, afbeelding 2 van 2
    • Unscrew the two screws holding the metal plate using a T8 screwdriver.

    • Left one is a 24 mm screw, and the right one is a 31 mm screw.

    • Remove the metal plate.

  6. PlayStation 4 Slim Disc Rollers Replacement: stap 6, afbeelding 1 van 3 PlayStation 4 Slim Disc Rollers Replacement: stap 6, afbeelding 2 van 3 PlayStation 4 Slim Disc Rollers Replacement: stap 6, afbeelding 3 van 3
    • Unscrew the 3.0mm screw holding the antenna using a Phillip #00 screwdriver.

    • Lift the antenna up.

  7. PlayStation 4 Slim Disc Rollers Replacement: stap 7, afbeelding 1 van 1
    • Using a Phillips 00# screwdriver, unscrew all Phillips screws.

    • Unscrew the 31.0mm screw using a T8 screwdriver.

  8. PlayStation 4 Slim Disc Rollers Replacement: stap 8, afbeelding 1 van 3 PlayStation 4 Slim Disc Rollers Replacement: stap 8, afbeelding 2 van 3 PlayStation 4 Slim Disc Rollers Replacement: stap 8, afbeelding 3 van 3
    • With the welded plastics, use either a tweezer, a nose plier, or a metal spudger to round off the tops until the metal cover can be lifted out.

    • This may take some time if you only use a tweezer or a metal spludger. A nose plier may be the best and most efficient at this.

    • If you overdue this part, you can leave the welded screws too thin to hold down the cover which could make the metal cover loose and cause rattle noises.

    • When reversing this part, try to push down on the tops of the welds so they are able to hold the cover once again.

  9. PlayStation 4 Slim Disc Rollers Replacement: stap 9, afbeelding 1 van 3 PlayStation 4 Slim Disc Rollers Replacement: stap 9, afbeelding 2 van 3 PlayStation 4 Slim Disc Rollers Replacement: stap 9, afbeelding 3 van 3
    • Slightly lift up the power supply from where it is holding the metal cover.

    • Lift up the metal cover then pull out from the power supply.

  10. PlayStation 4 Slim Disc Rollers Replacement: stap 10, afbeelding 1 van 3 PlayStation 4 Slim Disc Rollers Replacement: stap 10, afbeelding 2 van 3 PlayStation 4 Slim Disc Rollers Replacement: stap 10, afbeelding 3 van 3
    • Use a Philips 00# screwdriver to unscrew the two 3.0mm screws.

    • Remove the small metal piece just by lifting up.

    • Remove disc drive by first pulling up from the back side and then slide it out.

  11. PlayStation 4 Slim Disc Rollers Replacement: stap 11, afbeelding 1 van 3 PlayStation 4 Slim Disc Rollers Replacement: stap 11, afbeelding 2 van 3 PlayStation 4 Slim Disc Rollers Replacement: stap 11, afbeelding 3 van 3
    • To remove rollers, pull up on the white connector rod.

    • Then slide the left roller out of the white small gear.

  12. PlayStation 4 Slim Disc Rollers Replacement: stap 12, afbeelding 1 van 3 PlayStation 4 Slim Disc Rollers Replacement: stap 12, afbeelding 2 van 3 PlayStation 4 Slim Disc Rollers Replacement: stap 12, afbeelding 3 van 3
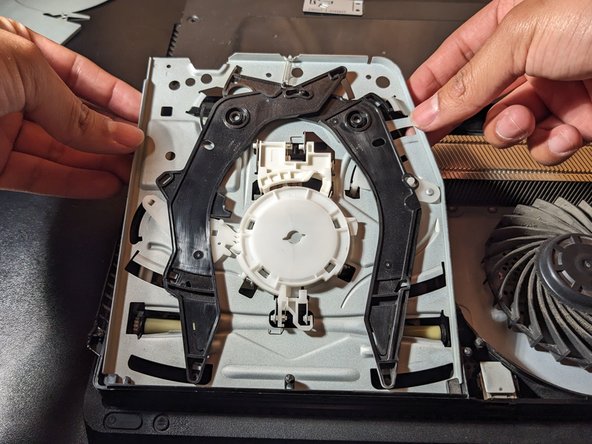
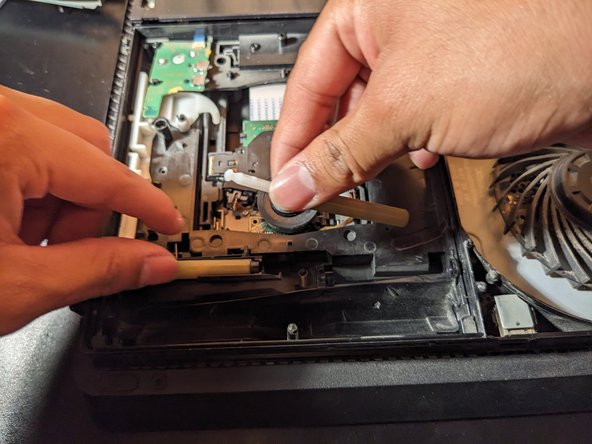
    • To return the rollers back into position, first place the left roller back, connecting to the white gear, and push down until you hear a click.

    • Make sure the larger black end is facing the small white connector rod for both rollers.

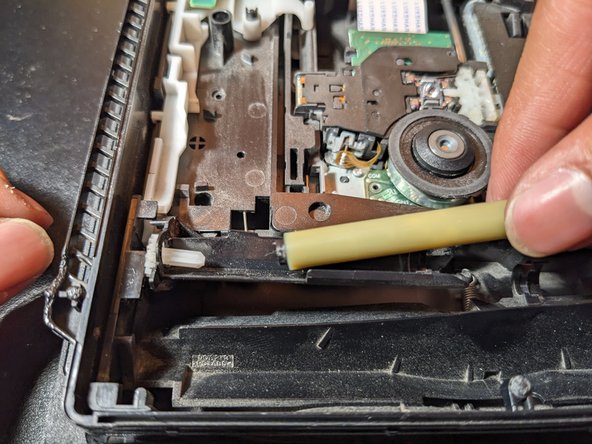
    • Align the ends of the white connector rod to the holes at the end of the right roller. Then place the right side of the right roller down first so you can connect the left roller to the white connector rod.

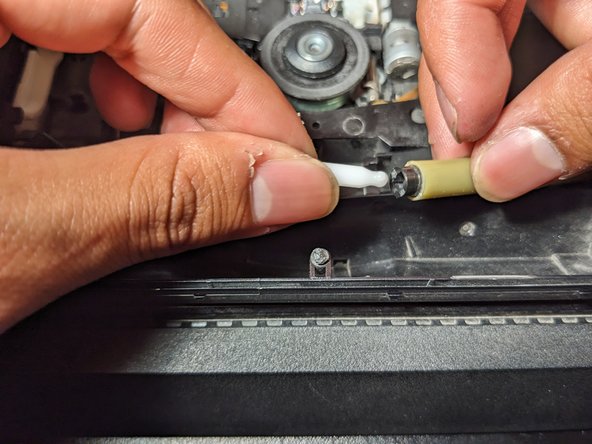
    • Push down between the white connector rod and the right roller until you hear a click.

Conclusie

To reassemble your device, follow these instructions in reverse order.

2 andere personen hebben deze handleiding voltooid.

David Martinez

Lid sinds: 03/20/24

265 Reputatie

1 Handleiding geschreven

Team

0 opmerkingen

Voeg opmerking toe

Weergavestatistieken:

Afgelopen 24 uren: 17

Afgelopen 7 dagen: 150

Afgelopen 30 dagen: 950

Altijd: 1,069