Inleiding
This guide will show the steps needed to remove the motherboard in the PlayStation 4 Pro. The motherboard has many small components that are rather delicate, careful handling is necessary.
Wat je nodig hebt
-
-
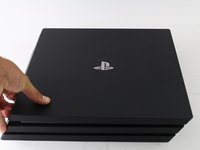
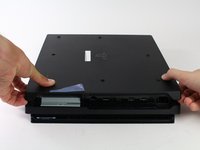
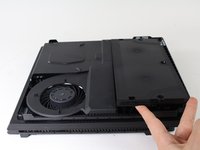
Flip the console upside down.
-
Use your finger to pull and snap off the plastic cover over the hard drive.
-
-
-
Flip the console right side up.
-
Grip the two corners located at the front of the device.
-
Pull upwards until a loud click is heard.
-
After both corners detach, slide the cover backwards and lift off.
-
-
-
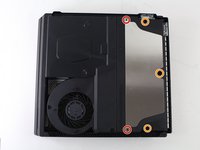
Use a T8 Torx Security screwdriver to remove five screws from the rear of the device.
-
Two 31mm screws.
-
Three 10mm screws for the 7000 models; Two gray 10mm screws (upper and lower screws on the illustration) if the PS4 Pro is a 7100-series model.
-
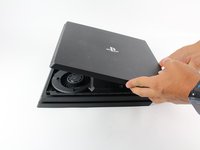
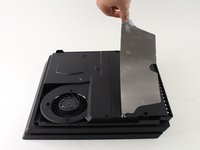
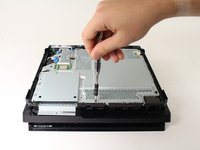
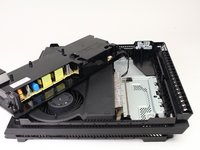
Remove the metal plate by pulling it up.
-
-
-
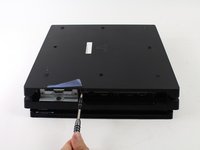
Flip the console over so the bottom is facing up.
-
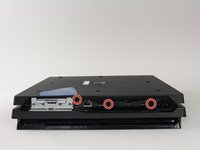
Use a T8 Torx Security screwdriver to remove the three black 7mm screws in the back panel. (7000-series models only); or one 7mm screw (the middle one) with 7100-series models and the warranty sticker to the left.
-
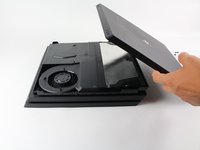
Remove the bottom cover in the same way as the top cover. Grip the cover on both sides and pull up until it clicks. Then slide the cover off; With 7100-series models, pay attention to the two clips that replace the corresponding screws.
-
-
-
-
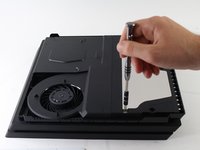
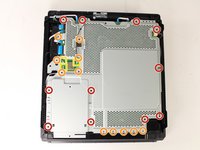
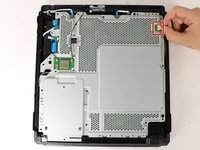
Use a T8 Torx security screwdriver to remove the eleven 10mm silver screws from the metal plate.
-
Use a Phillips #1 screwdriver to remove the eleven 4mm black screws from the metal plate.
-
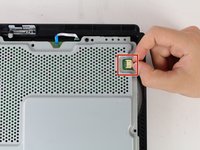
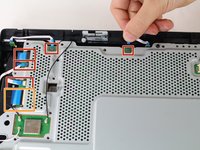
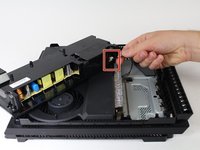
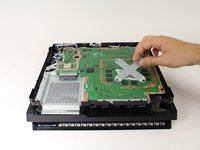
Use a spudger to disconnect the three antenna cables (two black and one white) by prying them straight up from their sockets.
-
-
-
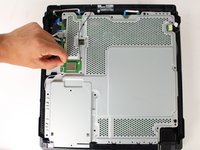
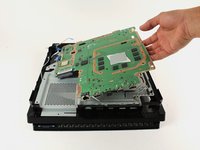
Carefully flip the console over so the bottom is facing up.
-
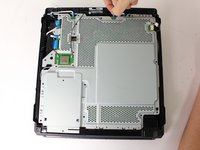
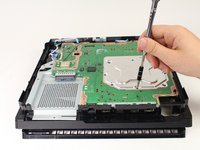
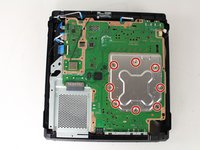
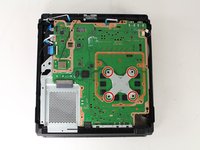
Use a Phillips #1 screwdriver to remove the eight 4mm screws on the metal plate with the X-like symbol.
-
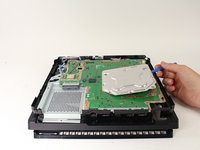
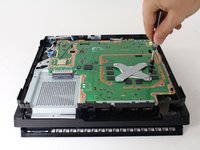
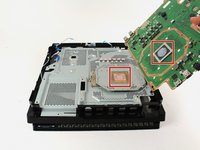
Use a plastic opening tool to remove the metal plate with the X-like shape.
-


To reassemble your device, follow these instructions in reverse order.
To reassemble your device, follow these instructions in reverse order.
Annuleren: ik heb deze handleiding niet afgemaakt.
63 andere personen hebben deze handleiding voltooid.
Team

Cal Poly, Team S21-G5, Livingston Spring 2017 Lid van Cal Poly, Team S21-G5, Livingston Spring 2017
CPSU-LIVINGSTON-S17S21G5
4 Leden
49 handleidingen geschreven
14 opmerkingen
This guide is for the initial release CUH-7000 models. Of note is the changes to the CUH-7100 series that do make this guide an issue. Steps 4 and 5 have a different items to note. You can damage it following this guide if you don’t adjust. There no longer 3 security screws for the case, but just one. This single screw is still covered by a warranty sticker, but the second one is a blank sticker and no screw behind it. There is also no 10mm screw in the center power supply in Step 4, it’s a support post. You still remove the 4 other screws, but you must then flip the console over and remove a T8 screw to the right on the HDD cage and another closer to the right side. You can then flip the console over again to remove the battery and plug it. Just remove all the metal plate screws to be sure, but make sure you hold the board when you flip it again or you will bend the battery prongs like I found out the hard way.
Hi, are these region/console/digitally signed? I have a dead board and was hopint to do a stragiht replacment for antother working board I will buy?
I'm asking the same question? Can you make it work with a board from another console? And do you need to replace the optical drive too?
On the CUH-7115B model, On step 4, the power supply has 2 T8 10mm screws instead of 3. The center screw on the power supply is a plastic fake screw for structural support. This plastic screw does not come out. Don’t be worried if you strip this plastic screw.