Inleiding
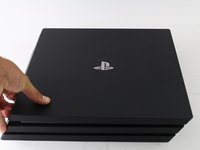
This guide will show the steps necessary to remove the fan from the PlayStation 4 Pro. There are many steps necessary to complete this, as well as some warranty-voiding disassembly required. A majority of the PS4 Pro needs to be disassembled to remove the fan.
Wat je nodig hebt
-
-
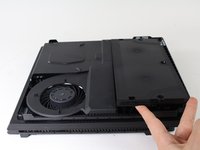
Flip the console upside down.
-
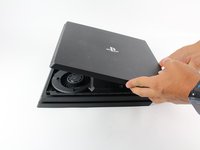
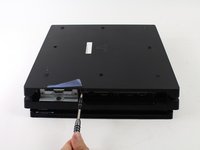
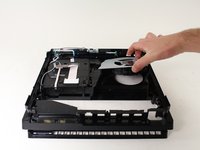
Use your finger to pull and snap off the plastic cover over the hard drive.
-
-
-
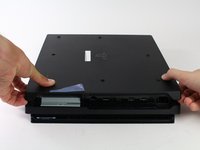
Flip the console right side up.
-
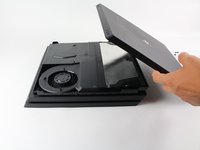
Grip the two corners located at the front of the device.
-
Pull upwards until a loud click is heard.
-
After both corners detach, slide the cover backwards and lift off.
-
-
-
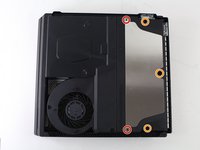
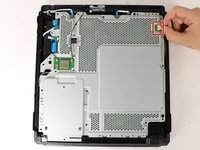
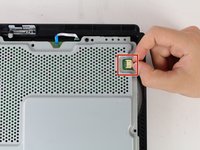
Use a T8 Torx Security screwdriver to remove five screws from the rear of the device.
-
Two 31mm screws.
-
Three 10mm screws for the 7000 models; Two gray 10mm screws (upper and lower screws on the illustration) if the PS4 Pro is a 7100-series model.
-
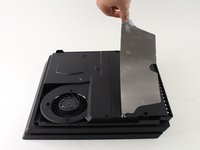
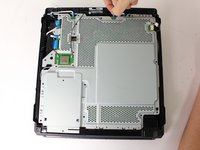
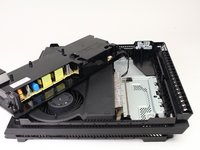
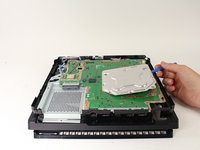
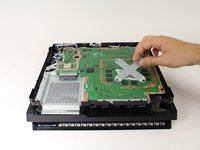
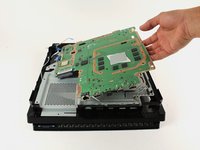
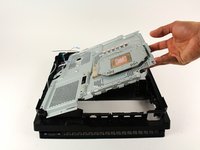
Remove the metal plate by pulling it up.
-
-
-
Flip the console over so the bottom is facing up.
-
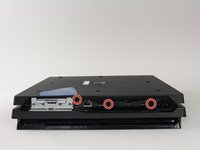
Use a T8 Torx Security screwdriver to remove the three black 7mm screws in the back panel. (7000-series models only); or one 7mm screw (the middle one) with 7100-series models and the warranty sticker to the left.
-
Remove the bottom cover in the same way as the top cover. Grip the cover on both sides and pull up until it clicks. Then slide the cover off; With 7100-series models, pay attention to the two clips that replace the corresponding screws.
-
-
-
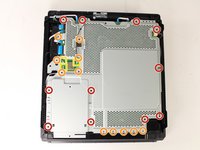
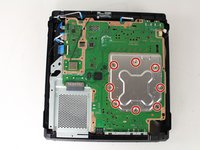
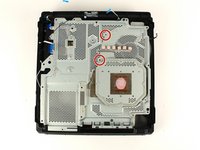
Use a T8 Torx security screwdriver to remove the eleven 10mm silver screws from the metal plate.
-
Use a Phillips #1 screwdriver to remove the eleven 4mm black screws from the metal plate.
-
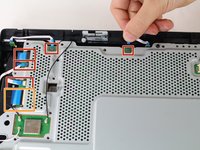
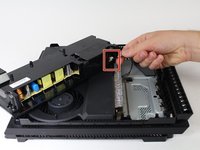
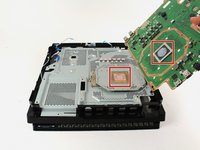
Use a spudger to disconnect the three antenna cables (two black and one white) by prying them straight up from their sockets.
-
-
-
-
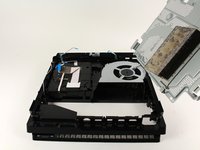
Carefully flip the console over so the bottom is facing up.
-
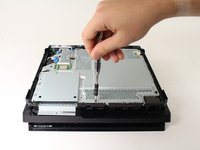
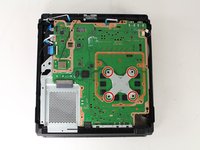
Use a Phillips #1 screwdriver to remove the eight 4mm screws on the metal plate with the X-like symbol.
-
Use a plastic opening tool to remove the metal plate with the X-like shape.
-
-
-
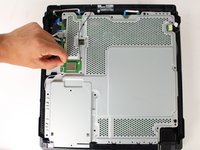
Use a Phillips #1 screwdriver to remove the two 6 mm silver screws from the metal plate.
-
-
-
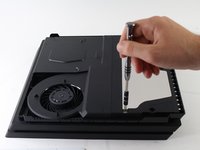
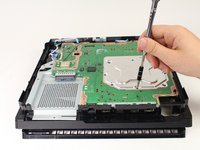
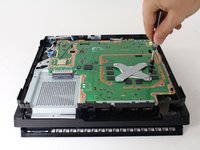
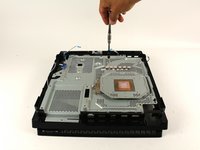
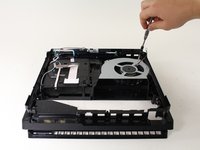
Use a Phillips #0 screwdriver to remove the two 6mm screws on the fan.
-
Grab the fan and lift up to remove it.
-


To reassemble your device, follow these instructions in reverse order.
To reassemble your device, follow these instructions in reverse order.
Annuleren: ik heb deze handleiding niet afgemaakt.
117 andere personen hebben deze handleiding voltooid.
Team

Cal Poly, Team S21-G5, Livingston Spring 2017 Lid van Cal Poly, Team S21-G5, Livingston Spring 2017
CPSU-LIVINGSTON-S17S21G5
4 Leden
49 handleidingen geschreven
14 opmerkingen
Danke für die Anleitung. hat alles super geklappt. Bloß beim letzten Schritt ist die Schraube vom Lüfter nicht oben links sondern unten rechts. Mfg
Thanks for the guide. Very comprehensive.
I’m clueless with electronics but my PS4 was on its death throes with overheating. I read this guide and watched the video (coffee break included) and got to work. The only trouble I had was that my husband (he’s a good guy normally) decided to help and used too big pliers and broke the connector between the power supply and PS4. Ok, so 5 days wait for replacement. I replaced the fan, thermal paste, and pads and put it back together (shaking like a leaf in a hurricane). It’s quiet and works thanks to ifixit.com. Thank you so much!
This was super helpful! For the power supply, I was trying to pull at the socket the cable was plugged into (same color plastic). I think it would have worked better just wiggling the cable.
Also, T8 worked fine, but putting it back together, I noticed T9 was better fit, so if you have a T9, use that instead. After cleaning and repasting, it’s so much quieter. Thanks!