Ga door naar hoofdinhoud

Pipo Smart S1 Screen Replacement

Wat je nodig hebt

  1. Pipo Smart S1 Screen Replacement, Battery: stap 1, afbeelding 1 van 3 Pipo Smart S1 Screen Replacement, Battery: stap 1, afbeelding 2 van 3 Pipo Smart S1 Screen Replacement, Battery: stap 1, afbeelding 3 van 3
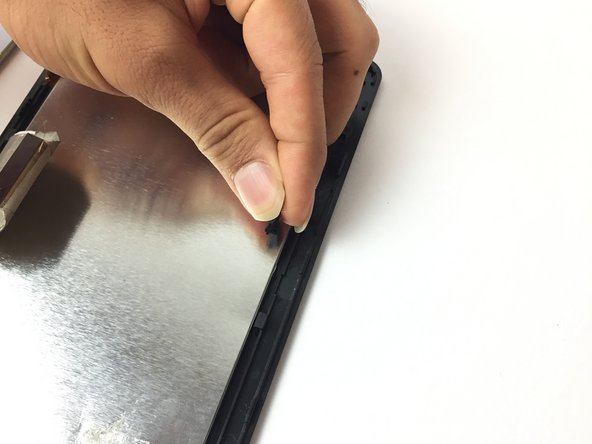
    • Insert an iFixit opening tool between the body and display of the tablet at the bottom of the device where the charging port is.

    • Slide the tool along the gap you are creating, moving to the right direction against the mini USB port.

  2. Pipo Smart S1 Screen Replacement: stap 2, afbeelding 1 van 1
    • Gently pry the body of the tablet and pop the back cover open.

    • Lift the back cover of the device and place it on the side.

  3. Pipo Smart S1 Screen Replacement: stap 3, afbeelding 1 van 1
    • Lift the edge of the white tape with the iFixit opening tool.

  4. Pipo Smart S1 Screen Replacement: stap 4, afbeelding 1 van 2 Pipo Smart S1 Screen Replacement: stap 4, afbeelding 2 van 2
    • Lift the white tape with your fingers, then lift the yellow tape that holds the battery extension.

  5. Pipo Smart S1 Screen Replacement: stap 5, afbeelding 1 van 1
    • On the bottom of your tablet, use the Phillips #0 screwdriver to take the two 3mm screws out.

  6. Pipo Smart S1 Screen Replacement: stap 6, afbeelding 1 van 2 Pipo Smart S1 Screen Replacement: stap 6, afbeelding 2 van 2
    • Lift the headphone jack and move it to the other side, placing it on the surface you are working on.

  7. Pipo Smart S1 Screen Replacement: stap 7, afbeelding 1 van 2 Pipo Smart S1 Screen Replacement: stap 7, afbeelding 2 van 2
    • Use a spudger to pry the battery and detach it from the glue underneath it.

    • Be careful not to pinch the battery—lithium batteries are hazardous and prone to short circuiting, and thus burning and/or exploding.

  8. Pipo Smart S1 Screen Replacement: stap 8, afbeelding 1 van 1
    • Lift the battery and place it a little further away from the positive and negative battery wires.

  9. Pipo Smart S1 Screen Replacement: stap 9, afbeelding 1 van 1
    • Using your soldering iron, melt the two lead spots to detach the wires.

    • The soldering iron is extremely hot, so handle with caution. Always keep the soldering iron holder next to you when using it so you can return it easily.

    • When reassembling, make sure you solder the right pole to the right spot on the circuit board, as swapping them can burn the motherboard.

  10. Pipo Smart S1 Screen Replacement: stap 10, afbeelding 1 van 2 Pipo Smart S1 Screen Replacement: stap 10, afbeelding 2 van 2
    • Remove the two wires. Then remove the battery completely from the device.

    • Make sure you tape the negative and positive battery wires to keep them from short-circuiting.

  11. Pipo Smart S1 Screen Replacement, Screen: stap 11, afbeelding 1 van 2 Pipo Smart S1 Screen Replacement, Screen: stap 11, afbeelding 2 van 2
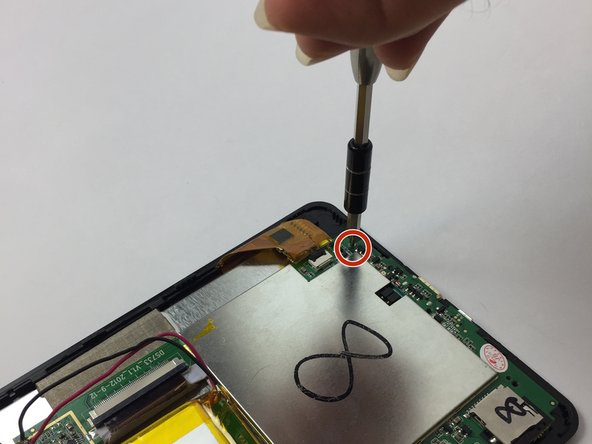
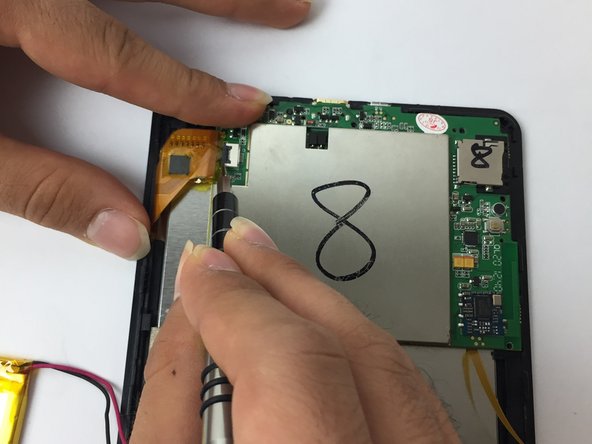
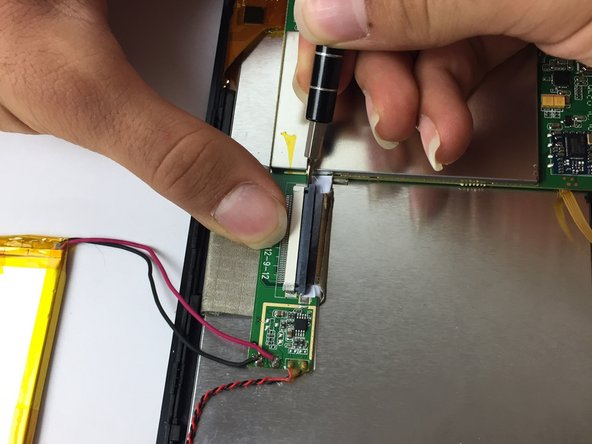
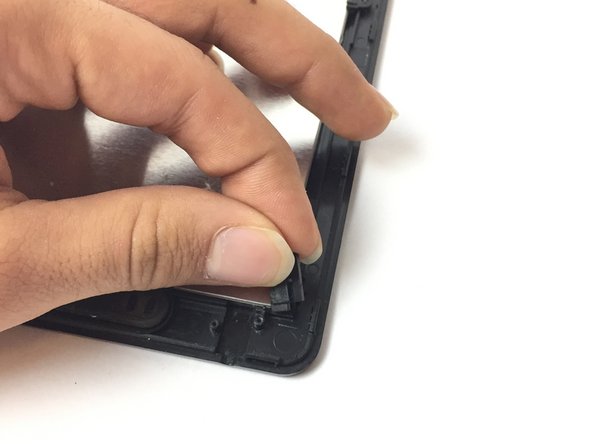
    • On the bottom of your tablet, take your J000 screwdriver and take out the three 3mm screws that hold down the motherboard.

  12. Pipo Smart S1 Screen Replacement: stap 12, afbeelding 1 van 2 Pipo Smart S1 Screen Replacement: stap 12, afbeelding 2 van 2
    • Locate the orange connection strip that connects the motherboard to the display screen. Use your J001 to pry the connector off.

  13. Pipo Smart S1 Screen Replacement: stap 13, afbeelding 1 van 2 Pipo Smart S1 Screen Replacement: stap 13, afbeelding 2 van 2
    • Take your J001 screwdriver and carefully push out the cable ribbon alternating on both sides.

  14. Pipo Smart S1 Screen Replacement: stap 14, afbeelding 1 van 1
    • After you loosened the cable ribbon with your J001 screwdriver, pull it out with your fingers.

  15. Pipo Smart S1 Screen Replacement: stap 15, afbeelding 1 van 2 Pipo Smart S1 Screen Replacement: stap 15, afbeelding 2 van 2
    • After the motherboard is freed from screws and connections, now you can lift it with two fingers and slowly place it next to your device front cover that holds the display screen.

    • The speaker connection that is on the front cover of your device is still attached to the motherboard; therefore place the motherboard close to the front cover.

  16. Pipo Smart S1 Screen Replacement: stap 16, afbeelding 1 van 3 Pipo Smart S1 Screen Replacement: stap 16, afbeelding 2 van 3 Pipo Smart S1 Screen Replacement: stap 16, afbeelding 3 van 3
    • Take you J000 screwdriver and take out the screws that hold down the levers that keeps the display screen clamped down.

    • Remove the two connectors with your fingers.

  17. Pipo Smart S1 Screen Replacement: stap 17, afbeelding 1 van 1
    • Pry off the display screen using J001 screwdriver.

  18. Pipo Smart S1 Screen Replacement: stap 18, afbeelding 1 van 1
    • Using your fingers, remove the defective screen from your device.

Conclusie

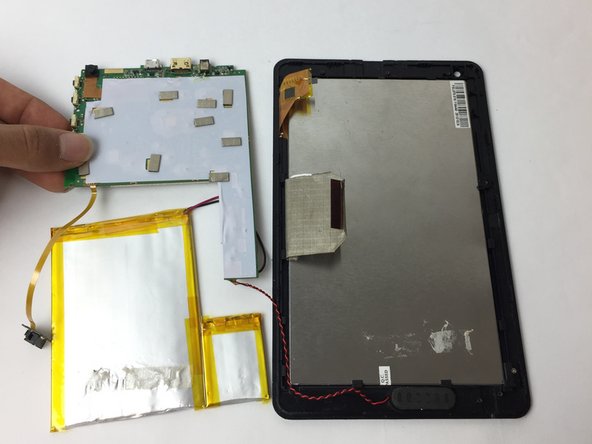
To reassemble your device, follow these instructions in reverse order.

Één andere persoon heeft deze handleiding voltooid.

Ali Alqallaf

Lid sinds: 09/28/16

340 Reputatie

3 handleidingen geschreven

Team

USF Tampa, Team 3-6, Passmore Fall 2016 Lid van USF Tampa, Team 3-6, Passmore Fall 2016

USFT-PASSMORE-F16S3G6

3 Leden

6 handleidingen geschreven

0 opmerkingen

Voeg opmerking toe

Weergavestatistieken:

Afgelopen 24 uren: 0

Afgelopen 7 dagen: 0

Afgelopen 30 dagen: 2

Altijd: 631