Ga door naar hoofdinhoud

Philips DC320 37 Speaker Replacement

Wat je nodig hebt

  1. Philips DC320 37 Speaker Replacement, Docking entertainment system: stap 1, afbeelding 1 van 1
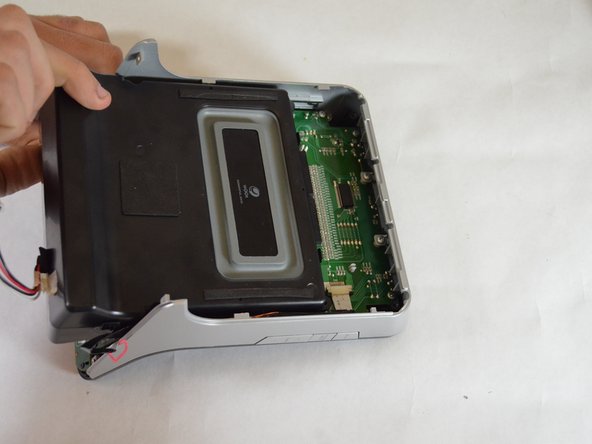
    • Pry off the four white feet with the pointed end of the spudger

  2. Philips DC320 37 Speaker Replacement: stap 2, afbeelding 1 van 1
    • Gently unscrew the four 15.5 mm Phillips #2 screws that hold the bottom panel to the dock.

  3. Philips DC320 37 Speaker Replacement: stap 3, afbeelding 1 van 1
    • Use the flat end of the spudger to pry the lid off from the two connectors holding it to the body of the dock.

    • The connectors on the panel are fragile and may break.

  4. Philips DC320 37 Speaker Replacement: stap 4, afbeelding 1 van 3 Philips DC320 37 Speaker Replacement: stap 4, afbeelding 2 van 3 Philips DC320 37 Speaker Replacement: stap 4, afbeelding 3 van 3
    • Carefully pull up and out the four electrical connectors and two ribbon connectors that connect the bottom panel to the dock.

    • Electrical Connectors

    • Ribbon Connectors

    • The cables do not have a lot of slack in them. Be careful not to break the connectors.

    • One wire is soldered onto the bottom panel. Be careful not to break this bond.

  5. Philips DC320 37 Speaker Replacement, Speaker: stap 5, afbeelding 1 van 1
    • Unscrew the two 6 mm Phillips #00 screws attaching the back panel to device.

  6. Philips DC320 37 Speaker Replacement: stap 6, afbeelding 1 van 3 Philips DC320 37 Speaker Replacement: stap 6, afbeelding 2 van 3 Philips DC320 37 Speaker Replacement: stap 6, afbeelding 3 van 3
    • Slide the back panel towards top of the device and lift away from the device to detach back panel.

  7. Philips DC320 37 Speaker Replacement: stap 7, afbeelding 1 van 1
    • Unscrew the four 16 mm Phillips #2 screws attaching the speaker unit to device.

  8. Philips DC320 37 Speaker Replacement: stap 8, afbeelding 1 van 2 Philips DC320 37 Speaker Replacement: stap 8, afbeelding 2 van 2
    • Slide the speaker towards the bottom of the device to remove.

Conclusie

To reassemble your device, follow these instructions in reverse order.

Graham Rolph

Lid sinds: 04/18/13

1 Reputatie

2 handleidingen geschreven

Team

Cal Poly, Team 3-48, Amido Spring 2013 Lid van Cal Poly, Team 3-48, Amido Spring 2013

CPSU-AMIDO-S13S3G48

4 Leden

6 handleidingen geschreven

0 opmerkingen

Voeg opmerking toe

Weergavestatistieken:

Afgelopen 24 uren: 0

Afgelopen 7 dagen: 0

Afgelopen 30 dagen: 2

Altijd: 900