Ga door naar hoofdinhoud

Pentax Optio WG-2 Menu Buttons Replacement

Gearchiveerde handleiding
Deze handleiding wordt enkel nog bijgehouden voor historische doeleinden. Gebruik de laatste versie van deze gids om uw reparatie uit te voeren.

Wat je nodig hebt

  1. Voorzichtig: stappen 1-6 komen van een handleiding die in bewerking is.

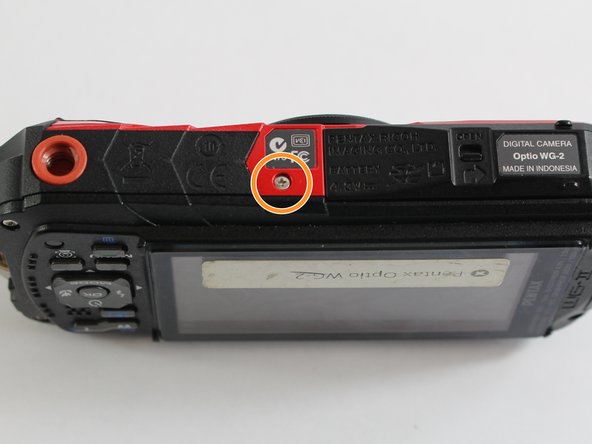
    Pentax Optio WG-2 Menu Buttons Replacement, Back Case: stap 1, afbeelding 1 van 2 Pentax Optio WG-2 Menu Buttons Replacement, Back Case: stap 1, afbeelding 2 van 2
    • Remove all four 1 mm JIS #00 screws from the back of the camera.

  2. Pentax Optio WG-2 Menu Buttons Replacement: stap 2, afbeelding 1 van 1
    • Use your finger to peel the grip off the top of the camera.

    • For best results, start from the right side of the camera, opposite the buttons.

    • Once the grip is removed, you will most likely lose the water-tight seal.

  3. Pentax Optio WG-2 Menu Buttons Replacement: stap 3, afbeelding 1 van 1
    • Use the tweezers to remove the two buttons from the top of the camera.

    • The buttons may fall out while removing the grip.

  4. Pentax Optio WG-2 Menu Buttons Replacement: stap 4, afbeelding 1 van 3 Pentax Optio WG-2 Menu Buttons Replacement: stap 4, afbeelding 2 van 3 Pentax Optio WG-2 Menu Buttons Replacement: stap 4, afbeelding 3 van 3
    • Remove the three 1 mm JIS #000 screws from the top.

    • Remove the 1 mm JIS #000 screw from the bottom.

  5. Pentax Optio WG-2 Menu Buttons Replacement: stap 5, afbeelding 1 van 1
    • Carefully separate the back and the front of the camera.

    • There are three ribbon cables connecting the two boards. Be careful not to tear them.

  6. Pentax Optio WG-2 Menu Buttons Replacement: stap 6, afbeelding 1 van 1
    • Use the tip of a spudger to flip up the small retaining flaps on the ribbon cable ZIF connectors.

    • Carefully pull the ribbon cables out of their sockets.

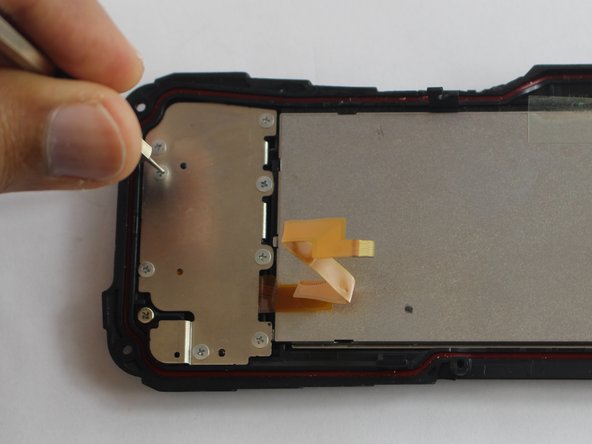
  7. Pentax Optio WG-2 Menu Buttons Replacement, Menu Buttons: stap 7, afbeelding 1 van 2 Pentax Optio WG-2 Menu Buttons Replacement, Menu Buttons: stap 7, afbeelding 2 van 2
    • Remove the eight JS#000 screws using a screwdriver and lift panel up.

    • This screw does not need to be removed.

  8. Pentax Optio WG-2 Menu Buttons Replacement: stap 8, afbeelding 1 van 1
    • Once panel is removed the button 'sheet' can be removed.

Conclusie

To reassemble your device, follow these instructions in reverse order.

Matthew Bessette

Lid sinds: 03/04/16

658 Reputatie

6 handleidingen geschreven

Team

UMass Dartmouth, Team 6-7, Bhusal Spring 2016 Lid van UMass Dartmouth, Team 6-7, Bhusal Spring 2016

UMASSD-BHUSAL-S16S6G7

3 Leden

6 handleidingen geschreven

0 opmerkingen

Voeg opmerking toe

Weergavestatistieken:

Afgelopen 24 uren: 0

Afgelopen 7 dagen: 0

Afgelopen 30 dagen: 0

Altijd: 187