Ga door naar hoofdinhoud

Panasonic Toughbook CF-53 Wi-Fi Card Replacement

Wat je nodig hebt

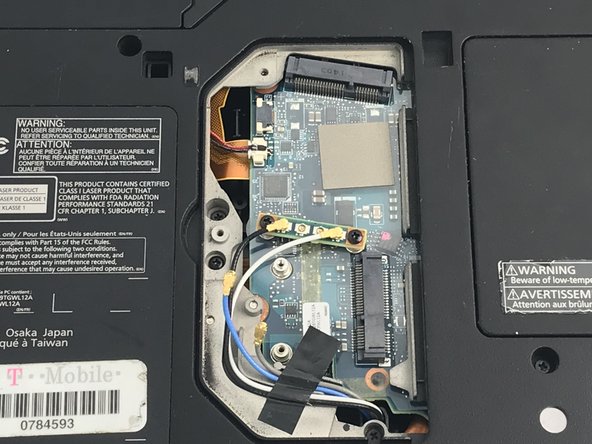
  1. Panasonic Toughbook CF-53 Wi-Fi Card Replacement, Wi-Fi & Bluetooth Card: stap 1, afbeelding 1 van 3 Panasonic Toughbook CF-53 Wi-Fi Card Replacement, Wi-Fi & Bluetooth Card: stap 1, afbeelding 2 van 3 Panasonic Toughbook CF-53 Wi-Fi Card Replacement, Wi-Fi & Bluetooth Card: stap 1, afbeelding 3 van 3
    • Turn the laptop to its back side and align it so that the handle is facing away from you.

    • Remove the single 4 mm Phillips #00 screw from the Wi-Fi card/optical drive cover and remove the plastic cover.

    • The Wi-Fi card is located closest to you , below the little strip-sized circuit board.

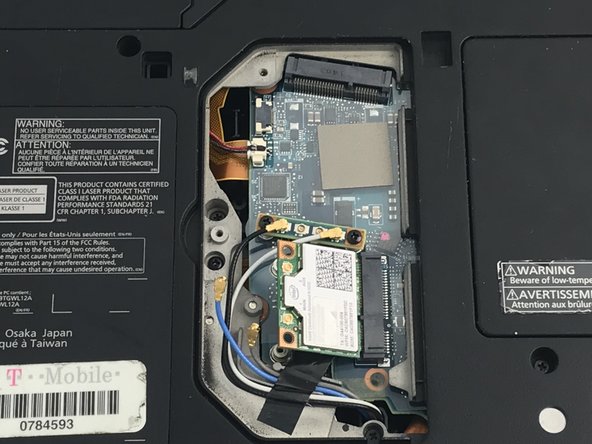
  2. Panasonic Toughbook CF-53 Wi-Fi Card Replacement: stap 2, afbeelding 1 van 2 Panasonic Toughbook CF-53 Wi-Fi Card Replacement: stap 2, afbeelding 2 van 2
    • Very gently pry up on the two connectors attached to the Wi-Fi card using the flat end of a spudger.

    • It is very important to be careful with these connectors because they are difficult to replace or repair.

    • Once both connectors have been detached, carefully hold the wires back to have access to the Wi-Fi card.

  3. Panasonic Toughbook CF-53 Wi-Fi Card Replacement: stap 3, afbeelding 1 van 3 Panasonic Toughbook CF-53 Wi-Fi Card Replacement: stap 3, afbeelding 2 van 3 Panasonic Toughbook CF-53 Wi-Fi Card Replacement: stap 3, afbeelding 3 van 3
    • Remove the two 4 mm Phillips #00 screws that secure the card to the board.

    • Gently lift the card up and pull it out of its connection slot.

    • The Wi-Fi card is now removed.

    • When inserting the new Wi-Fi card into the connection slot, place the card at a 40 degree angle and push it all the way back, then lay it flat.

Conclusie

To reassemble your device, follow these instructions in reverse order.

0 opmerkingen

Voeg opmerking toe

Weergavestatistieken:

Afgelopen 24 uren: 3

Afgelopen 7 dagen: 17

Afgelopen 30 dagen: 68

Altijd: 2,893