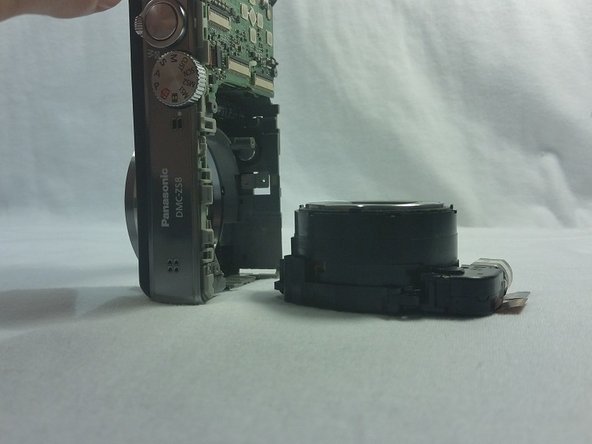
Ga door naar hoofdinhoud

Panasonic Lumix DMC-ZS8 Lens Replacement

Wat je nodig hebt

  1. Panasonic Lumix DMC-ZS8 Lens Replacement, Lens: stap 1, afbeelding 1 van 3 Panasonic Lumix DMC-ZS8 Lens Replacement, Lens: stap 1, afbeelding 2 van 3 Panasonic Lumix DMC-ZS8 Lens Replacement, Lens: stap 1, afbeelding 3 van 3
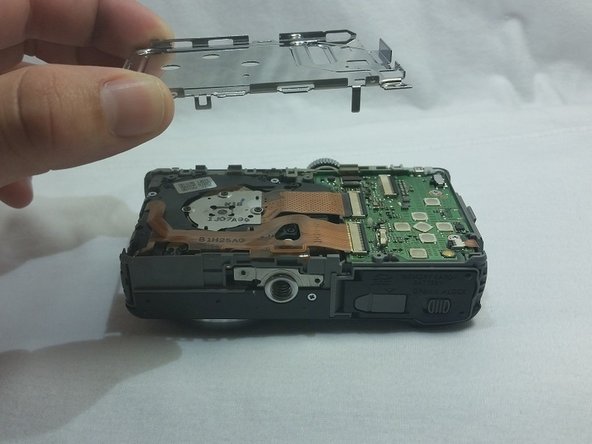
    • Take a Phillips Head screwdriver and remove the 2mm screws on the left and right side of the camera.

  2. Panasonic Lumix DMC-ZS8 Lens Replacement: stap 2, afbeelding 1 van 1
    • Remove the 3 Phillips 4mm screws located on the aluminum plating inside the camera.

    • Then remove the 3 Phillips 2mm screws located in the middle of the aluminum plating.

  3. Panasonic Lumix DMC-ZS8 Lens Replacement: stap 3, afbeelding 1 van 2 Panasonic Lumix DMC-ZS8 Lens Replacement: stap 3, afbeelding 2 van 2
    • Lay the camera on the front side where the aluminum panel is facing up.

    • Once the camera is in the right position, lift up the aluminum plating.

  4. Panasonic Lumix DMC-ZS8 Lens Replacement: stap 4, afbeelding 1 van 2 Panasonic Lumix DMC-ZS8 Lens Replacement: stap 4, afbeelding 2 van 2
    • Stand the camera up in the upright position.

    • Unplug both copper wiring plugs from the motherboard.

  5. Panasonic Lumix DMC-ZS8 Lens Replacement: stap 5, afbeelding 1 van 3 Panasonic Lumix DMC-ZS8 Lens Replacement: stap 5, afbeelding 2 van 3 Panasonic Lumix DMC-ZS8 Lens Replacement: stap 5, afbeelding 3 van 3
    • Lift your camera into the upright position

    • The camera lens should slide out. (Pry it out with a spudger or a plastic opening tool if needed)

Conclusie

To reassemble your device, follow these instructions in reverse order.

Één andere persoon heeft deze handleiding voltooid.

Elijah Painter

Lid sinds: 03/03/15

153 Reputatie

1 Handleiding geschreven

Team

0 opmerkingen

Voeg opmerking toe

Weergavestatistieken:

Afgelopen 24 uren: 0

Afgelopen 7 dagen: 2

Afgelopen 30 dagen: 16

Altijd: 1,494