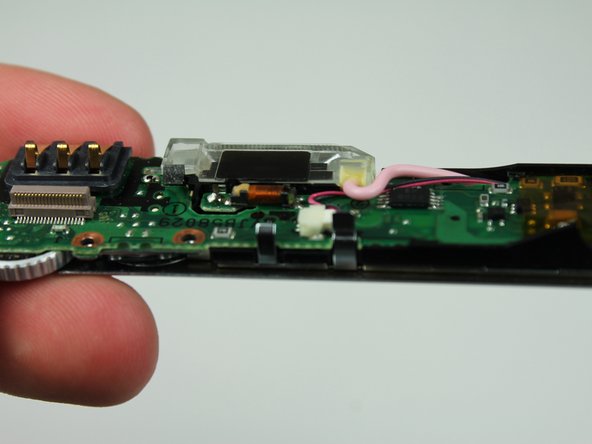
Ga door naar hoofdinhoud

Panasonic Lumix DMC-FX07 Top Panel Buttons Replacement

Wat je nodig hebt

  1. Panasonic Lumix DMC-FX07 Top Panel Buttons Replacement, Battery: stap 1, afbeelding 1 van 1
    • Move the switch on the battery door to the Open position.

    • The door will automatically swing open after you let it go.

  2. Panasonic Lumix DMC-FX07 Top Panel Buttons Replacement: stap 2, afbeelding 1 van 2 Panasonic Lumix DMC-FX07 Top Panel Buttons Replacement: stap 2, afbeelding 2 van 2
    • Push the small gray tab on the top right corner to the left. The battery will pop out slightly.

    • Keep your finger clear of the battery when it pops out.

  3. Panasonic Lumix DMC-FX07 Top Panel Buttons Replacement, Memory Card: stap 3, afbeelding 1 van 1
    • Push the memory card in and let go.

    • The memory card will pop out slightly.

    • Pull out the memory card.

  4. Panasonic Lumix DMC-FX07 Top Panel Buttons Replacement, Back Cover: stap 4, afbeelding 1 van 2 Panasonic Lumix DMC-FX07 Top Panel Buttons Replacement, Back Cover: stap 4, afbeelding 2 van 2
    • Unscrew the small screws on the sides of the camera.

    • The screws on the left side(#00P, 4.7mm) are longer than the screw on the right side(#00P, 3.3mm).

  5. Panasonic Lumix DMC-FX07 Top Panel Buttons Replacement: stap 5, afbeelding 1 van 2 Panasonic Lumix DMC-FX07 Top Panel Buttons Replacement: stap 5, afbeelding 2 van 2
    • Unscrew the three small screws on the bottom(#00P, 3.3mm).

    • The bottom will fall off.

  6. Panasonic Lumix DMC-FX07 Top Panel Buttons Replacement: stap 6, afbeelding 1 van 3 Panasonic Lumix DMC-FX07 Top Panel Buttons Replacement: stap 6, afbeelding 2 van 3 Panasonic Lumix DMC-FX07 Top Panel Buttons Replacement: stap 6, afbeelding 3 van 3
    • Lift up the bottom back cover by prying the bottom edge with the spudger.

    • Gently lift up the back cover with your hand from the bottom to the top.

  7. Panasonic Lumix DMC-FX07 Top Panel Buttons Replacement: stap 7, afbeelding 1 van 3 Panasonic Lumix DMC-FX07 Top Panel Buttons Replacement: stap 7, afbeelding 2 van 3 Panasonic Lumix DMC-FX07 Top Panel Buttons Replacement: stap 7, afbeelding 3 van 3
    • Lift the tabs on the ZIF connectors.

    • The ribbon cables should easily come out of the ZIF connectors.

  8. Panasonic Lumix DMC-FX07 Top Panel Buttons Replacement, Top Cover: stap 8, afbeelding 1 van 2 Panasonic Lumix DMC-FX07 Top Panel Buttons Replacement, Top Cover: stap 8, afbeelding 2 van 2
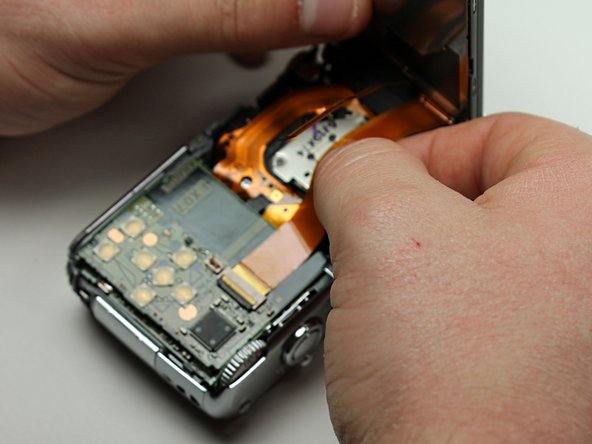
    • Using the spudger, pry off the top cover by gliding the spudger along the entire edge between the top cover and the front cover.

    • Be careful not to damage the cylindrical capacitor on the circuit board under the top cover.

  9. Panasonic Lumix DMC-FX07 Top Panel Buttons Replacement, Top Panel Buttons: stap 9, afbeelding 1 van 1
    • Unscrew the small screws beneath the top cover(#00P, 1.7mm).

  10. Panasonic Lumix DMC-FX07 Top Panel Buttons Replacement: stap 10, afbeelding 1 van 3 Panasonic Lumix DMC-FX07 Top Panel Buttons Replacement: stap 10, afbeelding 2 van 3 Panasonic Lumix DMC-FX07 Top Panel Buttons Replacement: stap 10, afbeelding 3 van 3
    • Lift the motherboard out with your hand by pushing the tabs out and pulling the motherboard up.

    • The on/off switch and the anti-shake button may fall out.

  11. Panasonic Lumix DMC-FX07 Top Panel Buttons Replacement: stap 11, afbeelding 1 van 1
    • The buttons are hardwired into the top motherboard board.

    • To replace the top buttons, you must replace the top motherboard.

Conclusie

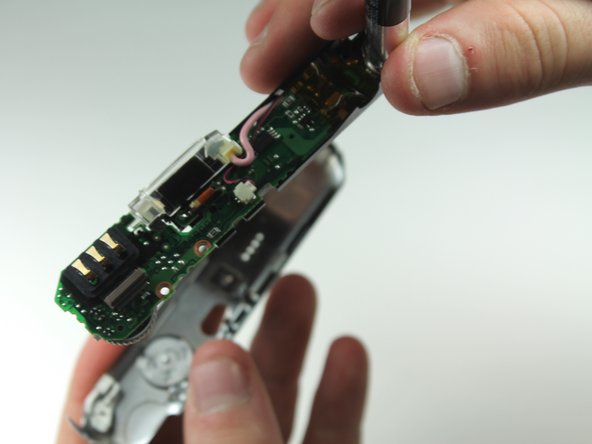
To reassemble your device, follow these instructions in reverse order.

Één andere persoon heeft deze handleiding voltooid.

Karissa

Lid sinds: 04/13/12

50 Reputatie

8 handleidingen geschreven

Team

Cal Poly, Team 6-23, Amido Spring 2012 Lid van Cal Poly, Team 6-23, Amido Spring 2012

CPSU-AMIDO-S12S6G23

4 Leden

10 handleidingen geschreven

0 opmerkingen

Voeg opmerking toe

Weergavestatistieken:

Afgelopen 24 uren: 1

Afgelopen 7 dagen: 6

Afgelopen 30 dagen: 13

Altijd: 703