Ga door naar hoofdinhoud

Deze handleiding heeft recentere wijzigingen. Schakel over naar de nieuwste niet-geverifieerde versie.

Palm m500 Motherboard Replacement

Wat je nodig hebt

  1. Palm m500 Motherboard Replacement, Back Panel: stap 1, afbeelding 1 van 1
    • Remove the stylus from the side of the PDA by sliding it upwards.

  2. Palm m500 Motherboard Replacement: stap 2, afbeelding 1 van 2 Palm m500 Motherboard Replacement: stap 2, afbeelding 2 van 2
    • Remove the 4 screws from the corners of the back panel of the device using a size T6 Torx screwdriver.

    • Place screws in a plastic bag or another safe place.

  3. Palm m500 Motherboard Replacement: stap 3, afbeelding 1 van 3 Palm m500 Motherboard Replacement: stap 3, afbeelding 2 van 3 Palm m500 Motherboard Replacement: stap 3, afbeelding 3 van 3
    • Insert the edge of the plastic opening tool between the back panel and the black stylus holder.

    • Carefully and forcefully pry the panels apart.

  4. Palm m500 Motherboard Replacement, Battery: stap 4, afbeelding 1 van 3 Palm m500 Motherboard Replacement, Battery: stap 4, afbeelding 2 van 3 Palm m500 Motherboard Replacement, Battery: stap 4, afbeelding 3 van 3
    • Use tweezers to unplug the battery cable from the motherboard socket.

    • Gently remove the battery from the motherboard using your thumb and forefinger to pull upwards.

    • The battery may be difficult to remove because of light adhesive on the back. It may require some force to pry the battery away from the motherboard with your fingers.

  5. Palm m500 Motherboard Replacement, Motherboard: stap 5, afbeelding 1 van 3 Palm m500 Motherboard Replacement, Motherboard: stap 5, afbeelding 2 van 3 Palm m500 Motherboard Replacement, Motherboard: stap 5, afbeelding 3 van 3
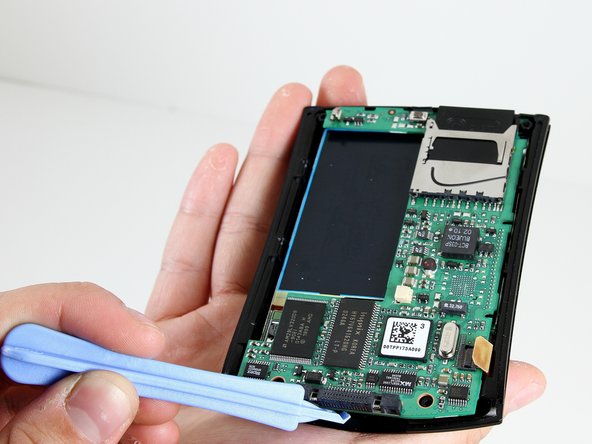
    • Use the plastic opening tool to pry the orange clamp away from the motherboard.

    • Use the plastic opening tool at the bottom of the device to pry the motherboard away from the front plate.

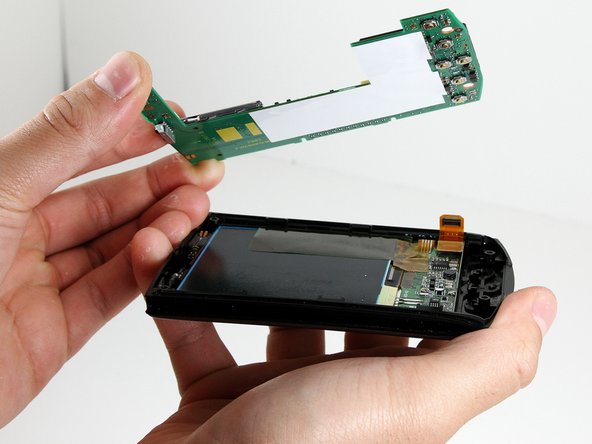
    • Gently and forcefully lift the motherboard away from the front plate by using your thumb and forefinger.

Conclusie

To reassemble your device, follow these instructions in reverse order.

Miles Johnson

Lid sinds: 01/11/11

579 Reputatie

4 handleidingen geschreven

Team

Cal Poly, Team 14-9, Forte Winter 2011 Lid van Cal Poly, Team 14-9, Forte Winter 2011

CPSU-FORTE-W11S14G9

6 Leden

6 handleidingen geschreven

0 opmerkingen

Voeg opmerking toe

Weergavestatistieken:

Afgelopen 24 uren: 0

Afgelopen 7 dagen: 0

Afgelopen 30 dagen: 2

Altijd: 1,143