Inleiding
I decided to create this guide because i got *triggerred* trying to reassemble the PS4 Dualshock 4 Controller
Wat je nodig hebt
-
-
Remove these two triggers and springs from the backplate.
-
Find which trigger goes on which side and put the springs in the trigger part facing towards the inside of the controller.
-
-
-
On these two clips...
-
Push down the trigger until it clicks on both sides.
The top part of the spring will slide down into the rail(groove/cutout) rather than the bottom part of the spring sliding down into the rail and the bottom part of the spring will push up against the concaved interior of the trigger housing. Hope this helps
.Yes, this photo is wrong. One arm of the spring is in the rail the other arm is inside the trigger pushing the trigger out to its normal position. The “green” arm goes in the rail & the “blue” arm goes inside the trigger. Rotate spring about 90degrees counterclockwise.
-
-
-
-
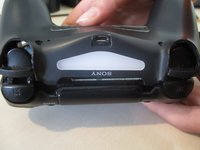
Connect the light bar cable using your fingers. Make sure it is fully pushed down and that is plugged in the right way.
-
-
-
close the cover starting from the side of the triggers. Don't worry if it's a bit hard to do so, but be careful so you don't break the plastic between the trigger and the bumper.
-
Push down until it clicks everywhere.
-
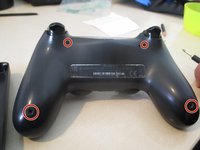
Finally, screw in these four screws using a PH0 screwdriver.
-


Annuleren: ik heb deze handleiding niet afgemaakt.
24 andere personen hebben deze handleiding voltooid.

3 opmerkingen
This guide is wrong. The top part spring should be inside the trigger, if you look at the other trigger it’s not exposed.
Thanks for pointing it out. I do not have this controller anymore as it was from a repair job so unfortunately, I cannot correct it. If you or someone else happens to have one and is able to take high-quality pictures I’d be more than grateful to accept your correction.
Devnol -