Ga door naar hoofdinhoud

Deze handleiding heeft recentere wijzigingen. Schakel over naar de nieuwste niet-geverifieerde versie.

Opening the iHome iH9

Alleen vereisten
Deze handleiding is alleen bedoeld als vereiste voor andere handleidingen. Het staat niet op zichzelf.

Wat je nodig hebt

  1. Opening the iHome iH9, Backup Batteries: stap 1, afbeelding 1 van 3 Opening the iHome iH9, Backup Batteries: stap 1, afbeelding 2 van 3 Opening the iHome iH9, Backup Batteries: stap 1, afbeelding 3 van 3
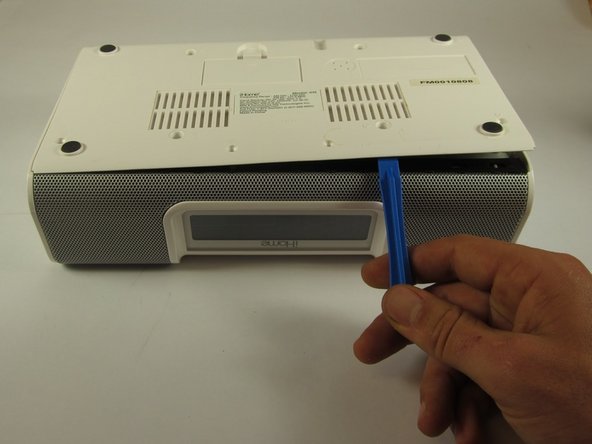
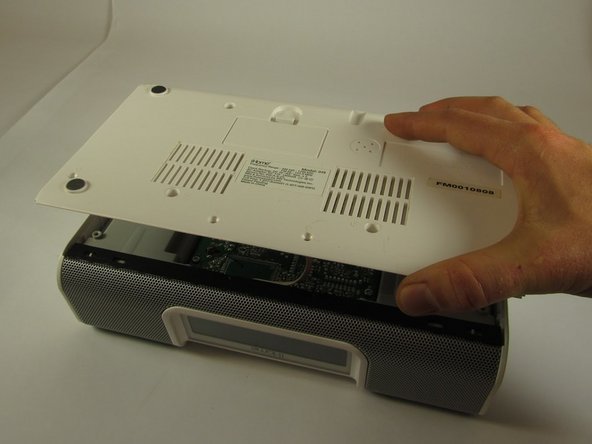
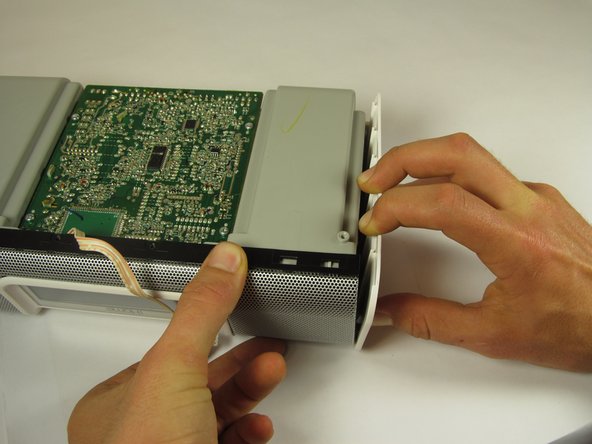
    • Pull the tab towards you and lift up to remove the battery cover.

    • Remove the two AA batteries.

  2. Opening the iHome iH9, Opening the iHome iH9: stap 2, afbeelding 1 van 1
    • Unscrew the four 8mm Phillips #2 screws.

    • Unscrew the six 25mm Phillips #2 screws.

    • Reinstall the backup battery cover so it is out of the way.

  3. Opening the iHome iH9: stap 3, afbeelding 1 van 3 Opening the iHome iH9: stap 3, afbeelding 2 van 3 Opening the iHome iH9: stap 3, afbeelding 3 van 3
    • Pry the backplate up with a plastic opening tool between the back plate and the speaker grill.

    • Be careful when lifting the bottom plate up; there is a short white and orange 4-pin connector attached to its underside.

    • Lift the bottom plate up while making sure the connector remains attached.

  4. Opening the iHome iH9: stap 4, afbeelding 1 van 3 Opening the iHome iH9: stap 4, afbeelding 2 van 3 Opening the iHome iH9: stap 4, afbeelding 3 van 3
    • Use your hands to flip the backing plate away from you and rest it upside down on the iH9.

    • Unplug the white and orange 4-pin connector by pulling it in the direction of the wires.

    • Set the backing plate aside.

  5. Opening the iHome iH9: stap 5, afbeelding 1 van 1
    • Place the device so that the speaker grill is face down.

    • Remove the two 10mm Phillips #2 screws on interior sides of the speaker housings.

  6. Opening the iHome iH9: stap 6, afbeelding 1 van 2 Opening the iHome iH9: stap 6, afbeelding 2 van 2
    • Place the iH9 upside down.

    • Wires connect the core assembly to the housing; do not attempt to pull the core assembly completely out.

    • Using both hands, pull the housing siding away from the device while simultaneously lifting the motherboard and speaker assembly straight up.

    • Repeat for the other side.

  7. Opening the iHome iH9: stap 7, afbeelding 1 van 1
    • Stand the iH9 on its grill.

    • Separate the motherboard and speaker assembly by rocking it back and forth and pulling the assembly towards you.

    • Remove the small back panel.

  8. Opening the iHome iH9: stap 8, afbeelding 1 van 3 Opening the iHome iH9: stap 8, afbeelding 2 van 3 Opening the iHome iH9: stap 8, afbeelding 3 van 3
    • Firmly pull the wide 9-pin connector with black covering on the underside of the upper housing to unplug it.

    • Lay the housing and core assembly flat and close to each one another.

  9. Opening the iHome iH9: stap 9, afbeelding 1 van 2 Opening the iHome iH9: stap 9, afbeelding 2 van 2
    • Unplug the narrow 9-pin connector from the motherboard.

  10. Opening the iHome iH9: stap 10, afbeelding 1 van 1
    • Cut the zip tie holding the wires together with a wire cutter. The two sides of the device housing are now fully separated.

Conclusie

To reassemble your device, follow these instructions in reverse order.

Curtis Wathne

Lid sinds: 01/31/15

397 Reputatie

3 handleidingen geschreven

Team

Cal Poly, Team 8-39, Amido Winter 2015 Lid van Cal Poly, Team 8-39, Amido Winter 2015

CPSU-AMIDO-W15S8G39

4 Leden

8 handleidingen geschreven

0 opmerkingen

Voeg opmerking toe

Weergavestatistieken:

Afgelopen 24 uren: 0

Afgelopen 7 dagen: 0

Afgelopen 30 dagen: 0

Altijd: 48